

Introduction: HOW TO: Use Old CDs for Mosaic Craft Projects - DIY Kitchen Backsplash Tips and Tricks


This instructable goes into detail about how we (my partner Renier and I) created a mosaic backsplash using CDs and the tips and tricks we learned along the way.
The backsplash is truly impressive. When light shines on it, it creates beautiful colorful light shows that change depending on where you are standing in relation to it. Its reflective qualities bring more light to the space, actually minimizing the need to use artificial light when working in the kitchen during the day. One of its most rewarding qualities however is that it was basically made from trash - CDs that no longer had any use. As you may see in Step #6 "Why use CDs - Environmental benefits," even some of the more "advanced" cities do not accept CDs for recycling. Do you have other ideas or tips & tricks for how to reuse CDs? Feel free to post them or any links in the comments.
It's hard to say how long a project like this would take. There were many times when Renier asked me "when do you think we'll finish this backsplash" and I'd say "today if we really want to." I think it totally depends of the determination of the persons working on it. We started this project while having a lot of other things going on, so it was something we continued bit by bit every day when we found some time. It took us about 2 months to finish, but it could have taken us just a fraction of that time if it were our primary focus.
Step 1: Tools for Cutting CDs

The most important part when cutting the CDs is to be careful not to damage the holographic film which is the most fragile part and also the one that we want to preserve because the effect they give off is really the star of this show. Check out the next step to see what trick we came up with to give more strength to the film so that it doesn't chip away.
The first thing we tried was using scissors. Only one pair, apparently the toughest of all our scissors, cut well enough that we could stand to keep working with it and it didn't ruin the holographic film. Personally, the scissors were hurting my hands too much, so I had to leave that to Renier.. who was okay with them.
The second tool that came our way was a pair of gardening scissors. This one was less painful for me so I continued with that one while Renier still preferred the scissors.
One night a friend came over while we were working on our CD backsplash and happened to have Plastic cutting scissors with him..of all things!! We had no idea these existed and they were so small that we were a little skeptical before we tried it. They actually cut better than any other tool we tried, worked effortlessly and even cut curves!! They had a curved tip, but I understand these are available with a straight tip too.
Step 2: Types of CDs and a Useful Trick


When choosing your CDs, you can try to choose CDs that are less scratched, in the end however, once all the pieces are together, those are details that you won't see unless you're looking for them.
Once we started cutting the CDs, we quickly realized that there are different TYPES of CDs - as in, they do not all cut the same way.
Some CDs are composed of two layers of plastic with the film sandwiched in between them --> we found that these just broke to pieces when we tried to cut into them.
Other CDs (the ones we want for this type of project) are composed of a plastic layer with a layer of film on the outside which has the printed image or info on top. Most of the time, if you have a sharp tool, these CDs will cut pretty well but you may find that the film will start chipping or coming off where you cut it. Don't worry, there is still hope!
The photo sequenceshows a simple trick that you can use to give the film more strength so that it remains fairly intact when you cut it. Apply while glue, as shown, to the printed side of the CD and let it dry. Once dry, try cutting it and notice the difference.
If you give it a try, I hope this trick works for you as well as it worked for us. We did it this way for the majority of CDs we used to make our kitchen backsplash project. It actually allowed us to use a LOT of the CDs that we set aside because we thought we couldn't work with them :)
Step 3: Cutting the CDs - Shapes and Sizes

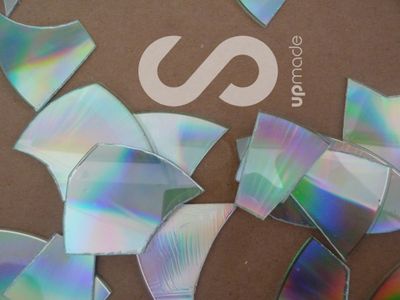

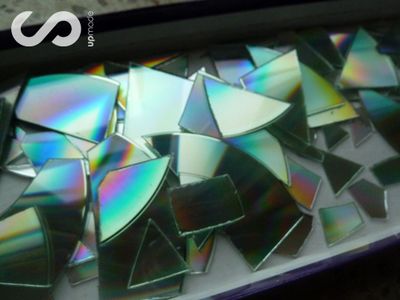

This step will depend somewhat on what tool you're working with. Unless you're going with a specific design, don't limit yourself to the shapes and sizes of the pieces you cut.
We also separated the smaller pieces from the large ones so we could use them to fill in gaps at the end.
Step 4: Apply CD Pieces to Mosaic Surface


As seen in the photos, the wall was textured before starting this project because we initially planned to do this mosaic with left over tiles from renovations around the home. It's not necessary to do that if we're using a material like CDs. They don't have too much depth, so to get a nice flat surface in the end, it seems it would be better to leave the surface flat from the start.
Before getting started, I wanted to see what effect the CD pieces would give to the specific surface we planned to work with. I used just a bit of white glue to temporarily adhere some CD pieces to the wall (first photo). We loved the effect and agreed that we should continue the project. When I went to take the temporarily glued pieces off the wall, they were really stuck on there, so we just continued the mosaic from there using the same glue.
I guess there are at least 2 ways that one can go about this project:
The first is to collect all the CDs, have them all cut to pieces, and THEN start gluing the pieces to the mosaic surface, preferably starting in one corner and moving it along from there. Easy peasy!
And then there is the way we did it, which was much more spontaneous because we'd never done a backsplash from CDs before and we don't know if anyone has ever tried to do this... so we had to figure it out as we went and let the process teach us.
We did NOT have all our CDs from the beginning. We also didn't know if we might find CDs of other colors later in the process or how the whole cutting of CDs would evolve as we went along, so because of that we didn't start the mosaic from 1 corner . We distributed the bigger pieces over the whole surface for the mosaic, saving the smaller ones for filling in the gaps later.
Step 5: Grouting


The grouting process posed some challenges for us, and we want to share all that here because what we learned as a result we find to be very useful for future projects.
Please note that you should really be using rubber gloves or some other form of protection for your skin when working with grout.
We used some unsanded grout we had from a previous project. We didn't want to use white grout because that would require more cleaning and scrubbing, and scrubbing is something we really don't want to have to do because the exposed surface of the CDs is plastic, and if that surface has significant scratches it will fade the effect of the holographic film when light shines on it.
After mixing the grout, we wet the surface and then applied the grout making sure to get it in all the cracks. The instructions for our grout said to let it dry for 30 minutes before taking the excess off. After more than 30 minutes, we went to take the excess off and it really felt like it wasn't dry enough yet, it was coming out from between the cracks and exposing the wall surface we started with. The CDs don't have too much depth, so there's really just a bit of grout that goes in between the cracks. I think this also happened because we left too much space between pieces, so when trying to clean the excess off, the sponge had enough space to get in between the CD pieces to take out the grout (which we don't want because we need the grout to dry between the pieces to keep them together) We let it dry for a while longer and when we tried again it seemed to be doing the same thing (we definitely left too much space between the pieces). At this point, late in the night and frustrated by the thought that maybe this wouldn't work out and our dream of a shiny backsplash was being shattered, we reapplied more grout and left it overnight. ERROR! In the morning, the grout was REALLY REALLY dry. YAY! Right? No. When I went to clean it off with a wet sponge, it required way more muscle to take off than one should ever need for the task. But hey, hope was restored, so I was willing to put in that work to see it finished. I spent a couple of intense hours cleaning the dry grout with water and a hand towel - during this process I realized that the surface of the CDs was being scratched by the movement of the grout as I was cleaning it away, but there was not other option at this point. Once everything was cleaned away, I did a final wipe with vinegar water to take off any fine powder left on the surface.
In conclusion, if we had left less space between the pieces, we wouldn't have had the problem of the grout coming out when we tried to clean off the excess. The grout has a specific time for drying and if it is left longer it will become hard to take off. Because we let it get hard, cleaning it off was difficult and that scratched the pieces in the process. The scratching of the CDs did indeed fade the colors a little bit and made them a little less intense when light shines on them, but that really doesn't take the magic away.
Step 6: Why Use CDs? Environmental Benefits


The two images here show some CDs that we came across during the process of us working on this project.
They weren't taken at a designated waste collection area or anything like that, one was taken at a beach area and the other beside a university building. They show us a few of the places this material can end up unless we reuse it.
On the City of Toronto website, CDs are categorized as "Top bin sins," which apparently makes them not recyclable. Thankfully we still have another option, which is reusing this material for awesome arts and crafts projects. Surely you, or someone next to you has a pile of CDs somewhere that could use sorting through.
Here's a link to an awesome blog post by Whole Natural Life called "How (and Why) to Recycle CDs." The post is from 2012, but still proves to be relevant.

Runner Up in the
Glitter Challenge

Runner Up in the
Crafting 101


