

Introduction: Handheld Motor Tester for FIRST Robotics


This is another useful device brought to you by the students from Killer Bees Robotics: FRC Team 33.
This Instructable show how to create a handy motor testing device for Robotics Development. Every team should have one of these tools. It is incredibly useful and can be made for next to nothing out of stuff every FIRST team probably has laying around the shop. We have had one of these for years and use it daily. It allows you to safely do motor testing without needing a control system or speed controllers and allows you to reverse directions easily without swapping wires. I couldn't build robots without something like this.
We call device this the "Phaser" around the shop because it looks like the Phaser guns Capt Kirk and Mr. Spock used on the original Star Trek series.
Items needed:
- an old cordless drill - 12 volts or higher
- 12 gauge wire
- 30 AMP snap action circuit breaker http://www.andymark.com/30-amp-snap-action-circui...
- 2 female Insulated spade crimps
- 2 fork crimps
- crimping tool
- wire stripper
- FIRST battery connector http://www.andymark.com/anderson-sb-50a-connector...
- Dual Banana Jack Binding Posts https://www.amazon.com/uxcell-Plastic-Thread-Bana...
- 2.5" hole saw
- a small piece of 3/4" wood (Plastic will also work)
- 5/16" drill bit
- screwdrivers - usually P1 or T10 depending on your exact drill
- Banana cable test leads https://www.amazon.com/AST-Labs-Banana-Stackable-...
Step 1: Acquire an Old Cordless Drill

Pick any old 12 volt drill. 14.4v, 18v or 20 volt ones will work too. Don't use a lower voltage model, the trigger circuit may not be able to handle a 12 volt supply. The batteries on these cordless drills wear out after a few years, and the batteries often cost more than the drill, so it is cheaper to get a newer drill than it is to replace the batteries. After a few years of running a FIRST team or similar program, you end up with a small collection dead drills. This is a great way to put one to use. If you don't have one in your shop, start asking the parents. Almost everyone who makes things has an old drill or two somewhere.
A quick sweep of our shop found 4 different models by Skil, Bosch, Ryobi, and Black & Decker.
We chose the Bosch one, largely because we had several of this model. We wanted to make several more Phasers and we wanted them to all be the same.
Note: Because the actual drill batteries are the thing which fails first, we deliberately are NOT using the actual drill battery as part of this system. Every team has lots of Robot Batteries, which are more suitable for robot system testing anyway. This setup is designed to use a Robot Battery with the standard connector as the power source.
Step 2: Take Off the Front of Drill Housing

Remove the outer case to expose the drill's innards.
On most drills the tool you need is either a #1 Phillips or T10 Torx driver.
Step 3: Cut the Wires and Remove the Motor and Gearbox

All you need to keep is the trigger assembly and the casing.
Step 4: Use a Hole Saw to Cut a Wood Plug.


This is the part that is a bit arbitrary, depending on the exact drill you pick.
What you are doing here is making a plug to go in the end of the drill where the transmission / clutch used to be.
In our case with the Bosch drill, we made a 2.5" diameter slug out of 3/4" pine on the drill press. A small piece of 1/4" polycarbonate or similar would also work.
Step 5: Drill 2 Holes in Plug and Cut to Fit Inside of the Drill Body


Drill two 5/16" holes to accept the binding posts.
Spacing should be 3/4" on center, but double check on the part you have first to make sure.
We then notched out the slug on a band saw to fit snugly into the grooves in our drill housing. You will have to do a little of your own inventing here to make yours work. Basically just whittle out this piece until it fits (see Step 10 to see where this part goes). You could do this operation on a lathe too if you have one. An alternative it just to make a smaller slug that fits completely inside your drill body and use short screws or rivets to fasten it in, or alternately, use a thin plastic plate to fit in the grooves.
Step 6: Strip and Crimp the Trigger Wires


Strip and add a female spade crimp to one wire of the trigger wires and a ring/fork terminal onto the other trigger wire.
Step 7: Make a Short Jumper Wire


Make a short 4 inch jumper. Strip a 12 guage wire and add a female spade crimp on one end and fork crimp on other end.
Step 8: Add Battery Harness to Trigger Assembly


You can either make a harness from some 12 gauge wire and an Anderson battery connector, use an old robot battery harness, or do what we did and use the pigtail off of an old battery charger.
Be advised that if you try to use a heavy 6 gauge robot battery harness, you may not be able to solder this without a big soldering iron and you may melt the trigger if you are not careful.
Solder the two leads to the trigger input battery terminals.
Be sure to try to figure out which one used to be positive and negative. It should still work if you get it backwards, but the variable speed feature will likely no longer work. If you still have an old drill battery, there is often a plus or minus on the battery casing.
Step 9: Attach Binding Post Assembly to Filler Plug


Attach the dual binding post assembly to the wooden filler plug.
make sure the posts are long enough to get all the way through the wood and allow the fork crimps to still fit under the nuts. Sand the plug down to be a bit thinner if this is a problem
Step 10: Install Filler Plug, Jumper and Circuit Breaker


Install the 30 Amp Snap Action breaker into the two female spade crimps. This is an important part of the design, because it prevents the device from bursting into flames if overloaded, and trust me, someone on your team will inevitably overload it.
Attach the fork terminals under the binding post rear nuts. Make sure the nuts are pretty tight.
If you can determine which trigger wire is forward, attach this one to the red binding post. It really doesn't matter much, but it is nice to be consistent. You can check this with a robot battery and a voltmeter.
Fit the wooden slug in the front of the drill body. Tuck in all the wires and breaker. Use electrical tape or cable ties as needed to keep everything in place while you close the case.
Step 11: Close Up Drill Casing

Reinstall the outer drill casing. Make sure all wires are routed such that you can close the case.
Often the direction switch above the trigger is a bit tricky to get back in.
Reinstall all of the casing screws.
I recommend to zip-tie the battery harness cable to the case at the bottom exit point securely to strain relieve the wires.
Step 12: Verify Trigger Fit and Add Bananas Cables.

Once the case is closed you are ready for your first test.
Make sure that the trigger and direction selector work freely before testing.
Install your banana jacks test leads into the front binding posts.
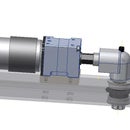
Step 13: Attach to a Motor and Battery and Test!


Plug in a robot battery and test the trigger again both ways.
It should be fine. If no sparks or smoke appear, you have completed this build successfully and are ready for your first motor test.
Grab a CIM motor or other 12VDC robot motor and connect the wires to your alligator clip leads. Press the trigger and verify the motor spins one direction. Some, but not all drill types will support variable speed operation with partial trigger, some are just on/off. Reverse the direction switch and verify the motor reverses.
Congratulations: You have successfully completed your first Phaser!
If you feel inspired and have more drills at your disposal, crank out a few more of these. This is one of my favorite devices in the first few weeks of the build season, and all of my prototyping groups are constantly in need of a phaser for their testing.
Step 14: Happy Phasing !


We hope you enjoyed this Instructable and that your team finds this device useful.
If you have any questions, you can always reach our team at http://www.killerbees33.com/contact/
Good luck to all teams in the 2017 FRC season!


