

Introduction: Have a Bumper Crop With Moisture Sensors and ARDUINO


I must be addicted to Instructables in between work and doing my home tasks to keep sharing my knowledge for no money on Instructables writing another instructable.
I am a judge now, sifting through many Instructables and always find some Instructables that inspire me or some that need complete improvement. Some are not entirely correct. Making comments forever was not the way to go, so I simply re-design other ideas, improve the Arduino code and improve on them with my knowledge or completely refurbish and publish them to help the community to make better things.
By going through many Instructables and comments I found that there is a great misunderstanding of moisture sensors. The majority thinks that they must be expensive to work properly.
So I looked at https://www.instructables.com/id/Arduino-LCD-Soil-M...
and thought that the moisture sensor needs improvement. I played with this idea before, so I experienced that the sensors delaminate.
My comment was
****"Wait a long time to refresh your display, otherwise you "de galvanise" your probes.
putting constant current through probes is a chemical or electrochemical delamination process. If probes are immersed in an aqueous solution (the soil). The metal on the probes dissolves in the electrolytic process. To make your probes last, keep this process to a minimum. A longer delay is suggested as the circuit does not need to test every second. I use galvanised 6 mm thick bolts A2-70 or A4-70 as probes together with the cheap Chinese sensor. If the probes are magnetic, they contain iron and are not of good quality. 5 minutes x60x1000 = 5*60*1000 delay(5*60*1000);// =5 minutes"*****
But I check what I say to be correct and found that a delay does NOT work.
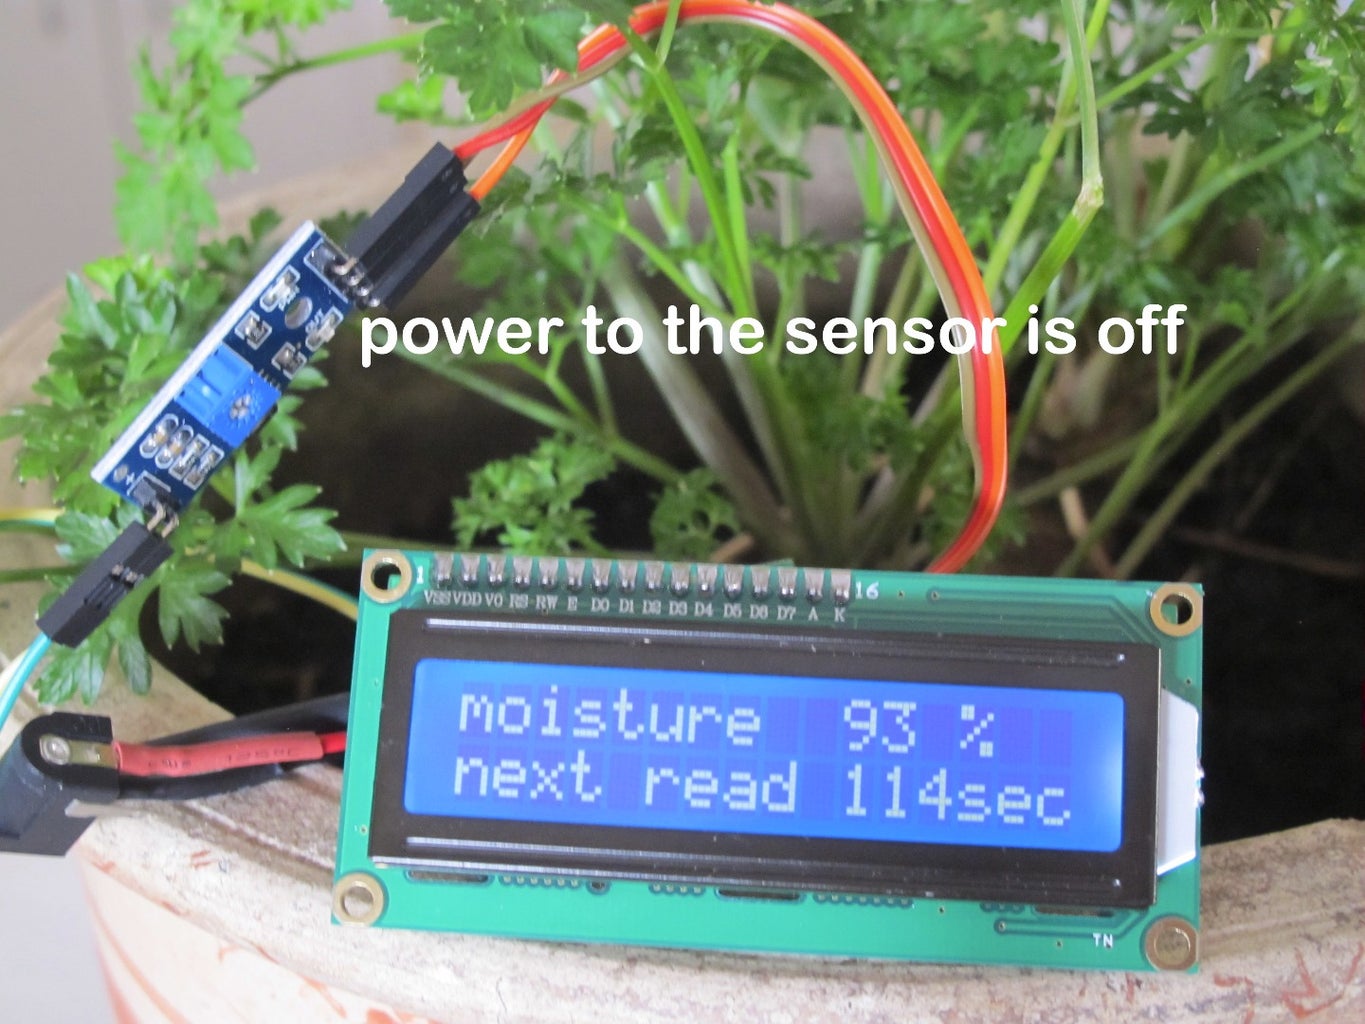
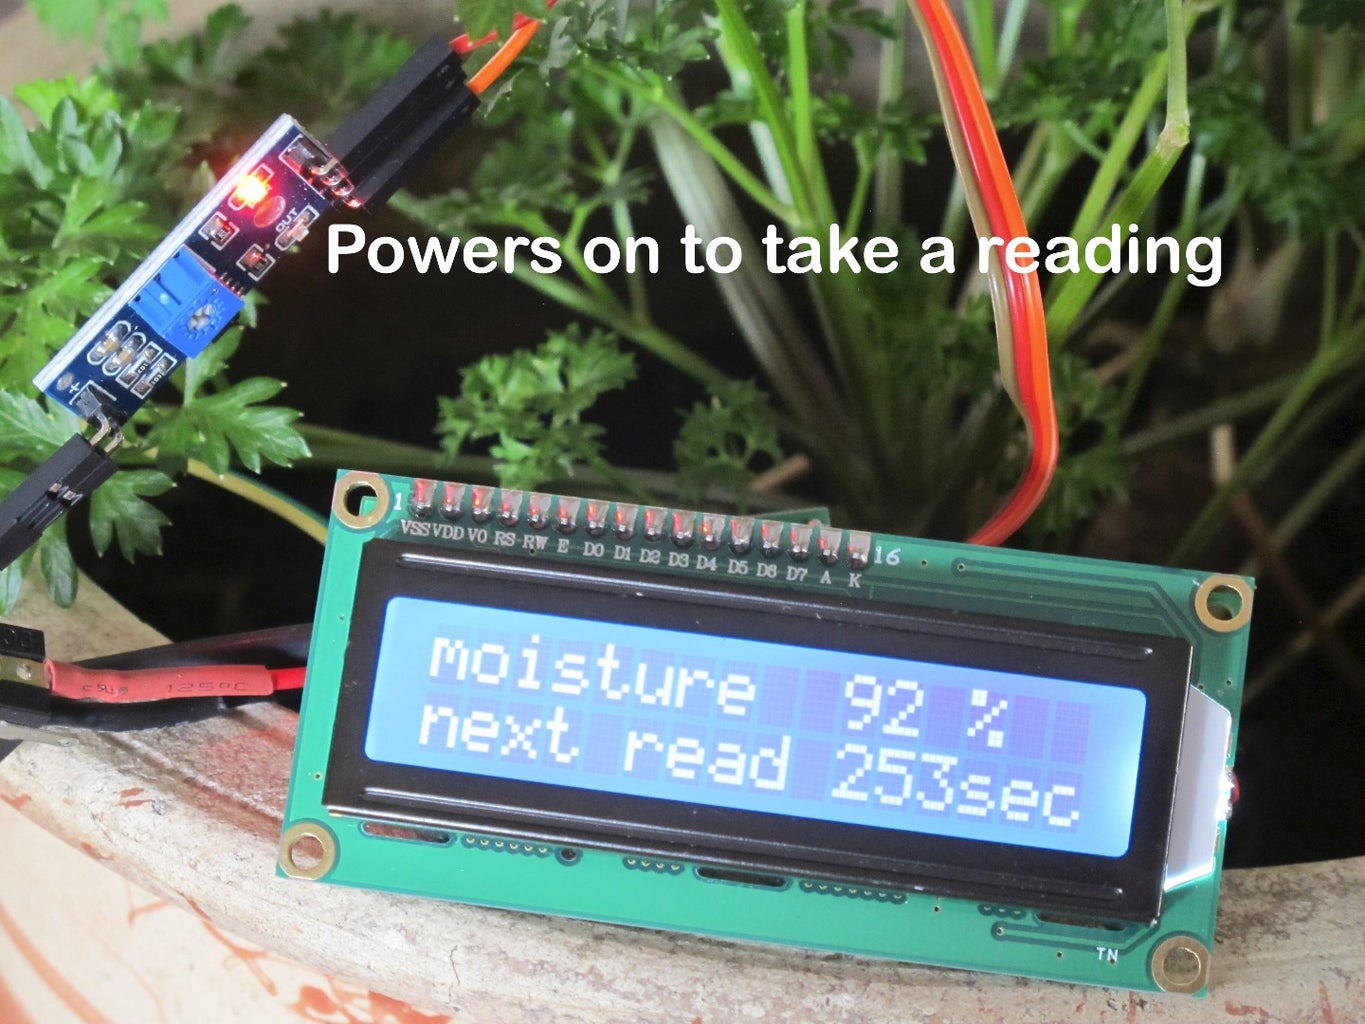
Only by turning off the power to the sensor works.
So I had to create a new code by using pin 12 on the Arduino and use it to turn the power on just before it takes a reading and turn it off after the reading. The time interval was set to 5 minutes as microcontrollers go so fast and destroy the sensor in half an hour.
By taking a reading every 5 or even better every 15 minutes will keep the metal on the sensor longer.
People ask what sensor they use when they see a nail in the picture.
Yes that's all: A nail or a metal probe of some sort and a YL69 sensor.
I use stainless steel and the YL 69 on analog pin A0.
To make this photo I pulled them out of my garden.
Step 1:


Here the stainless steel screw probes.
Not magnetic. They have been in my garden for six months and show only small traces of de galvanisation.
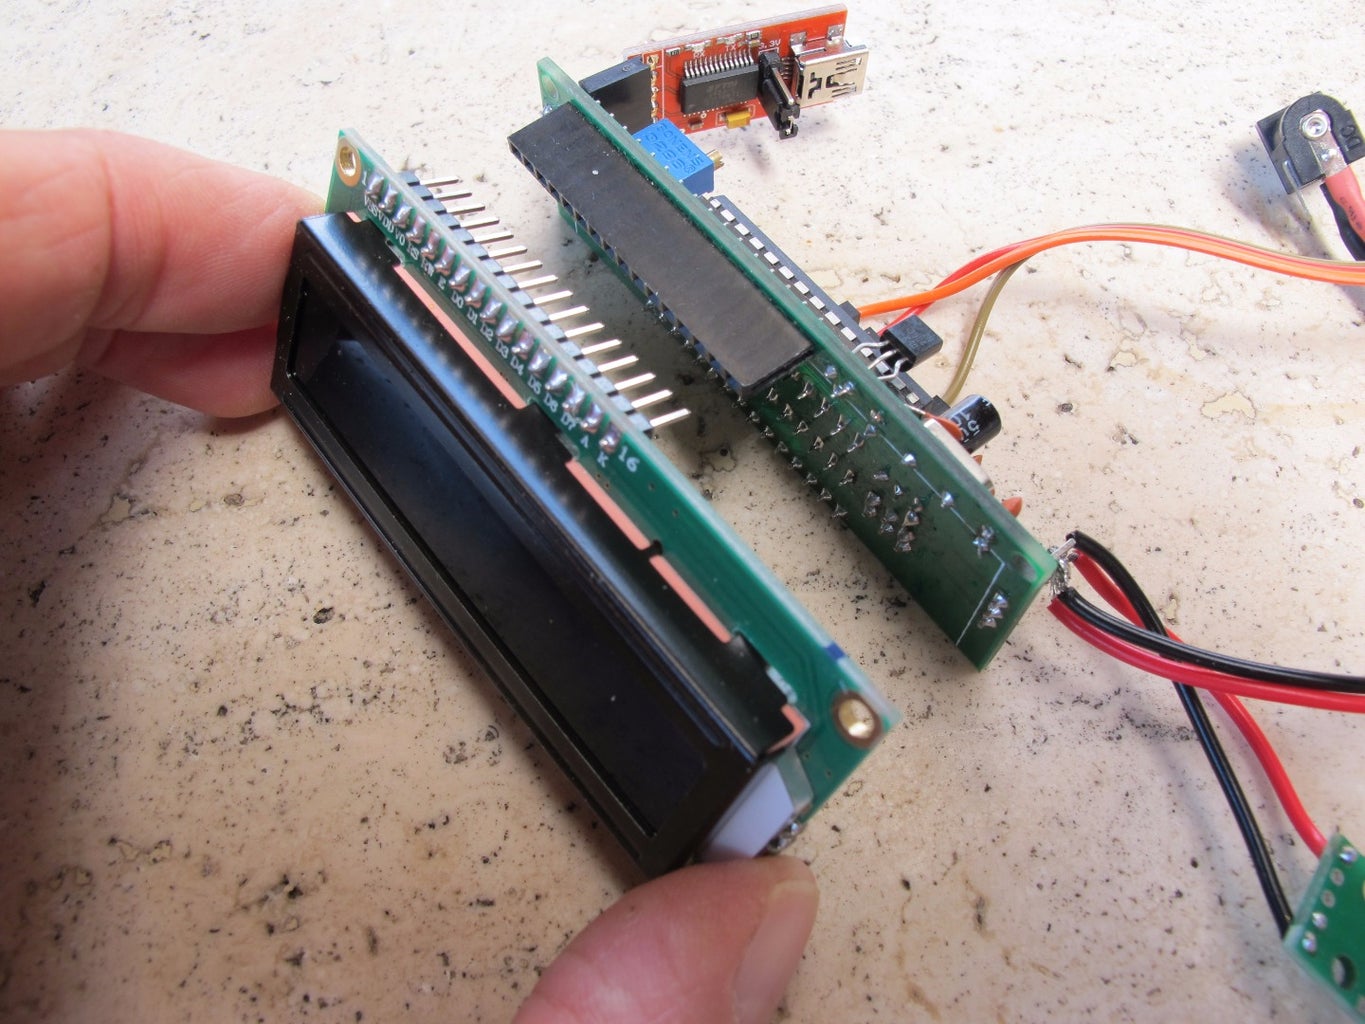
As a driver for the LCD screen, I used again the buildcircuit.com kit as there are fewer wires hanging out.
Just plug the LCD in. Soldering skill are needed here assembling them.
I have them in stock.Just send an email to arduinomastercomau@gmail.com for orders.
The improved code that turns the sensor off and on again before the reading is all you need now.
This section was updated on the 19th July 2016 to enter the Low Water Garden competition
To improve your crop you:
- Choose plants that are in season for your area.
- Start putting your seed packets in the fridge a week before planting.You create a falls winter.
- Then when you take them out of the fridge they react like it is spring due to the temperature change. Start the seeds in moist grow wool or plastic bags with moist paper inside. Use plain rain water or chlorine free charcoal filtered water without any fertilizer.
- Get liquid fertiliser A and B solution from your nearest Hydroponic farm (much cheaper) and a watering pump or solenoid. Then add the pump connected to the Arduino to give the plant the needed moisture. When the reading is LOW. Constant moisture will prevent oxygen getting to the roots and the plant can get root rot and die. It is essential to experiment to get the right moisture balance. When the plant begins to grow to start your liquid fertiliser at half strength. No matter if you have a drip to waist or hydroponic system. Some farmers grow nonflowering crops like lettuce. They do not add phosphorous to the fertilizer as they are not needed. If you grow flowering crops you may consider adding phosphorus separately. But they also grow without.
- For a drip to waist system uses more salt-free river sand then soil for good drainage.
- Use black hoses and a dark container to store the water and to prevent algae growth from the sunlight.Those flexible ones bought at you hydroponic shop and not the stiff one from your hardware store. Keep the water oxygenated just like your fish aquarium. Stale sitting water will go off.
- Consider adding a thermostat in line BEFORE the water goes to the plant, as in our Queensland sun the water gets over 27 C inside the water lines, too hot for the plant and will burn your roots. Or a timer to prevent watering in the midday heat.
I get asked why A and B fertiliser. The fertilizers contain all minerals in one container and trace elements in the other. If they are put together in a concentrated form they crystallize in the container. That is why they need to be kept separate.
They are then poured into your water container at equal amounts.
- The nutrient strength I measure with a Bluelab truncheon nutrient meter. Caters for different charts EC, ppm x500, ppm x 700 and CF. I seal the bottom edge off with silicone to prevent the paper table inside under the plastic from rotting.
- I hardly check the PH because I also use tap water. Tap water is at PH 7.
If the PH of a plant is out, it can not absorb the nutrients.
- The nutrient strength you get from the internet. Many tables show the strength needed for healthy plant grows. ( those nutrients are specific for plants and not for humans to drink).
- Sometimes you get bacteria in your system, Hydrogen Peroxide is used to kill the bacteria. Simply add some to your water.
Hydrogen peroxide (H2O2) is the only germicidal agent composed only of water and oxygen. Like ozone, it kills disease organisms by oxidation! For this reason, Hydrogen peroxide is considered the world’s safest all natural effective sanitizer. It then dissolves into water and oxygen. A product also used as a mouthwash and many other home remedies. Just do not swallow it.
The difficult way would be running chlorine through your system in between crops.
- Do not plant different crops in one pot ( or hydroponics systems) as the roots compete by releasing toxins to compete with other crops.
- Every plant needs a different nutrient strength measured in PPM parts per million or EC electric conductivity and so on. For lettuce, my nutrient strength is 1.25 EC and I can not put them together with strawberries as the EC is 2.2 and would burn the roots of the lettuce. So they have to be on a separate system.
- Do not grow illegal crops inside a building. You will get caught out with today's technology and modern helicopters equipped with heat sensing devices detecting the grow light heat signature on your roof !!!!
The Arduino code in this inscrutable is only a display telling you the moisture on an LCD screen for now not switching anything.
The main objective here was that the sensors power turns off so that the probes do not de-laminate.
The sensor gets 5 Volt power on pin 12 HIGH to take a reading and then powers off again to improve plant health and avoid delamination or de-galvanisation of the probes.
More instructions in the code.
Happy planting, eat healthily. Avoid stress and processed food due to the unhealthy preservatives.
TIP: Your body adjusts the PH by itself easily with good nutrition. But struggles with processed food. You can buy test strips at your chemist to place under your tongue to check your own PH. We checked a family member when he had cancer and found that his saliva was too acidic.
Quotes by Robert Moller
- The only difference in someone who can do something and others can not is...
that one has an interest in it and others do not!
- Those who don't have don't care!
- You are unique and if you learn skills, you do not need to fear the future.
Attachments

Step 2:
Step 3:
Step 4:

Participated in the
Indoor Gardening Contest 2015


