

Introduction: Homemade Forge


Hey guys, today I bring you my step-by-step guide to building your own forge.
A while ago, I decided that I wanted to start doing some more serious metal-working and start in the art of manliness: blacksmithing. My only trouble was that I couldnt find many easy ways of building one, so I began planning and building for myself! Hope this helps anyone with the same predicament.
Step 1: Your Materials

The size of your forge is completely up to you, however for my forge, the materials you will need are:
58 cement or fire bricks, preferably with the dimensions along the lines of 12"x5"x5"
Steel grating that will be as wide and long as your forge
Air supply/bellows (I used a shop-vac in this case)
Coal
Step 2: Laying Your Bricks

First thing you will want to do is to find a location to put your forge. Put it in an open space away from trees and cover so your smoke and carbon monoxide can escape easily.
Next, you will want to flatten the ground you wish to use for your forge. You could even get some extra bricks and use them as a foundation.
Finally, based on your plan, start laying your bricks down. For my particular forge, I wanted it to be a pretty decent size, so I laid them so that there were 2 full brick lengths on each side.
Step 3: Incorporating Your Bellows

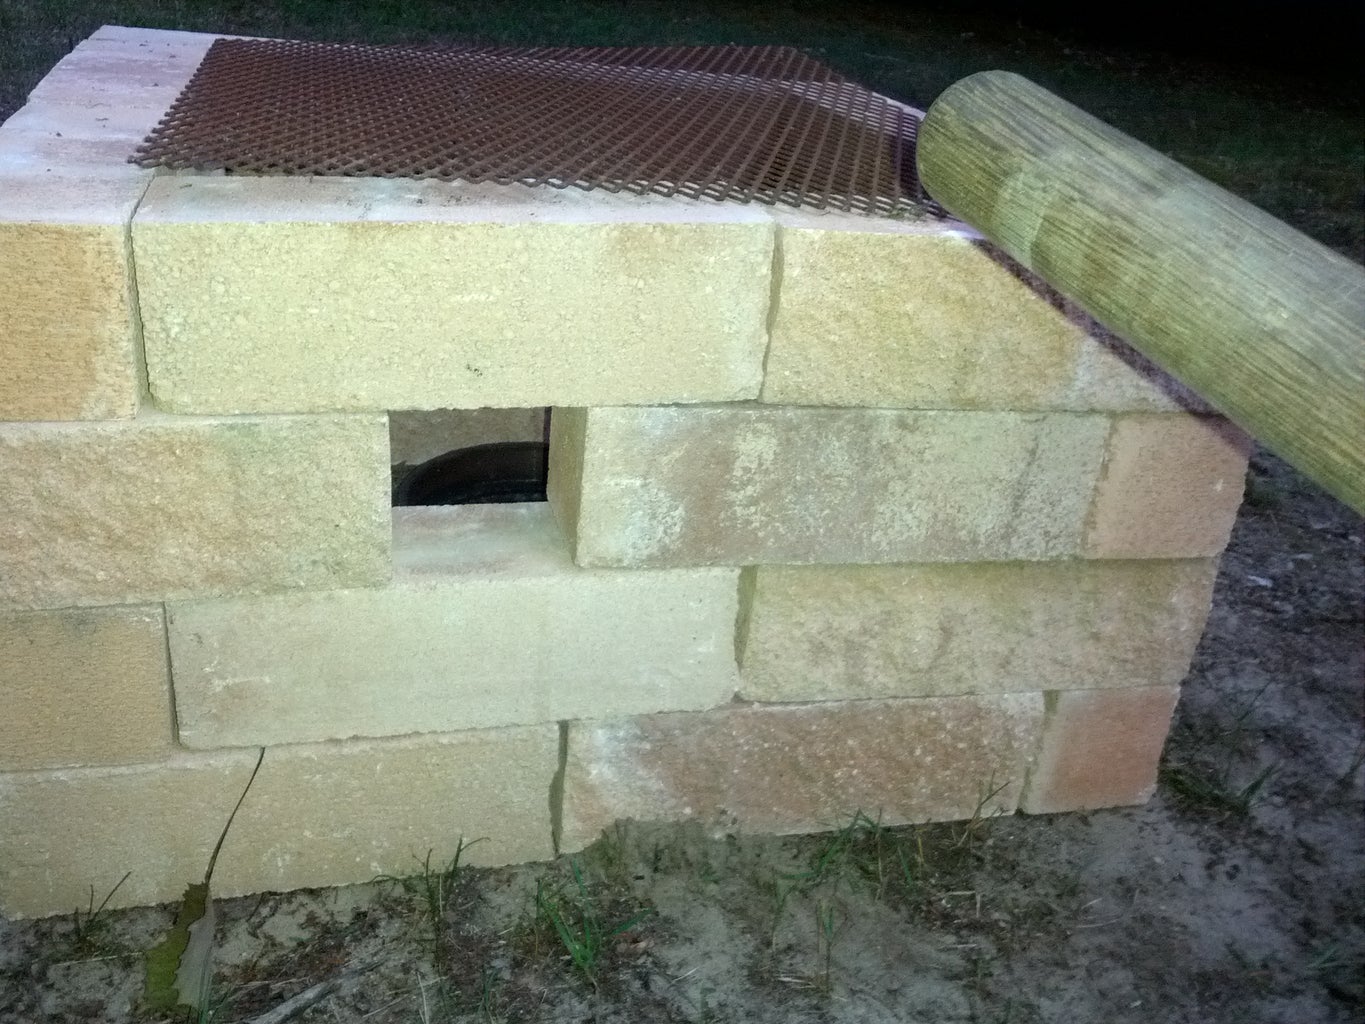
Keep stacking your bricks in a staggered formation so that the forge is stronger and less likely to collapse. Depending on how high you want your forge to stand will cause a variation on where you put your bellow opening. Originally I was not going to have mine as tall as it was, but I changed that.
Once you have reached the 5th layer of bricks, slide a brick over far enough to fit the nozzle of your vacuum in. You may cut the protruding part of the brick off for aesthetics, however I did not.
Step 4: Adding Your Grate

This is probably the most straightforward step in this instructable. Place your steel grating on your 6th layer of bricks and continue to stack bricks on top of that, leaving the front open so you can insert your object to be forged.
The steel grating is there so that as your coal burns down and gets smaller, the ash and useless remnants fall thru and are out of the way. The grating can be moved at a later time to clear the ash out.
Step 5: Finishing Up
Well, to finish up, you can trim off and protruding ends and fill any gaps in the bricks. I would advise not the use mortar to hold the bricks together as it may crack or explode from the heat if it is not perfectly dried. Your next step is to throw on some coal and fire up your new forge.
Get yourself some hammers, tongs, punches and chisels, an anvil and get to work.
Thanks for reading!

Participated in the
Weekend Projects Contest


