

Introduction: Homemade Wine Rack for FREE


This wine rack not only holds up to 9 wine glasses it also can chill a bottle of wine. This is the perfect gift or home project for anyone that loves wine.If you love free you will love this instructable.
Materials:
Wire spool- wire spools are completely free . All you have to do is ask, at home depot , lowes or any other hardware store. Many electrical companies have piles them to in various sizes.I got my wire spool for free, I actually got two in different sizes. I went to homedepot customer service and they said they would give me as many would fit in my car.
Glue(optional)
foam (optional)
paint/stain(optional)
Tools:
Rotary tool with sanding bit and router bit.
Step 1: Cutting the Holes.


First you need to use the router bit to make 9 equally spaced elongated U's.You want to make them big enough to fit most wine glasses but not too big that they would fall out easily.Secondly a circle needs to be ct in the direct center of the wire spool . I used the same router tip I used on the U's . as always make sure it is big enough to fit most wine bottle but not too big that you can't fit the liner.
Step 2: Sanding
Tnce the holes are cut, they will need to be sanded.The incision in the wood that you make will leave wood splinters that need to be sanded off. I also recommend sanding the top because the spool ar rough and may have splinters. the rotary tool fit perfectly inside the U to get it all sanded.
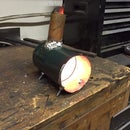
Step 3: Wine Chiller(optional)

Once the holes are cut and sanded you are ready to make the wine chiller. I make it out of foam insulation that i had laying around and some rubber matting.First i filled the inside with the foam then wrapped it in rubber mat which I glued in place.I the drilled a small hole using the rotary tool to create a drain for excess water.Once the glue is dry ,the wine chiller is done and you can now move on to the next step.
Step 4: Finishing Touches (optional)

This piece can be pained to stained any color you want. I decided not to because I wanted to levas the natural beauty of the wood. I did add the non scratch pads to the bottom so I wouldn't scratch up my table.This project only took me about 3-4 hours so it is a good weekend project that makes a great gift.
ENJOY!

Participated in the
Full Spectrum Laser Contest 2016

Participated in the
Plywood Contest

Participated in the
Homemade Gifts Contest 2015


