

Introduction: Your Earphones Attached Permanently to Jabra Clipper


Using your favorite earphone with Jabra Clipper is pretty annoying. There would either be long tangible cord or folded earphone wires. Plus, the 3.5mm jack would protrude and add more bulk and tangles. Fear not, Jabra Clipper is truly a hackable device, you can actually solder them permanently!
Step 1:

First of all, before you continue, remember that this is a guide to attach your beloved earphones permanently to Jabra Clipper. Thou who had weak of heart should not proceed.
Start by cutting your earphone wires. This is a very important step and you should do this even if you haven't had any Jabra Clipper in your posession. It provides pressure needed to complete the project, as there's no way to turn back now!
I cut around 30cm from the earbuds, which allows free head movements while the Clipper attaches to the neck side of T-shirt.
Step 2:


The Jabra Clipper's cover is actually made of very elastic rubber, which allows many hacking possibiliites!
To disassemble it, the cover needs to be peeled off. Start by inserting a screwdriver from any of the sides until you hit the steel chassis. Pull it upwards, and do the rest of uncovering ritual with your fingers.
Clean up the remaining sealant from the sides of the case. Now there the warranty and waterproofing goes! Relax, nobody needs waterproofing. Well at least, not on the level of what was offered by Jabra Clipper!
Step 3:


Once uncovered, you'll see the main PCB on the front panel, and the battery on the back. Both top and front PCBs are covered with some transparent hard plastic protector.
Watch out for the battery cables, you may need to gently pull them out later. Use a screwdriver when so.
Step 4:
The top protector plastic is next. Unscrew the two black screws on top of the device, but don't attempt to remove the top plastic yet.
Step 5:

Before you can remove the top plastic, you'll need to unlock the clip on upper right corner. Use a screwdriver for that. The top plastic will pop, and you can remove them.
Remember, be careful to never strain the flex cable on top left, connecting front and top PCB!
To remove the front plastic, use the screwdriver to pop it, starting from the bottom, and moving on to the sides.
Step 6:


You'll need to remove the front PCB. Check out the clip on the top, left, and a bit lower to the right. Pry open from the bottom of the front PCB, and work to the right and left clips. The top clip isn't movable so you'll have to move a bit downwards to pull the front PCB.
Now you may remove the top PCB. Again, beware not to strain the flex cable! To remove the top PCB, gently lift the microusb port side upwards, and push audio jack side to the microusb sideward, to remove it from the clip.
Step 7:

It's not mandatory to remove the battery to solder your earphones, but removing it would provide a bit of flexibility when soldering them. Also, now you can see that it's a 100mAh battery.
Step 8:

I didn't needed to remove the 3.5mm audio jack to solder the earphones, and guess what, I can now plug another earphones here. It works as a splitter!
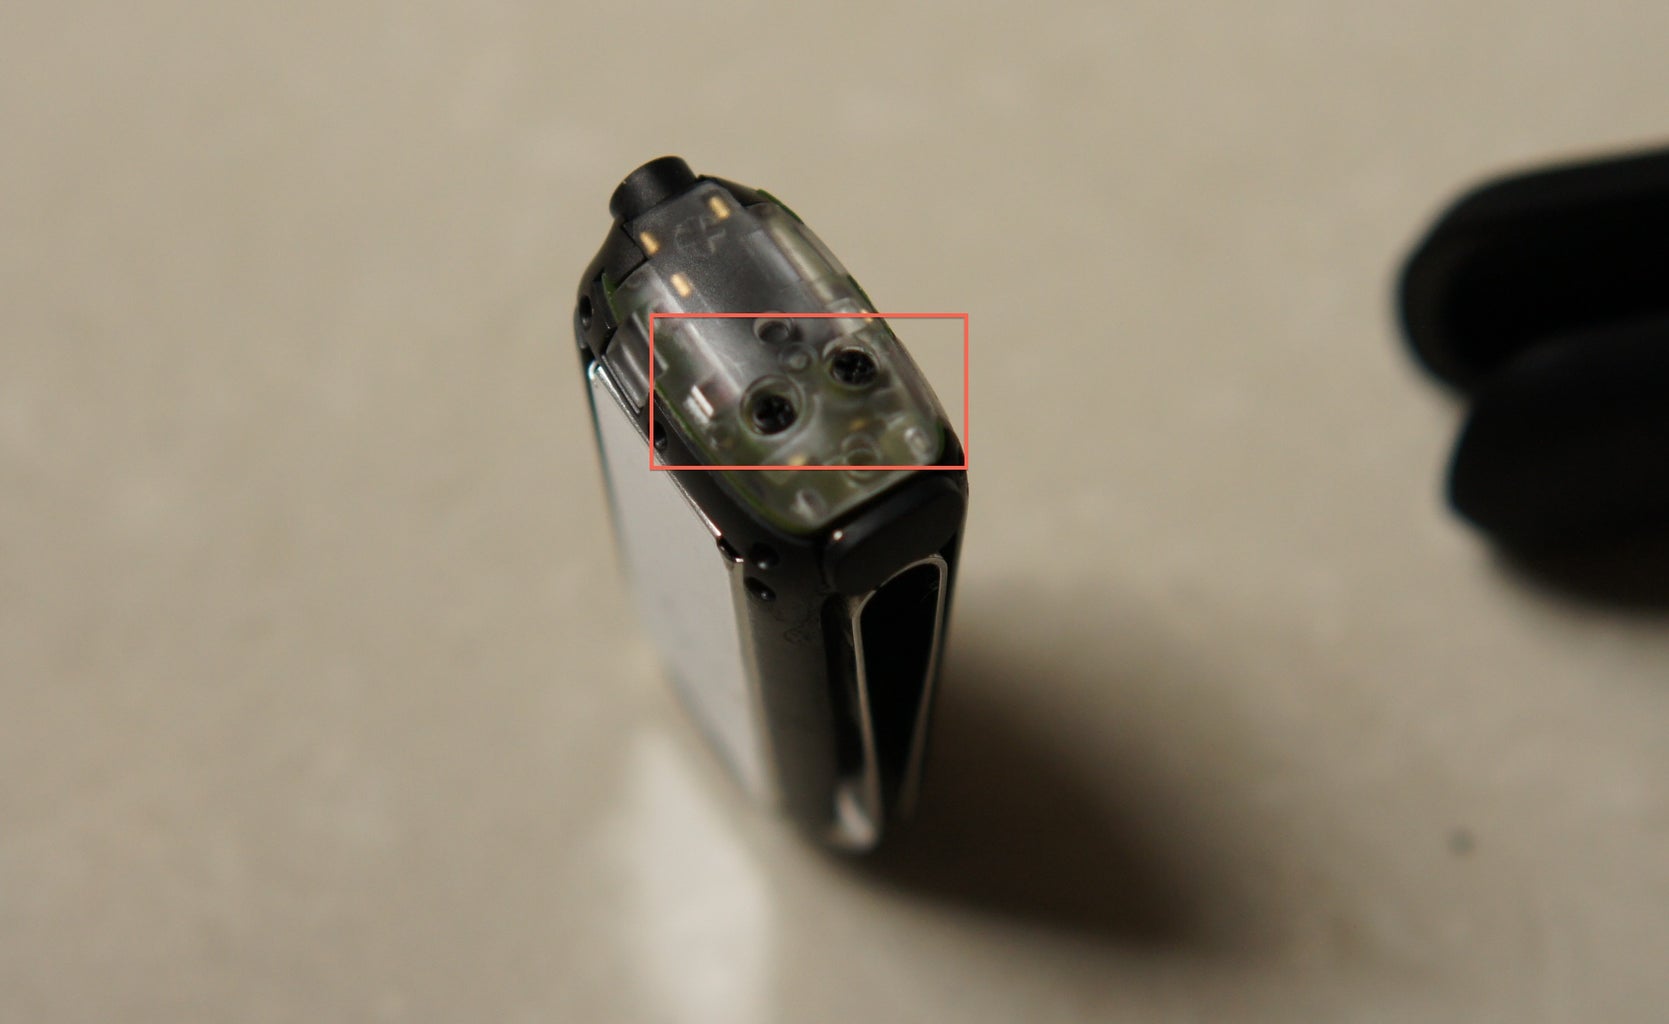
Now get ready to solder your earphones. Notice the spots where you should solder your R, L, and two G (common) wires from your earphones. I've got a couple of extra solders on the top right and left, only to figure out that those joints are active only when a 3.5mm jack is plugged in. Oh well.
Now reverse the steps to assemble the Jabra Clipper back. Please note that you'll need to cut some of the chassis' black plastic to allow space as well as let the headphone wires out. I've also cut out some parts of top clear plastics clip shown in the previous step.
Step 9:


Now this is how Jabra Clipper should be like! No extra wires, no 3.5mm plug hassles, and Sennheiser-quality earbuds! And I've actually soldered another battery in parallel on the back, without issue thanks to the elastic rubber cover!
Now the Clipper runs 12 hours of music and talk time!
Good luck on that with BackBeat Go :p


