

Introduction: How to Control a 3D Printer With a Phone Via DIY AstroBox


This Instructable will show you how to set up a Raspberry Pi-based print server so you can control and monitor your 3D printer remotely (including remote slicing) from a phone, tablet, or computer.
Wireless Printing
Of course, the main purpose of this Instructable is to show you how to build a print server that will allow you to untether your 3D printer from your computer. You will be able to launch prints directly from your phone, no computer required.

Remote Printer Control
By the time you complete this tutorial, you will be able to control your 3D printer remotely, from a phone, tablet, or remote computer. The AstroPrint software we will be using allows you to move your printer, extrude filament, adjust extruder and bed temperature, and actuate the fans.
Cloud Slicing
The most powerful feature of AstroPrint, and the one that sets it apart from other software, is the AstroPrint cloud slicing service. With other similar software, like OctoPrint, on which AstroPrint is based, you still need a computer with slicing software to prepare 3D printing files. The 3D print server we will build in this Instructable will allow you to go from STL 3D models, to launching print jobs, without any need for a computer at all. You can do everything from your phone.
Remote Monitoring
By connecting a webcam to the DIY AstroBox, you will be able to see your 3D printer from afar and monitor its progress. The AstroBox software can also automatically create time-lapse videos of your prints.
3D Printer Compatibility
The 3D print server we will build in this Instructable will work with most 3D printers. Basically, any 3D printer that uses non-proprietary host software will work. So, any 3D printer that uses Repetier, Cura, or other community-driven host software will work. The AstroPrint software we will install on the Raspberry Pi will replace this software.
The printers that will not work are those that use their own, proprietary host software packages. The most notable group of 3D printers that are incompatible with AstroPrint are MakerBots.
Customizing the Software
AstroPrint is open source and, with a bit of web development knowledge, you can fully customize the look and feel of AstroPrint. You can change all of the icons, all of the colors, all of the fonts, even the layout of the software. If you want to change how AstroPrint looks, check out the guide on Dabbletron.
Step 1: Gather Your Parts

We will need some parts to build our 3D print server.
To build your own 3D print server you are going to need a few parts. The table below lists all of the parts needed for this build. In the left-most column of the table, I've identified each part with a number. Below the table are some notes about each part corresponding to the numbers in the table.
The total cost for this project is about $85. If you have Amazon Prime you will not even need to pay for shipping.
Aside from the parts in the table below, you will obviously need a 3D printer. Back up to the previous step for an explanation of 3D printer compatibility with AstroPrint.
Parts List
| Reference Number | Image | Part | Quantity | Link |
|---|---|---|---|---|
| 1 | 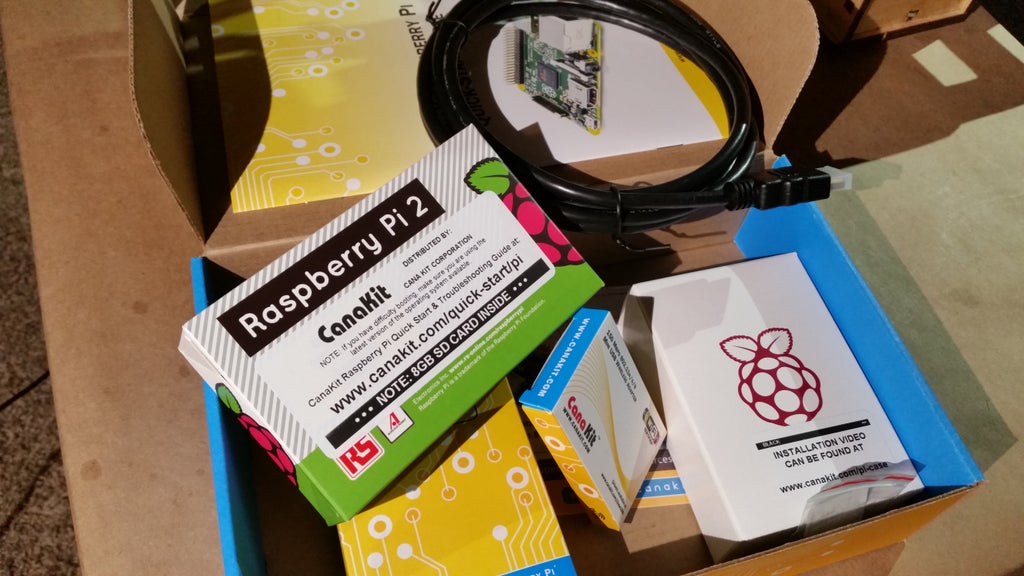 | Raspberry Pi 2 Complete Starter Kit | 1 | Amazon |
| 2 | 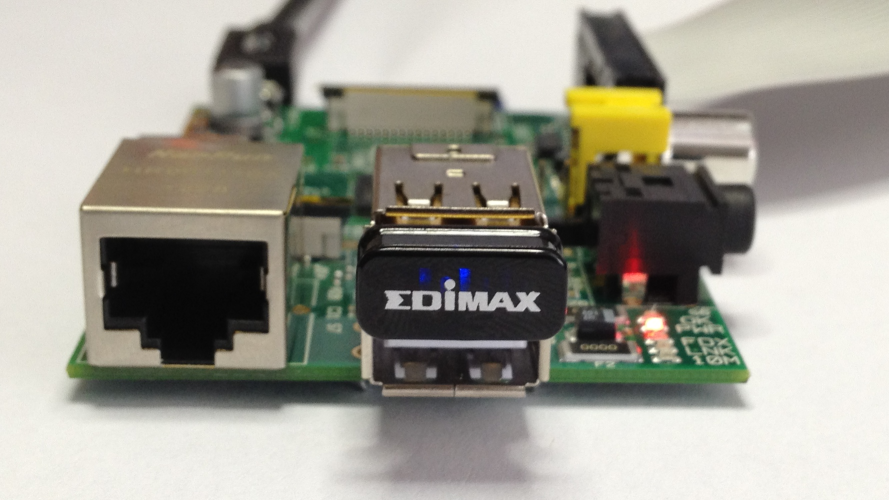 | Edimax EW-7811Un Wi-Fi USB Adapter | 1 | Amazon |
| 3 |  | Micro SD to SD Card Adapter | 1 | Amazon |
Part Notes
1 This Raspberry Pi starter kit is a convenient way to get all of the Raspberry Pi-related parts you will need for this build: a Raspberry Pi board, a power supply, a Raspberry Pi enclosure, and a micro SD card. Note that this kit does include a WiFi module, but it is, unfortunately, not supported by AstroPrint at the time of this writing. This kit also includes an HDMI cable which is not necessary for this build, but it is useful to have for debugging purposes.
2 This WiFi module is extremely popular for use with the Raspberry Pi. It is also the only module currently supported by AstroPrint. This is a concurrent mode WiFi adapter, meaning it can connect to your home WiFi network and act as a WiFi hotspot which will allow devices to talk to your printer locally and over the internet.
3 The Raspberry Pi 2 uses a micro SD card to hold the operating system (image). So, you will need some kind of adapter so you can plug the micro SD card into your computer and install the image onto the card. If you have a regular SD card reader on your computer, you can get this Micro SD to SD card adapter. Alternatively, you can get a micro SD to USB adapter.
Step 2: Download the AstroBox Raspberry Pi Image From AstroPrint
First we need to get the AstroBox software that will run on our Raspberry Pi.
What is AstroPrint?
AstroPrint provides a web interface for performing all of the functions needed to work with a 3D printer remotely, including internet-based slicing of STL files. By the end of this Instructable, you will be able to control your 3D printer entirely from your phone or tablet; you will not need to use a computer for any part of the process (unless you are designing a custom part).
AstroPrint basically consists of two parts: the AstroBox hardware, and the AstroPrint software/service. The AstroBox is the hardware that runs the AstroPrint software. The Astrobox connects to your 3D printer via USB, and gives your 3D printer a connection to the internet and the AstroPrint service. The AstroPrint software runs on the AstroBox and provides an interface between the 3D printer and AstroPrint's web application, including cloud slicing.
You can buy a bespoke AstroBox from the AstroPrint website. Otherwise, as we will be doing in this Instructable, you can build your own AstroBox from a Raspberry Pi (or a PCduino), and save approximately $80.
Download the AstroPrint Image
The AstroPrint image for Raspberry Pi can be downloaded from the AstroPrint website. In order to download the image, you will need to create an account with AstroPrint. Creating an account is totally free and I think creating an account is a very small price to pay for such a fantastic piece of software.
The image is a fairly large file, about 1.16 GB, so, depending upon the speed of your internet connection, it could take a few minutes to download.
Once the download is complete, make sure to extract the .zip file. Inside you will find the AstroPrint image; it has a .img file extension.
Step 3: Install AstroPrint Image Onto Micro SD (Windows)


Next we'll write the AstroPrint image onto the micro SD card.
Now that we have the AstroPrint image downloaded, we need to install the image on the Micro SD card. The Raspberry Pi stores its operating system on the SD card.
The procedure for installing the AstroPrint image onto the SD card is different depending upon whether you are using a Windows or a Mac. This page covers the procedure for Windows machines, the next step documents the process for Macs.
Download Win32DiskImager
On Windows, we will need to download an install a tool used to write OS images onto SD cards or flash drives. The program recommended by the Raspberry Pi Foundation is called Win32DiskImager. We will use this tool to install the AstroPrint image onto the SD card.
So, first download the Win32DiskImager utility from Sourceforge.
Install the AstroPrint Image
- Using your micro SD to SD card adapter, insert the micro SD card into your computer's SD card reader. If you do not have an SD card reader, you can use a micro SD to USB adapter instead.
- Once the download is complete, install Win32DiskImager.
- Open Win32DiskImager.
- In the upper-right corner to the Win32DiskImager window, under the Device section, choose the drive letter of your SD card. If you need to check on the drive letter, open My Computer and you should see the SD card listed under Devices with Removable Storage.It is extremely important that you select the correct drive letter. If you select something that isn't your SD card, you could permanently delete all the data on the selected device. If you accidentally select your hard drive (which the software shouldn't even let you do but still) you could destroy all the data on your computer. So just make certain you select the SD card's drive letter.
- Then, click the little folder icon next to the device selection and choose the AstroPrint image file you downloaded in the previous step.
- Click the Write button and wait for the process to complete.
- The image writing process can take a little while, but once it is done, click the Exit button, and eject your SD card.
Step 4: Install AstroPrint Image Onto Micro SD (Mac)
Next we'll write the AstroPrint image onto the micro SD card.
Now that we have the AstroPrint image downloaded, we need to install the image on the Micro SD card. The Raspberry Pi stores its operating system on the SD card.
The procedure for installing the AstroPrint image onto the SD card is different depending upon whether you are using a Windows or a Mac. This page covers the procedure for Windows machines, the next step documents the process for Macs.
Install the AstroPrint Image
AstroPrint recommends the RPi sd Card Builder: http://alltheware.wordpress.com/2012/12/11/easiest-way-sd-card-setup/. Alternatively, if you are familiar with the Raspberry Pi and feel comfortable with command line code, you can also follow the instructions here: http://www.raspberrypi.org/documentation/installation/installing-images/mac.md.
Once you are finished, remove the SD card from your computer.
Step 5: Assemble Raspberry Pi Enclosure


In this step we will assemble the Raspberry Pi enclosure with the Raspberry Pi 2 inside.
The Canakit Raspberry Pi 2 Complete Starter Kit includes a very nice enclosure for the board. If you do not want to use the included case you can, of course, just mount the Raspberry Pi wherever you have room, but the enclosure provides plenty of protection for the Raspberry Pi against physical damage or shorting out on metal tools, plus it gives the project a polished, professional look.
However, there is one small problem, the enclosure included in the Canakit package is made for the Raspberry Pi B+, not the Raspberry Pi 2. The case will still fit the Raspberry Pi 2, but getting the board to fit requires that you assemble the enclosure in a specific way.
Disassemble Empty Enclosure
First of all, since the enclosure comes already snapped together, we need to disassemble it. The enclosure has three parts: a lid, a base, and a body. First remove the enclosure lid, which is the part with the Raspberry Pi logo. The lid simply lifts off the body. Next, press your fingers down through the hole in the body and push out the enclosure base. The base is held on by tabs and it will take firm pressure to pop the base off the body.
Place the Raspberry Pi 2 into the Base
The first step of inserting the Raspberry Pi 2 into the enclosure is to mount it onto the enclosure base. If you take a look at the enclosure base, you will notice an arrow in one of the corners. You must put the corner of the Raspberry Pi 2 next to the USB ports underneath this tab first. With the corner under the arrow tab, the rest of the Raspberry Pi 2 board will sit flat on the enclosure base. You will know you have the Raspberry Pi 2 seated correctly when the ports on the side of the board fit into their slots in the enclosure.
Attach the Body
Next we will put the body back onto the base. Simply press the enclosure body onto the base and reengage all the tabs around the base. You will notice that the labeled cutouts in the body match up with all the Raspberry Pi 2 components, except for the CPU in the middle of the board. This is because the CPU is in a slightly different position on the Raspberry Pi 2 versus the B+.
Attach the Lid
Last we need to place the lid back on top of the enclosure. Simply line up the pegs/slots, and slide the lid back onto the body. Note that there will be a gap between the lid and the body. This gap is there to allow heat to escape the enclosure.
Step 6: Insert SD Card and WiFi Adapter


In this step we will plug the SD card and WiFi adapter into the Raspberry Pi.
Insert SD Card
If you take a look at the bottom of the Raspberry Pi 2 enclosure, you will find a slot allowing access to the micro SD card slot on the bottom of the Raspberry Pi 2. Gently insert the micro SD card with the AstroPrint image installed into the socket. Be careful not to use too much force because the SD card socket on the Raspberry Pi 2 is a bit fragile.
Plug in WiFi Adapter
The 3D print server we are building communicates with other devices over WiFi. As mentioned in the first step of this Instructable, the Edimax EW-7811Un is capable of connecting to your home WiFi network and acting as a WiFi hotspot.
It does not matter which USB port you choose for the WiFi adapter, simply pick one and plug the WiFi adapter into the Raspberry Pi.
Step 7: Power on and Connect to the Raspberry Pi


In this step we will turn on the Raspberry Pi 2 AstroBox and connect to it with a phone, or other WiFi device.
Attach the Power
Your Raspberry Pi AstroBox is now ready to be powered on for the first time. Simply plug in the power supply that was included in the Canakit package into the wall and the other end into the port on the side of the Raspberry Pi, next to the HDMI port.
Once you connect the power, the Raspberry Pi AstroBox will start up. The Raspberry Pi might take several minutes to start up and for the AstroPrint software to configure itself for initial setup. You should see a blue light flashing on the WiFi adapter which indicates the Raspberry Pi AstroBox should be ready to use.
Connect to the AstroBox
You can use any WiFi-enabled device to connect to your Raspberry Pi AstroBox. In this Instructable I am using an Android phone because I am setting up my wireless 3D printer in the basement where the noise will not bother anybody. Any WiFi-enabled device will work though.
The Raspberry Pi AstroBox will create its own WiFi hotspot. So, with your phone, search of the nearby WiFi networks. You should find one called astrobox-**** where the asterisks are just four random numbers. Connect to this network.
Now open your browser and navigate to http://10.10.0.1.
You will be presented with the AstroBox welcome screen.
Step 8: Follow AstroBox Setup Procedure


Follow the prompts in the AstroBox interface to set up the system.
We will go through a number of steps to configure and AstroBox. The process is fairly straightforward, there are only a few notes to make:
- When you are naming your AstroBox, do not use underscores. This is a known issue and it is probably one AstroPrint will fix soon.
- When you get to the step asking you to sign in to your AstroPrint account, if you have trouble logging in, try connecting your Raspberry Pi using an Ethernet connection instead. I actually went through the setup procedure a few times and occasionally the AstroBox is unable to sign in over WiFi.
- For now we are not connecting a 3D printer, just because I think it is easier to connect the printer and configure settings later on.
Once you are done going through the setup procedure, I think it is wise to restart the Raspberry Pi by unplugging it and then plugging it back in again. Among other things, the new name your gave your AstroBox will not show up in as the hotspot name until you reboot the Raspberry Pi.
Step 9: Connect Your 3D Printer


In this step we will attach a 3D printer to the Raspberry Pi AstroBox.
Before we can print we obviously need to connect a 3D printer to the Raspberry Pi AstroBox. To do this, just plug the USB cable from the 3D printer to the AstroBox.
After making the physical connection, we need to get the AstroBox to recognize the printer and we need to set up the printer.
Connect the Printer to the AstroPrint Software
With your phone still connected to the AstroBox, navigate to the settings page by tapping the gear icon on the bottom of the page. When the settings window opens, you should see a message informing you that there is no printer connected to the AstroBox.
Tap the Re-scan button and the AstroBox will check again to see if the 3D printer is connected. Your AstroBox should detect your 3D printer and connect to it. Note that the USB Device might not have the actual name of your 3D printer, it might just have the name of the controller your 3D printer uses.
Adjust Printer Profile
Next we need to input some basic settings for the 3D printer, for example the size of the build area. These settings are modified through your AstroPrint account. So, go to https://www.astroprint.com/ and sign in to your account. After you sign in, you will be taken to your Dashboard. You will do a lot of work from the Dashboard, it is where you access all the commands and apps used to control your 3D printer.
For now, select Printer Profiles. You will notice a message informing you that you have no printer profiles. So, press the green button to create your first.
There are two ways to input settings for your 3D printer. If you have a relatively new, commercial 3D printer, you can simply find your 3D printer in the list and use the settings provided by AstroPrint, saving you some time. Simply select a 3D printer manufacturer and a model.
If you have an older 3D printer, or a 3D printer you built yourself, you will need to input the settings manually. In the dropdown list, just select Create Custom Printer.... On the next screen, input a name for you 3D printer and all of the measurements.
Finally, click Create. You will be taken back to the Printers menu where you should see your 3D printer profile in the list.
Step 10: Add Material Profile


In this step we will input settings for the filament you are using.
In the previous step we input settings for the 3D printer; the settings are stored in a Printer Profile. Each 3D printer profile is associated with one or more Material Profiles. Material profiles store settings for your filament.
From the Dashboard, select Material Profiles. You will see the Printer Profile you just created in the list, along with a notification that there are no materials. Next to the name of your Printer Profile, select + New Material.
On the next screen, input a name for your Material Profile, the filament diameter, and the extrusion temperature. In the Name field, I like to include some description of the filament, like a color and plastic type, so I know what Material Profile corresponds to each filament spool.
When you are done, click Create.
Step 11: Launch a Print!


Congratulations! Your Raspberry Pi AstroBox is ready for its first print.
Find a Model
There are a number of ways you can send print jobs to your now AstroPrint-enabled 3D printer.
From the AstroPrint Dashboard you can access Thingiverse, CGTrader, or Yeggi for searching 3D printed models. Otherwise, you can create your own models using 3D Slash. Last, you can design your own model using software on your computer and upload it to your AstroPrint Dashboard.
Print your Model
Wherever your model came from, it will end up in your AstroPrint File Manager for your AstroBox. So, from the AstroPrint Dashboard, navigate to your Raspberry Pi AstroBox by tapping the Monitor button. You should find your RaspberryPi AstroBox listed on the page. Select Camera/Control. Finally, on the next screen, select the launch button.
This will bring you to the Dashboard for your AstroBox. Open the File Manager. You should find a list of whatever models you uploaded, as well as an AstroKey.stl file, which is the AstroPrint logo that was automatically placed in your File Manager.
You can launch a 3D print by tapping the 3D printer logo next to whatever model you want to print. When you press the print button you will be taken to a page where you can monitor the progress of your print.

Second Prize in the
Phone Contest

Participated in the
Raspberry Pi Contest

Participated in the
Epilog Contest VII


