

Introduction: How to Build a Snow Cave for Winter Survival


In this Instructable, I will give you the steps to build a snow cave that can protect you for many nights in a winter environment.
Items needed include:
Snow - If you live in Costa Rica, you probably wont be building a snow cave in your back yard.
Snow mobile - or some sort of transportation to get you to a good area. Snow Cat, snow shoes and ski's are all good options too.
Shovel - I like the small aluminum shovels that are collapsible.
Saw - The kind that works best is an old wood handled hand saw. The ones we use are about 36" long. Shorter ones would work but these long ones work great. Lightly coating it with oil before you leave will help.
Ski poles - Sticks and branches will work too but you really need something straight and smooth.
Tarp - We just used a light blue one that you can get anywhere.
Disclaimer: As always, common sense must be used in this or anything you do. This is a SNOW cave. Snow melts!. If the cave starts to collapse, crack or melt at any time during or after the build, abandon it immediately. This is just a guide on how to build a snow cave that has worked for me on two different occasions. I cannot be responsible for the way you build your cave.
OK, lets get started.
Step 1: Get Out There

I am a volunteer on Search and Rescue (SAR), Fire Fighting and Dive Rescue teams in Colorado. All year, we train on a large variety of topics. In the winters, we train on winter (surprise) survival techniques. I have successfully built and spent nights in two snow caves in different years. We have also built other types of field expedient shelters that are usually less work and can work just as well. The snow cave is my favorite.
My team has a fleet of snowmobiles. This is how we get to our overnight location.
We like to wait until about February or March depending on the snow fall that year. Usually, it takes most of a winter to get a good drift built up. I have been to other areas where drifts build up quickly.
Step 2: Find a Nice Snow Drift


Find a nice drift.
The drift that I like is at the edge of a large open area and the snow piles up real nice every year. This drift gets to be about 20' high, 40' wide and about 100' long. You see how small my partner looks in the pic. A "mature" drift like this is great because the snow is nice and packed. A mound of light fluffy snow that is not packed will not work. Even if you were able to get something built into it there is chance it could collapse. This would be really bad for anyone inside.
Step 3: Start Digging


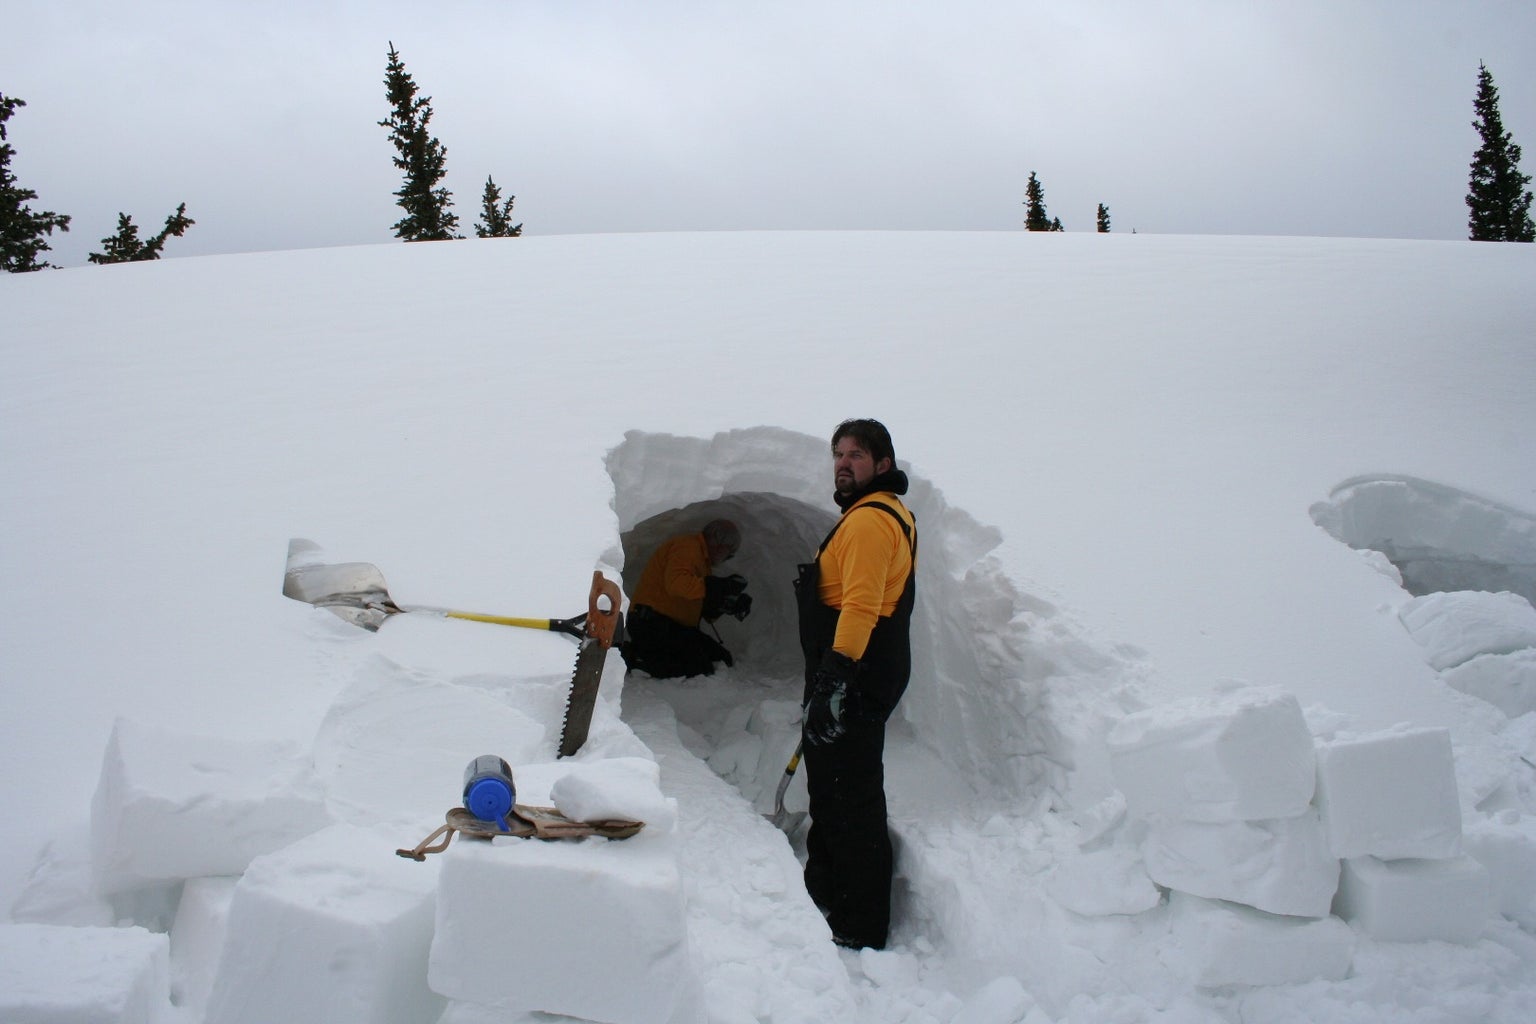


We always build our caves on the "back" side of the drift. This is the side away from the oncoming wind. This way, when the wind blows, it doesn't blow into the cave. A light accumulation of new snow is usually easy to manage.
I start by digging a path into the mound until my cut is about as tall as me. Once I get close to where I want my front door to be, I use the hand saw and cut my snow into blocks. I like to make them about 16" each way and as square as possible. Set these aside. They will be used later to build your front wall.
Once you have about 8 or 10 pieces (enough to enclose your front wall), you can go back to using the shovel. The cave will have a mushroom shape. Don't over excavate the floor. You want your sleeping area to be raised to about bench height. This will make being in and moving around in the cave easy. It will also allow the cold air to fall to the floor which needs to have a slight slope down to the outside.
Build a bench wide enough to lay comfortably on both sides and across the back. The sides will be the bed and the back will be your storage / table area. The cave needs to be deep enough so that the side benches are long enough for you to sleep flat on your back plus about 18" for your gear. I like to dig deep enough so that there is enough room for all of this plus the thickness of the front wall and a small bench outside the cave. My total length of bench was about 12 feet. Another small alcove shelf can be built about 12" above this platform. Here you can place a small candle. You would be surprised how much a candle can raise the temperature in a well insulated enclosure like a cave. DO NOT bring in a heater. You don't want to melt your cave from the inside.
Your gear should be kept inside. Searching for and digging your personal gear out of 6" of new snow is not fun.
Build the walls on a slope but tall enough so you can sit upright. The ceiling needs to have a nice arc in it to carry the load of the snow. DO NOT build straight up walls and a flat ceiling. They will not support near as much load and more than likely will collapse.
Use your ski pole (or stick) to make a small (1" to 1 1/2") air hole at the highest point in the ceiling. This hole needs to go straight up, all of the way to the outside and must be maintained while anyone is in the cave. This will let in fresh air and keep heat from accumulating at the top and melting your cave.
Now is a good time to move all of your gear in.
Step 4: Enclose the Cave

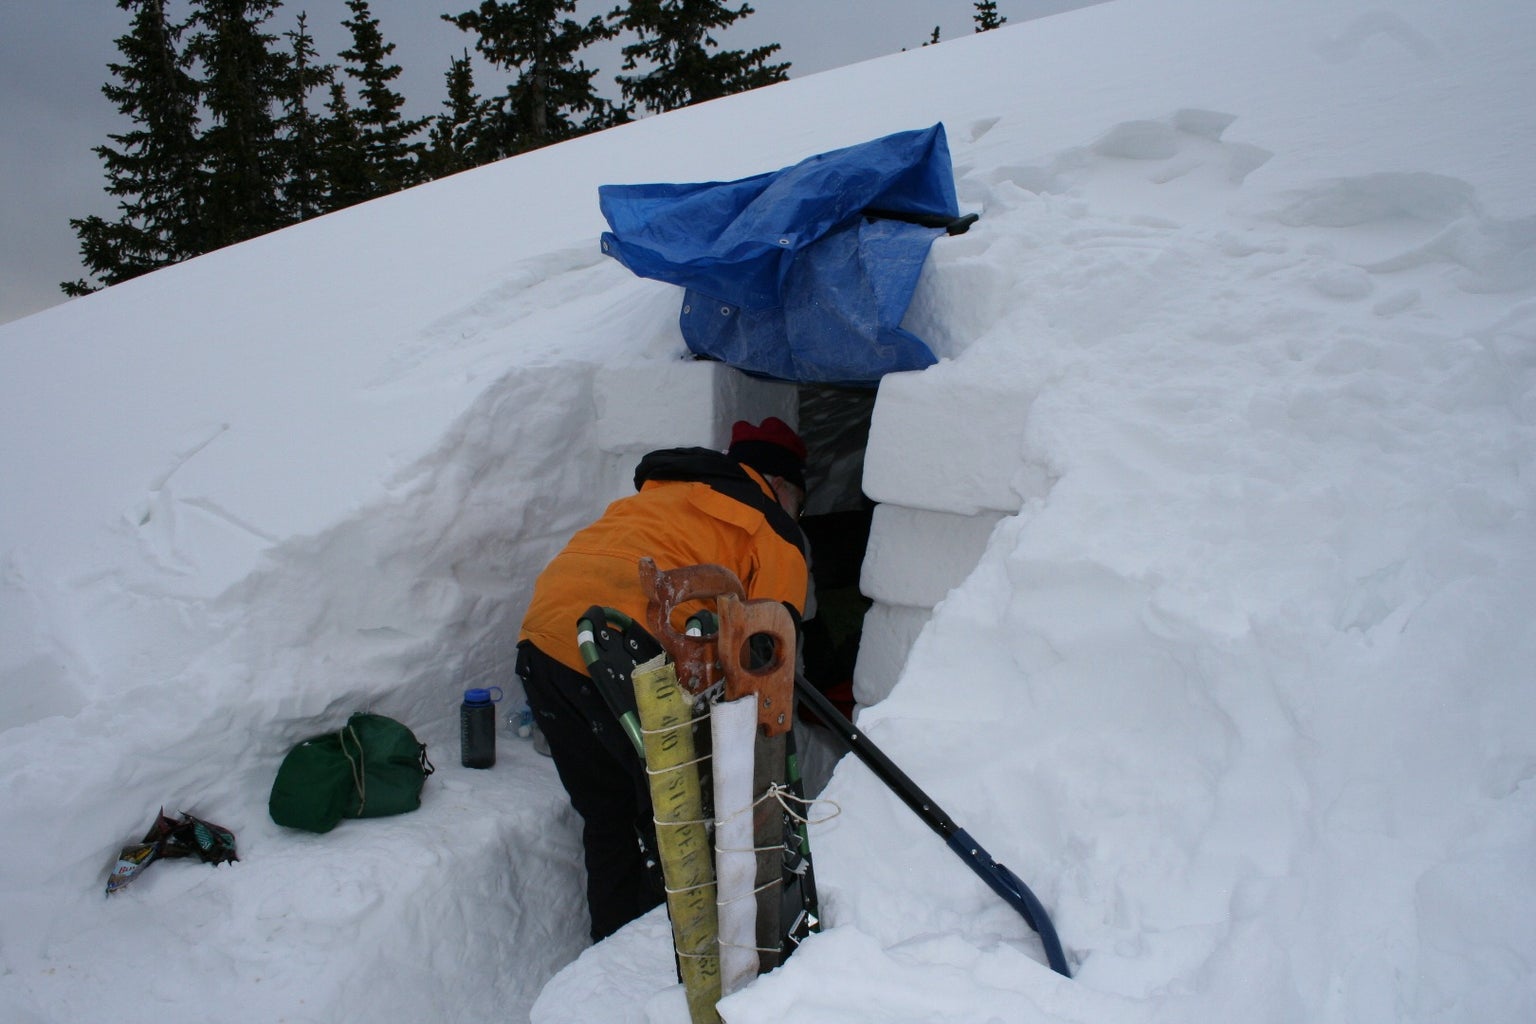

Now, we need those blocks that we set aside earlier. These will be the front wall of your cave.
Stack the blocks up on the bench sides until they are almost as high as the ceiling (not the roof). Use the saw to clean them up and make sure the door is as narrow as is comfortable for you to get through. Pack all holes, cracks and joints with snow.
Lay your ski poles or some long sticks wrapped in the tarp across the top of this new wall. Spread the poles about 8" apart and cover this with snow. This is the header for your doorway.
There you go!. One super cozy snow cave for two.
Both of my snow caves were very comfortable to sleep in. I never got cold in my sleeping bag. In fact, I was dreading having to go outside in the morning.
One last safety note: When we are done with our caves, we always collapse them from the outside. If someone found this cave later in the season when the snow is melting they could try to get in. We don't want anyone to get hurt or trapped. Please do the same.
Enjoy.
Step 5: Don't Forget to Vote.
If you enjoy my snow cave Instructable, please vote for it in the Survival competition. The button is in the upper right corner by the Instructable title.
Thanks, Aaron
Time is almost up for this contest. Please vote. Thank you.

First Prize in the
Survival Contest


