

Introduction: How to Mail a Popsicle / 3D Printed Postcard!


A 3D printed postcard for single use, with juice and added stick.
The “Ice-Pop” postcard functions as a popsicle mold, and when the happy recipient gets it, he or she simply put it in the refrigerator to make it pop out!
This instructable depicts one item from my project “Post Postcard”, in which I’ve tried to question a few assumptions:
The first comes from the fact that I am the owner of the production tool and materials. How can I use my 3D printer in a way that outsource services can’t?
The second challenge comes from the fact that 3D prints are watertight. This is a well known fact, but what can be done with it (other than vases)? In this popsicle postcard I also make use of water anomalies: by placing it in the fridge the water freeze, therefore expanding and breaking the mold/postcard.
Last, what are things that I can mail? What items can I make, then stamp and put in the post, are they any limits?
This is an ongoing project, which has already been exhibited in Jerusalem and Tel Aviv and I’m happy to share its concept and how-to.
***Please note that the end result is non-edible unless all the mentioned materials (filaments, resins) are food safe.
Step 1: Ingredients & Files

In the making of the Post Postcard project I’ve typically used two PLA filaments, one clear and the other pigmented, but in this tutorial I’ll demonstrate all steps with a single, clear filament. As mentioned before, if you’d really like to make it for more than just fun and to actually eat the result you must use food safe filaments and resins. A general summary of food safe 3D printing can be found in this link.
The software I used is Matter Control which makes it possible to pause a print, change the position of the Z axis, change filaments and resume to a pause point – a function that is a must-have in this project.
The printer used is a Printrbot simple metal model, which has the most critical feature for this project – the option to mess with the print and to to insert items during printing :)
Having said that, I’m certain there are more options for filaments (ABS), slicing software and 3D printers. This is all based on my personal experience and I’ll be more than happy to hear alternative solutions and methods for doing it.
Ingredient list:
1.75mm Transparent filament
Syrup Water, choose your favorite flavor (I've used strawberry as it give nice contrast :) About 100ml. (one glass).
Clear, quick drying epoxy resin (I've used the XTC-3D by Smooth-On)
Syringe + Needle, 10ml
Popsicle Sticks
Small Paint Brushes - 5 units
The needed files are:
Kartiv 3-1 - The .stl file for the printing.
Ice Pop - Back Side - The .pdf file for the printed side.


Step 2: Prepare the Popsicle Sticks


The Popsicle sticks need to be sealed as otherwise they will be leakage point for liquids. So first step will be to use the epoxy resin for the impermeability of the sticks as the epoxy takes time to cure.
Mix a small amount of the epoxy, about total sum of 2 ml (base+hardener) and cover third of the stick from both sides with a small paint brush.
Let the coated sticks dry on a lifted surface so they won't stick to nothing.
Step 3: Let the Printing Begin


Upload the stl file to you printing / slicing software, my suggestion is to use MatterControl as it enable to pause and resume to prints, a main feature in this project.
Locate the print in the center of the printing tray, adjust all other parameter according to your usual setting. I'm using non labelled transparent PLA 1.75 mm filament with nozzle temp. of 200°C and heat bed tep. of 70° C.
Printing time is about 3.5 hours.
Step 4: Pausing and Inserting the Popsicle Stick


30 to 40 minutes into the print, on layer 52 you need to pause the print, best practice is to pause the print at the inner perimeter of the popsicle. Once paused, lift the Z axis by 20 mm, and shift the X and Y axis by 20mm as well. Place a small piece of paper or plastic (business card / credit card) underneath the nozzle so it won't drip on the printed area.
* It is highly recommended to practice a bit with this technique of pausing and resuming with small prints, 10mm test cubes are great practice.
Place the coated (and dried) popsicle stick at the grooves in the print, the coated area is on the outside of the popsicle area yet penetrating it a bit (just need to cross the popsicle perimeter print) . Don't try to force it too hard as you may get the print bed out of calibration. Once placed, try to feel with your finger if the stick is leveled with the print, if not try to push the stick toward the surface of print or just sand it a bit.
After placing, hit the resume button, you may need to hold the stick downward the print until the nozzle gets above it and completes few rounds of printing.
Step 5: Completing the Print


Although it looks like the extruder is running on air, it will eventually complete the print :)
Remove the print gently, as it is a big flat surface attached to bed it might be tricky removing be patient and try releasing from different corner each time.
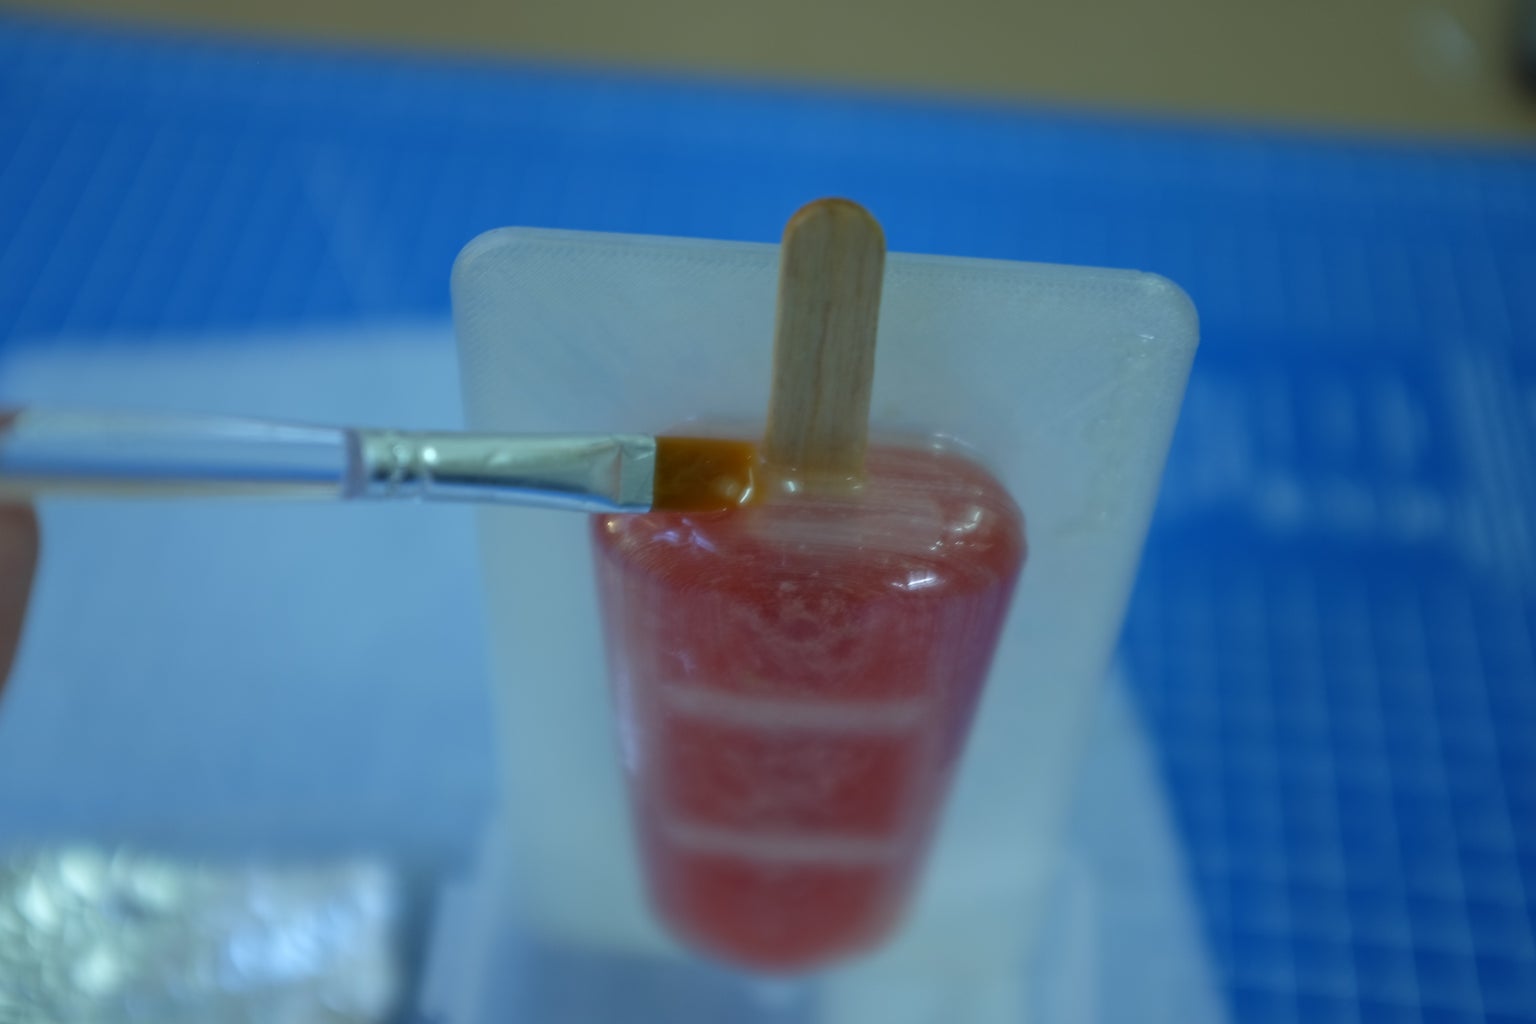
Step 6: Coating the Print


True, 3D printing is impermable, so why coating the print?
The epoxy coating serves us in two way, improving transparency and strengthening the print.
Before applying the resin, insert the syringe needle on the side of the stick, so it will penetrates the print. Also, recommended to apply a drop of oil on the needle before applying the coat, it assisting with the releasing later on.
Step 7: Filling Up the Print


After the coating had dried well, it's time for filling up the postcard.
Fill a glass with syrup water with your favorite flavor , about 100 ml, and fill the syringe with it.
Connect the syringe to the attached needle and inject the syrup water into the popsicle void. Try to fill it as much as possible as the water expand by 10% on freezing and we want the expanded volume to break the mold.
Remove the needle and seal the entry point with another layer of epoxy resin, it might need a double layer coating for prompt seal of the needle hole.
Once the resin dried, check the overall impermeability by pressing a bit the outer shell, if any leakage noticed coat with another layer of epoxy.
Step 8: The Backside of the Postcard


Print the attached PDF file, ensure that at the print setting, the "Page Scaling" tab is set to "None" (that way it will print it in 1:1 scale).
Cut the print by the purple/pink line and fill all the require mailing information.
Glue the printed paper to the printed postcard, best way is using adhesive spray but any other method may work as well.
Step 9: At the Post Office...And at the End of the Journey


When I first came to the post office to mail the postcards, the reaction I got was “no way, it’s not possible to deliver such an item” and “please wrap this up or put it in an envelop” – but from my perspective, that was missing the point entirely.
So I returned after a couple of days to the same place and the same people, but this time I told them that I have already done this in the past and that it was fine, and guess what – it actually worked! Here you can see the post office clerk and her supervisor checking and mailing the postcards and actually quite liking the idea… Also can be seen the Ice-Pop postcard at the happy recipient hand :)
Even If you’re being turned down at the beginning, don’t give up – the end result is worth the try!
Please share with me any pictures of your own trials and postcards.
Yonatan.

Participated in the
Design Now: 3D Design Contest 2016


