

Introduction: How to Make a Custom-faced Carbonite Sculpture Out of Glass


This instructable is an abbreviated version of a previous instructable describing how to make a casted glass sculpture of Han Solo frozen in carbonite. The twist on this will be to replace Han’s face with a model of my own.
https://www.instructables.com/id/How-to-Create-a-ridiculouslyawesome-Casted-Glas/
Step 1: Structure of the Instructable

- Preparation
- Creating the 3D Model
- Making the Mother Mold
- Making the Casting Mold
- Performing the Glass Casting
- Finishing Touches
Step 2: Preparation

- Molten glass and any foreign material in a high temperature kiln can give off toxic fumes. Make sure you properly ventilate your work area when operating the kiln to melt your glass
- The refractory components (structurally sound material at high temperatures) in the gypsum plaster and silica mold are harmful to your health if inhaled. You must use a respirator with sufficient rating to filter out any airborne particles when handling this material
- Broken glass is very sharp and may cut you if not handled properly (duh.) Wear heavy duty gloves and safety glasses when working with glass
- Heat transfers very slowly in a kiln and your cast glass masterpiece. Do not open the kiln and touch your cast object until completely cooled. Failure to do so could not only result in personal injury but also can potentially introduce sufficient stress to the cooling glass to cause cracking or shattering of the piece
Tools and Materials...
...for creating the 3D Model:
A PC (preferably a nice powerful Intel workstation)
SketchBook Express (or comparable photo editing software)
123D Catch
Autodesk 123D
Meshmixer
HD Movie (with the movie prop you want to re-create)
Sand Paper or Diamond Emery Board (not nearly as expensive as it sounds)
Wire Cutters
1.75mm ABS Plastic Filament (or compatible material for 3D printer)
Measuring Cup
Cardboard Box (for pouring the casting mold)
Metal Pan
Gypsum Plaster
Silica Flour (#200)
Water
Heavy Duty Aluminum Foil
Heavy Duty Bag (to break the glass in)
Kiln, Kiln Dams and Kiln Stands
Terra Cotta Pot
Kiln Wash or Kiln Paper
Compatible* Glass (I am using a single empty wine bottle as the casting material)
Diamond Emery Board
*Compatible glass refers to glass with the same or very similar coefficient of expansion and viscosity characteristics. If you use the glass from a single wine bottle, you'll be good to go. Use more than one wine bottle or glass from different sources and you could be setting yourself up for a big failure.
Step 3: Capturing and Preparing the Key Frames

You will first need to take pictures of your own head to build the 3D model. The 123D application uses pictures of an object taken from different angles and processes them to generate a 3D model of the object. You will be feeding your pictures into this tool to generate a 3D model of it.
Once you have captured around a couple dozen different angles of your head save them to the computer that you will use to edit them.
Using your photo editor remove everything from the image that you captured except for the object that you want to convert into a 3D model. Be careful around the edges of the object not to leave too much or take too much away from the object. This will help to eliminate extra geometry from being generated by 123D Catch. Once you have completed doing this for all of the images save them and move on to the next step.
Step 4: Creating the 3D Model

After you have gathered and prepared your key frames you must upload them to the 123D service to transform them into a 3D model. As of the time of this writing there was a tab at the top of the instructables.com page that took you to this service. Otherwise you can simply go to http://123dcatch.com/ and sign up for an account.
Once you are logged in to your account you can launch the web application that runs in your browser. After the application window appears you will see the option to "Create a New Capture" at the top left corner. Click on this item and you will be prompted to sign in to your account. A file-open dialogue box will appear once you have signed in prompting you to select the photos you wish to process. Select all of the photos you have cleaned up in the previous step and click "open" to link to your images to the application. You will now see a button on the upper left corner with a big green check mark. Click this to generate the model.
Step 5: Modifications and Clean Up

The next thing to prepare your model for printing is to create a flat surface that will be the base of the printed object. Meshmixer is a very useful tool for this purpose and a well written and illustrated tutorial is available describing how to clean up the model. Depending on the 3D printer that you use and the shape of your object you may need to create additional support structures.
The last clean-up operation to perform is deleting all of the superfluous geometry created by 123D Catch. Once you've done this you should have a clean model that can be used to print your mother mold. You may need to do some final touch ups on the model geometry if anything came out funky. This can be done either with Meshmixer or 123D. Perform the same clean-up process on the other models.
Step 6:

I've decided to source my 3D model of Han Solo from Thingiverse. User "gianteye" was kind enough to create and share this model that we can use as the carbonite slab portion of the model. You will now need to fuse these two elements together into a single model. First launch the 123D App application and log in to your account (create an account and install the application if you have not already done this.)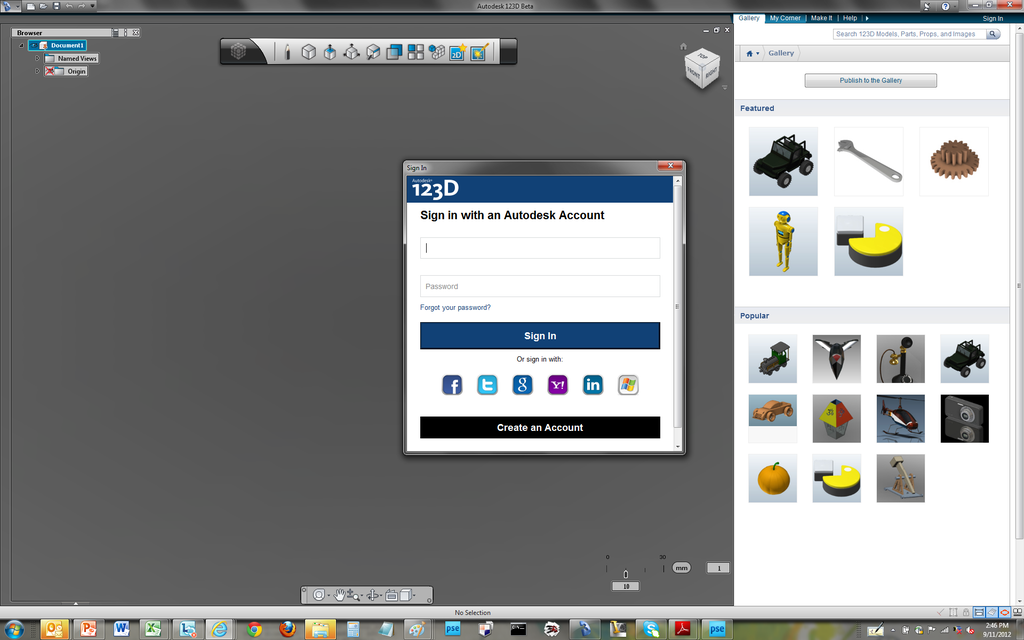
Import the STL model of Han Solo in carbonite that we downloaded previously from Thinigverse.com. 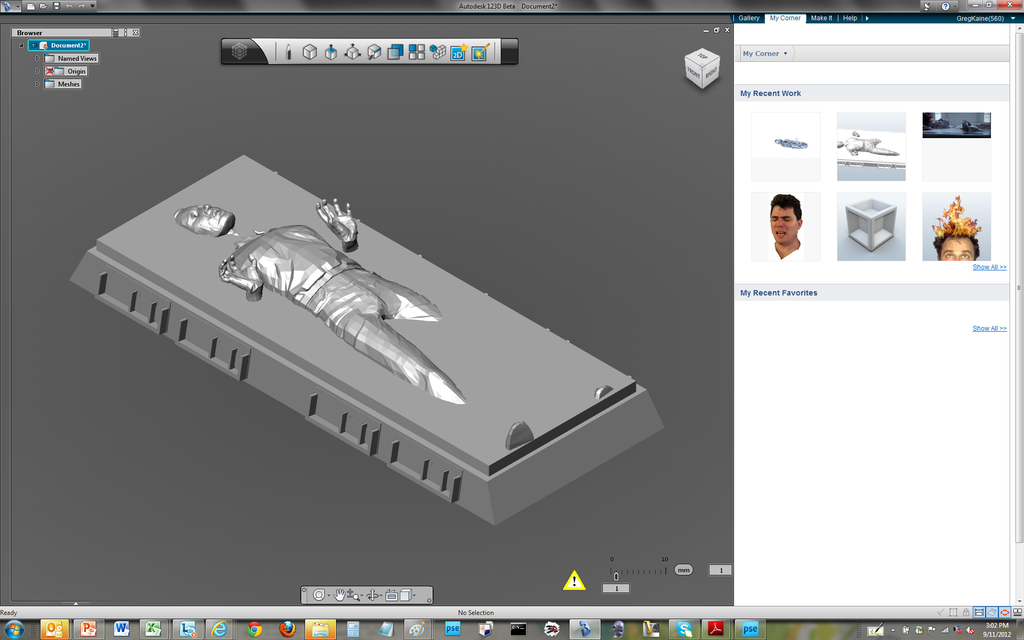
Next click on the "My Corner" tab in the upper left-hand corner of the application and load the model you created to combine with the first one. Do not check the model for water tightness when it prompts for this.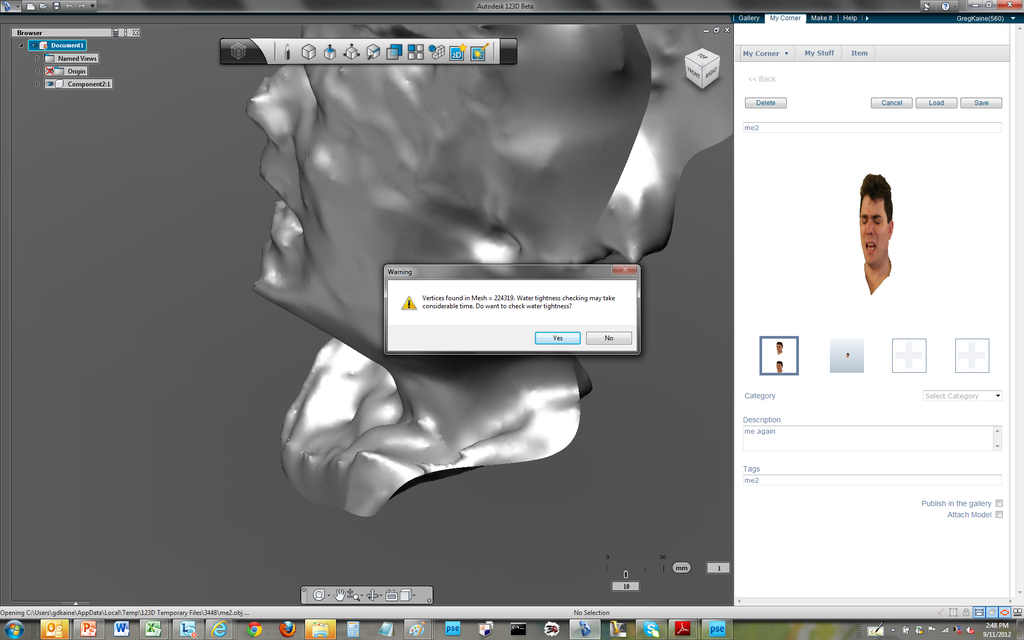
Now you will need to rotate, scale and move your models to align them so that they are overlapping in the way you want the 3D printed mother mold to appear. This is a little tricky and may take some time to complete. Be sure that you are not creating any gaps or discontinuities in the model.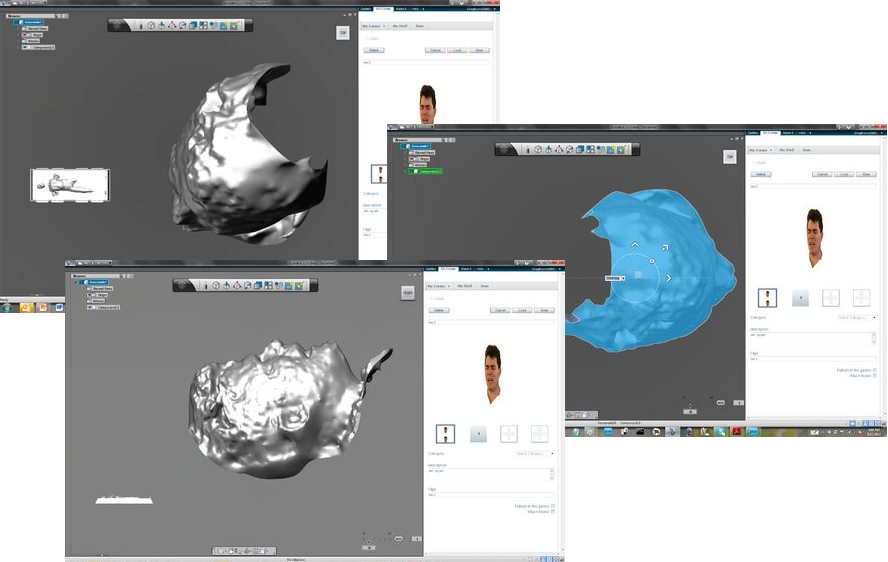
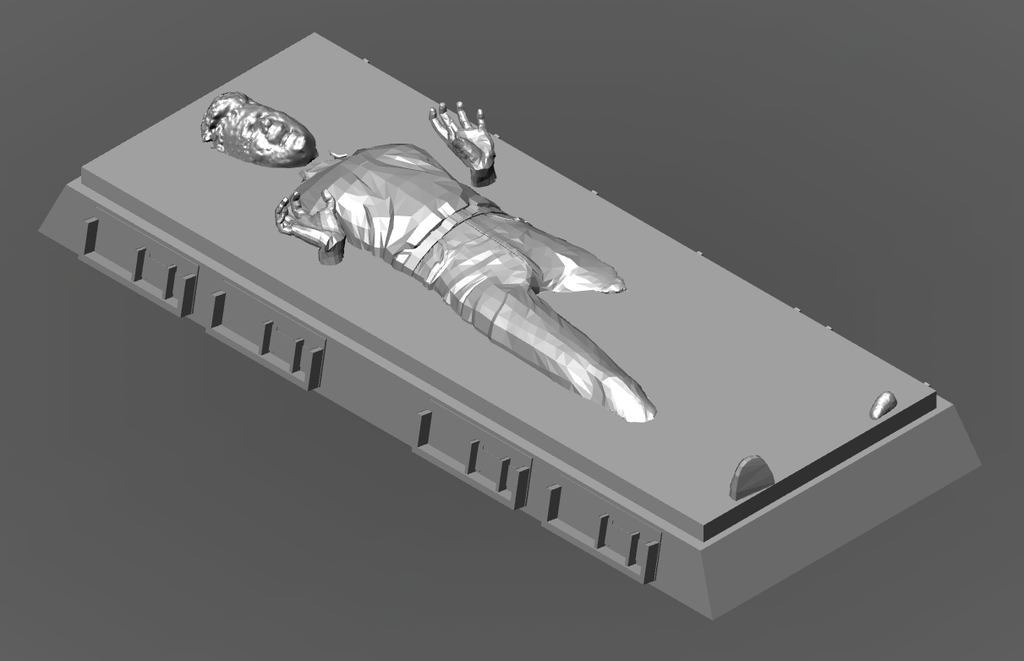
You can see here in the final illustration how I lined up the model of my head to replace that of Han Solo's.
Step 7: Preparing the Mother Mold

Before you send the job to the 3D printer for fabrication you should follow these precautionary suggestions
- Make sure that you have sufficient material on the filament spool before you print your object.
- Turn on the 3D printer and allow it to warm up for a sufficient period of time
- Perform a dry run of the print, if possible, with your 3D printer
Step 8: Printing the 3D Mother Mold

Since my new 3D printer hadn't yet arrived and I needed it to print the mother mold I was in a pinch. There was a convenient option available nearby: I made it at TechShop (www.techshop.ws) in San Jose. They have an UP! as well as a Maker Bot and a friendly fellow maker by the name of John was kind enough to show me the ropes on this machine and donated some of his time to my cause.
If you are using an UP! 3D printer you first need to import the STL model into the UP! software. Your model will look something like this after you import the file.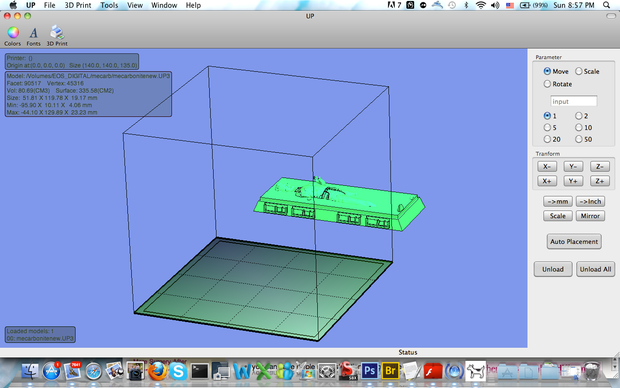
Click on the "Auto Placement" button to place the object in the center of the printing plate.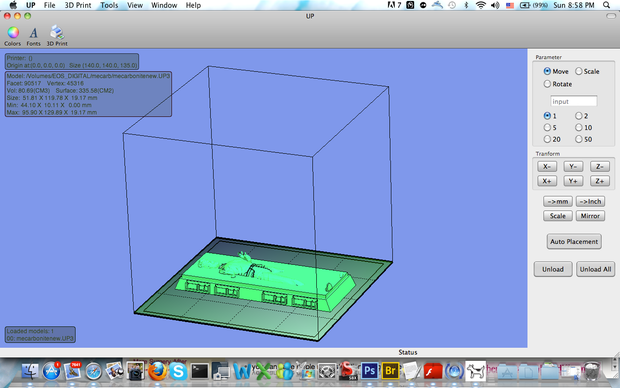
You may need to shrink the model a little to make room for a raft if you choose to construct one for your model.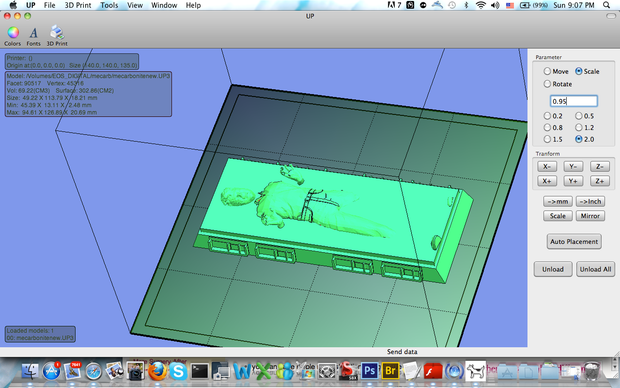
You can see in the following image the additional rafting geometry on the extrusion plate around the model. This additional material will help the model to resist warping and create a platform for the model to be built upon.
Since your project geometry will be different than mine I won't prescribe specific parameters for printing the model. But given the shape and details of my object I chose to fill the model with a more porous internal structure and defined support structures for features that exceeded 40 degrees from the extrusion plate. This will help features like the hands to stay in place while the ABS material hardens.
Once you are all set to kick off the 3D print job you can slam your hand down on that big red button and begin the 3D print process. My model was ~6" x ~1.5" and took around 1.5hours to print out completely.
This is 1.5 hours of print time compressed down to one minute.
While the print job is proceeding you may notice some warping at the edges of your model. There are a number of methods to help mitigate this phenomenon and I suggest you scour the Internets to find a method that works for your hardware and model. The next step describes the actions I took to clean up the printed model.
Step 9:

This stage is straight forward. It is just a matter of removing the support structure and smoothing out the surface of the printed object to remove any undesired texture resulting from the extrusion process.
- Use a pair of wire cutters to trim off the rafting material around the base of the 3D printed model
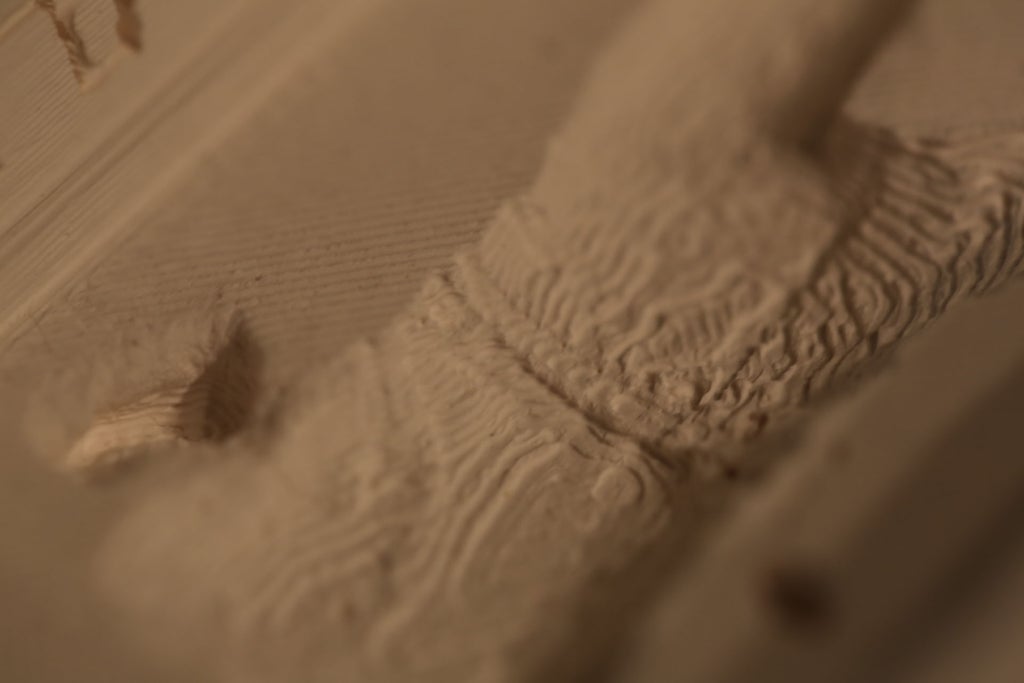
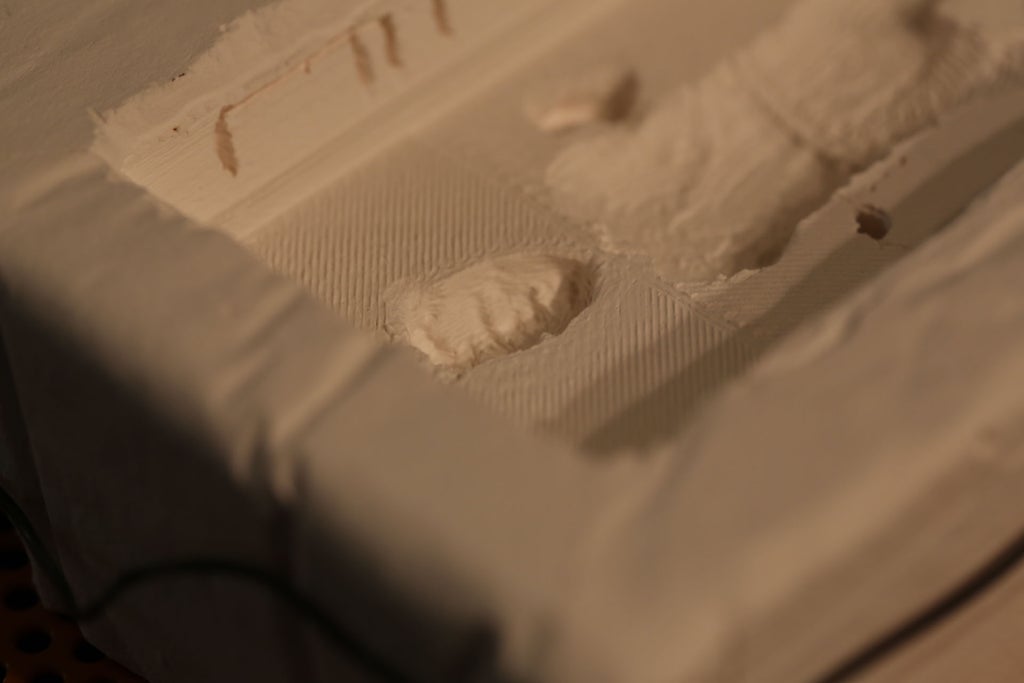
- Use fine sandpaper (200 grit or finer) and lightly sand the regions of the mother mold where you want to smooth out the surface texture
- For geometrically complex regions (face, hands, Ionian pillar capitals, etc...) you should use a small diamond emery board to work around these features
- Apply light, not heavy pressure to remove just a little of the surface at a time
- To correct for warped geometry I sanded down the warped regions until I was satisfied
- Keep a damp cloth handy to wipe off the resulting dust as you go. Try to keep the model clean as you proceed
-
When you have completed smoothing the surface of the mother mold to your satisfaction you should scrub it lightly with soft bristle brush. This will help to remove any excess ABS dust and keep it from mixing with the plaster solution
Step 10: Making the Plaster Casting Mold

-
Make sure you have all of your material and equipment ready and near by
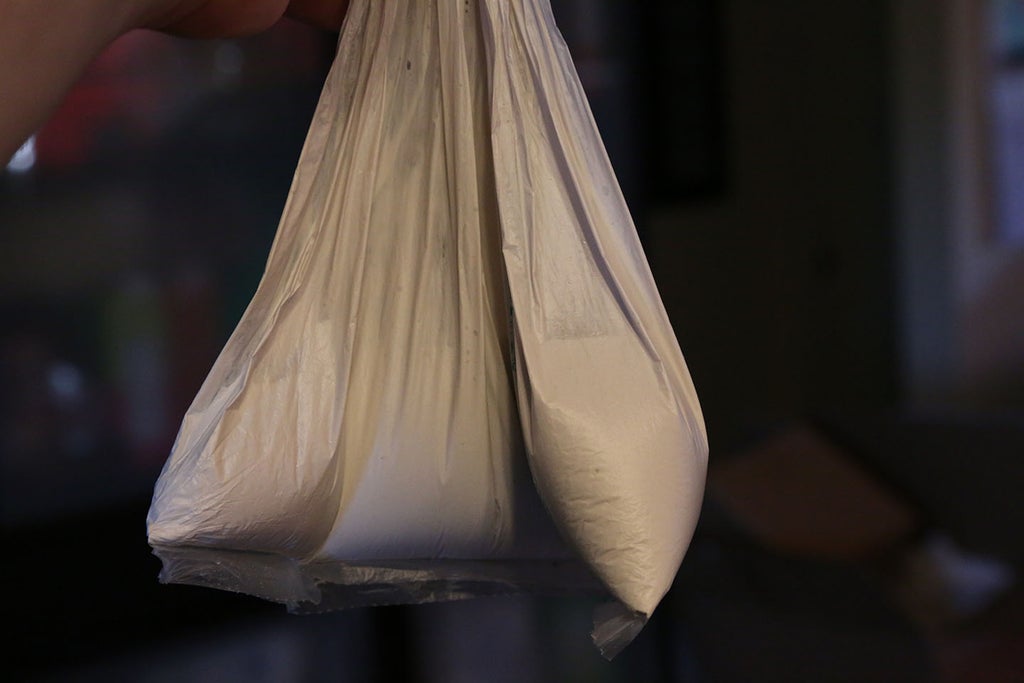
- Plastic bag (without any holes) at least twice the volume of your plaster mixture. (I used a thin bag used in grocery stores for holding fresh produce.)
- Measuring cup for measuring out the dry and wet ingredients
- Cardboard box for receiving the wet plaster and mother mold
- The mother mold
- A timer or clock within view to keep track of time while the plaster mixture is slacking (or proceeding with its chemical reaction.)
- Setup your tools and materials in a place you don't mind getting dirty or messy. I like to lay down a tarp or old newspaper to make clean up easier
- Silicosis is a terrible lung disease related to the inhalation of microscopic crystalline silica dust. Have and equip your respirator before you begin mixing the dry ingredients. Don't take any chances by skipping this important safety precaution.
While you are waiting on the slacking plaster mix you should prepare the cardboard box that will receive your mold. If you plan to throw away the box you can skip this step. However if you want to reuse the cardboard container for a future mold you should line the box with a semi-durable paper or other thin material. I cut up some strips of packing paper that worked great to preserve the box.
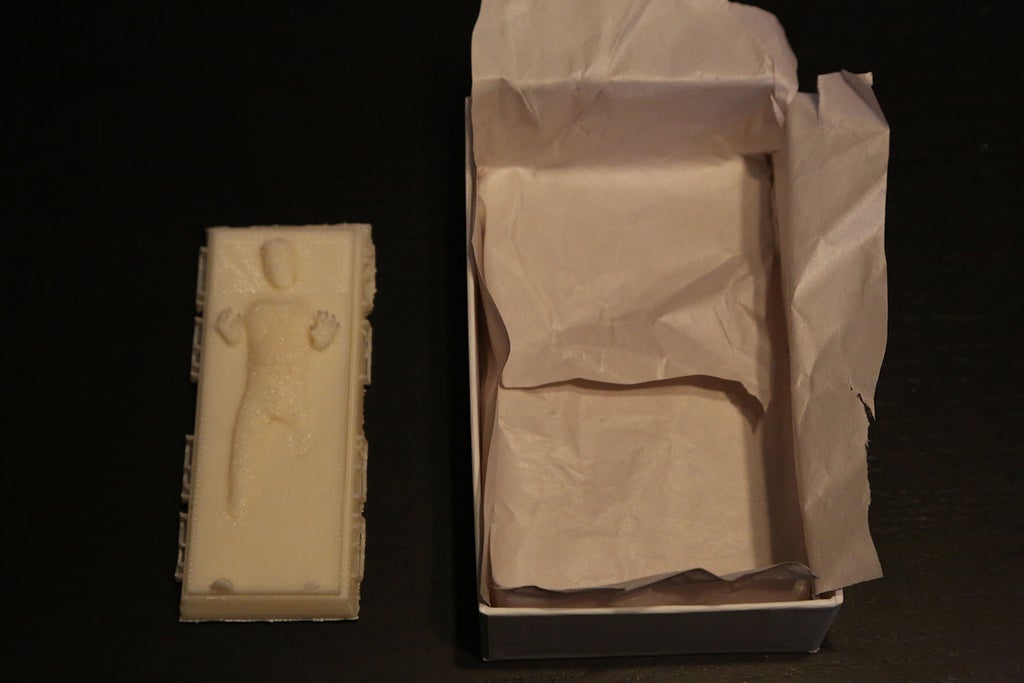
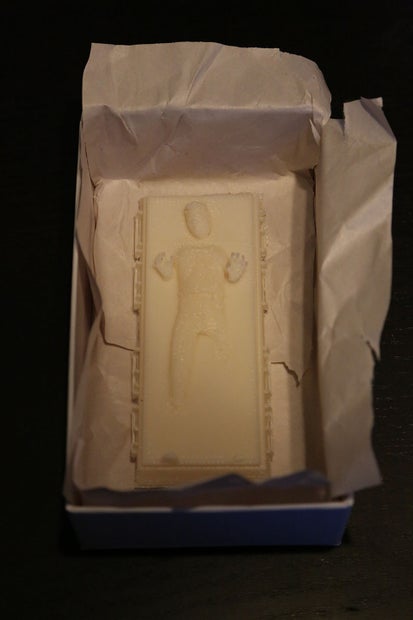
Next you should place your mother mold top-side-down into the box. Make sure you have at least an inch of space around the mother mold along the perimeter.
Once the plaster mix has slacked you can cut off the tip of the bag and slowly pour the plaster mix around the edges of your mother mold. Do not pour the mixture directly on to your mold. This process makes it much easier to control the flow and will minimize the production of bubbles in the plaster mold. Gently tap the sides of the box to work up any big air bubbles.
Step 11: Curing the Plaster Casting Mold

Now comes the fun part. You will have to wait a number of days to allow the plaster casting mold to cure, or dry and strengthen. If you not do allow the mold to fully dry it may break during the casting process spilling molten glass onto the floor of your kiln. This is not a good thing.
Approximately one hour after pouring the plaster mixture it should be solid and a little warm. Carefully remove the plaster mold from the card board box. Peel it from the mold. Don't worry if there are pieces stuck to the plaster--they will burn off in the kiln later. Now place the mold in a dry area with circulating air. You should leave it there for at least a day before moving on. The larger your mold, the longer you will need to wait. Given the size of my mother mold I waited a day before moving forward.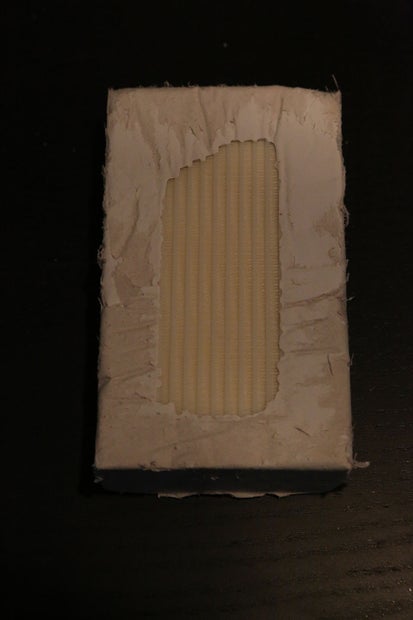
Here we have the air-dried plaster mold with the ABS mother mold firmly held in place.
After letting the plaster mold air-dry, you need to carefully remove the mother mold from the plaster mold. To do this you will first need to carve away any extra plaster and then warm up the ABS material to make it pliable. Using a sharp tool carefully cut away at the plaster around the edges of your mold. Here is what mine looked like after this process.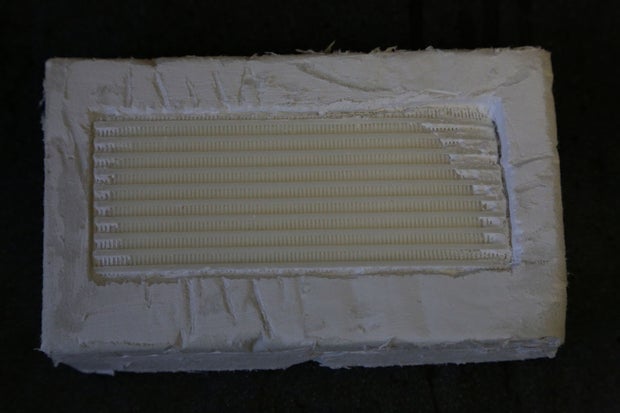
Now place the mold face up over a pan lined with heavy duty foil. Place the pan in the oven and set the temperature to 225 degrees. Allow the mold to soak at this temperature and then repeat this at 325 degrees. The soak time will depend on the size of your model. As for mine, I soaked for 30 minutes at each temperature. At this temperature the ABS model should be very soft. If it is not, increase the temperature slightly but do not exceed 350 degrees.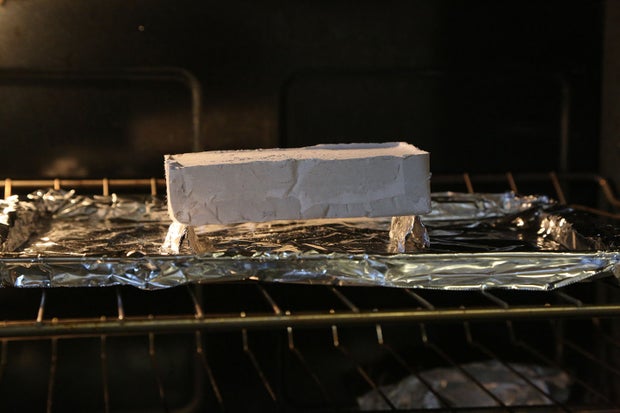
Make sure you use a hot glove to handle the mold as it will be hot. Then, using a pair of tweezers you can begin extracting the mother mold from the plaster mold. If your mother mold breaks apart, don't worry about it. You can always repair it or print another one. If you need to, use tweezers to remove fine pieces that are otherwise stuck. If you are unable to remove some of the pieces, don't worry, the next step will take care of this. When you have removed the mother mold turn off the oven and allow the part to slowly cool to room temperature inside the oven. After it has cooled remove it and proceed.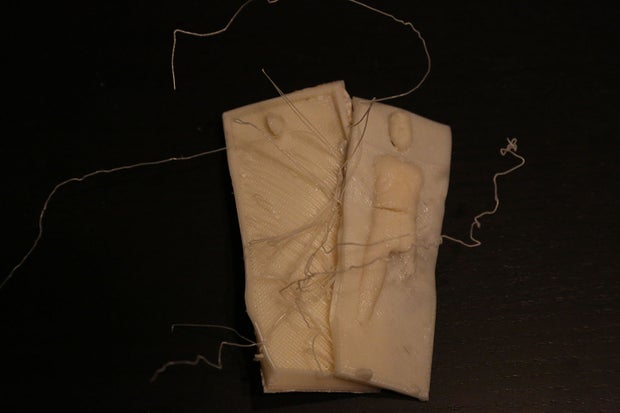
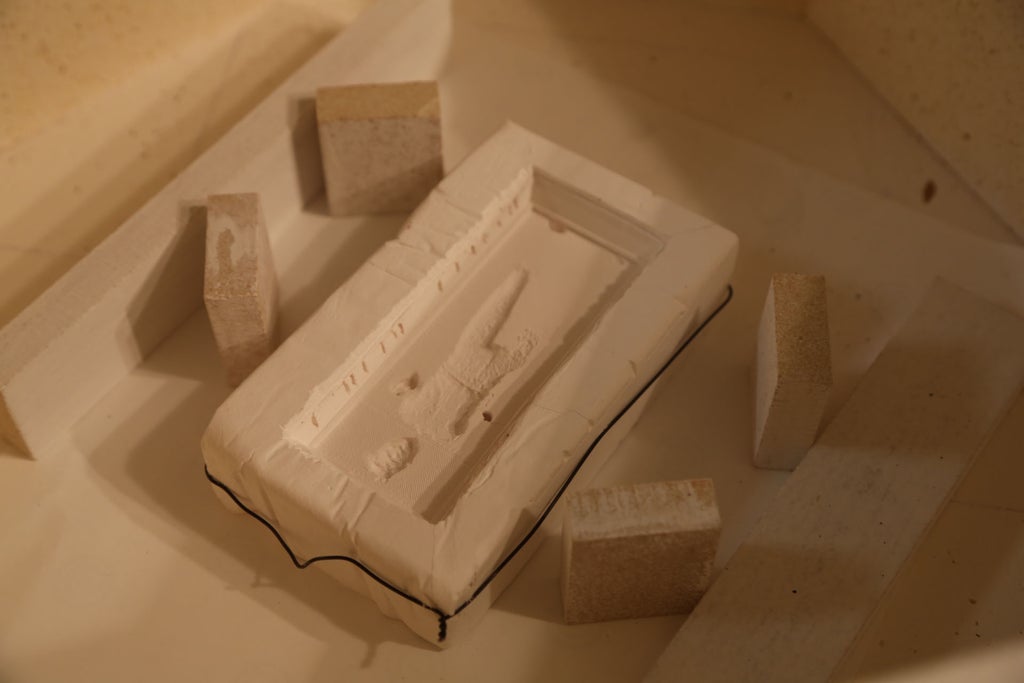
Here we have the extracted mother mold and the final plaster mold. I was very impressed with the level of detail that the plaster retained.
The final step here is to slowly heat the plaster mold up to 1200 in your kiln. You should heat the kiln at a rate of about 300 degrees per hour. Then allow the mold to soak at 1200 degrees for around 30 minutes. You can then bring the temperature down to 950 degrees at a rate of 300 degrees per hour. Finally turn off your kiln and allow the mold to slowly cool to room temperature. Any remaining bits of ABS will burn off in this process, but it is ESSENTIAL to have STRONG, EFFECTIVE VENTILATION to remove the TOXIC FUMES generated by this action. Do not leave any significant amounts of ABS in your plaster mold in order to minimize the volume of toxic fumes that will be produced.
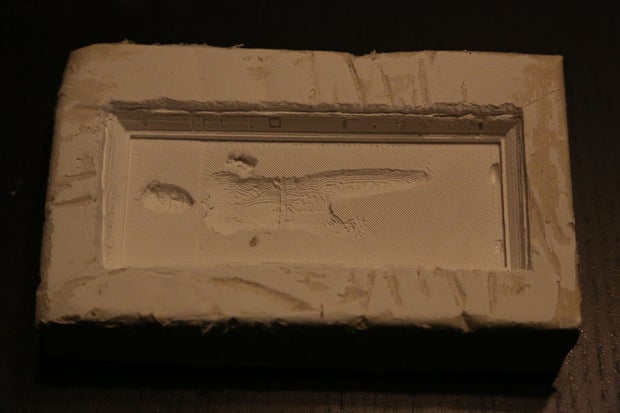
You will now have a finished plaster mold that is ready to receive the molten glass material! It is normal for cracks to appear in the plaster mold. Don't worry about these cracks unless you find that the mold is breaking into separate pieces. My piece came out of this process with a complete crack at the feet side of the mold. Just to be safe I surrounded the plaster mold with steel wire to hold the mold in position.
Step 12: Breaking the Bottle


- A hammer
- An empty wine bottle (dark colored glass preferred)
- A heavy duty bag to contain the bottle and broken glass
- SAFETY GLASSES
- HEAVY DUTY GLOVES
- A terracotta pot to hold the broken glass
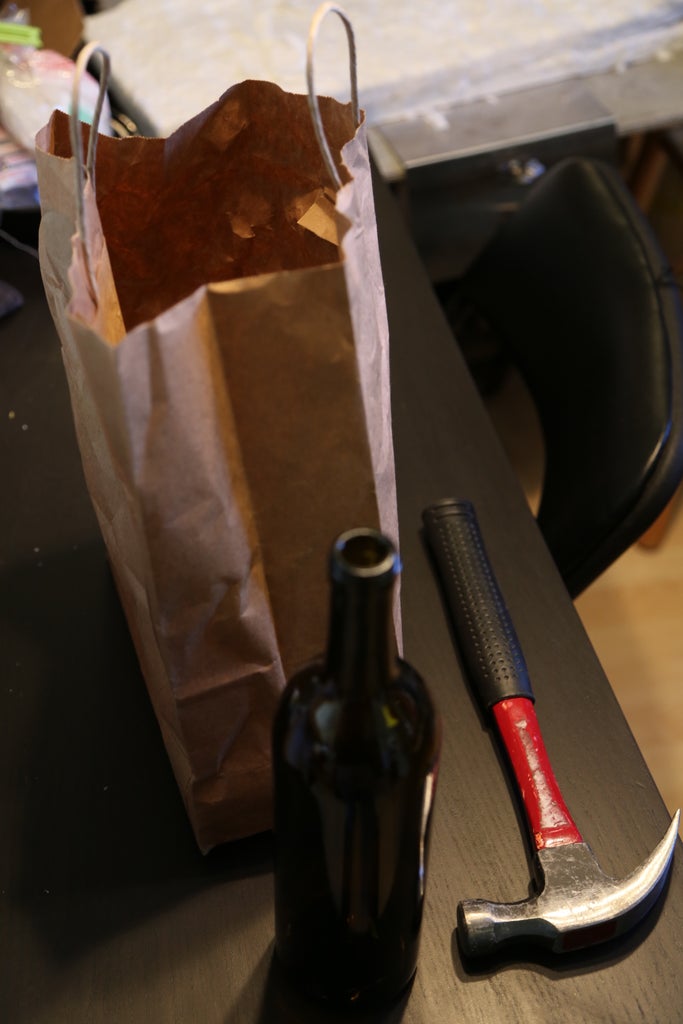
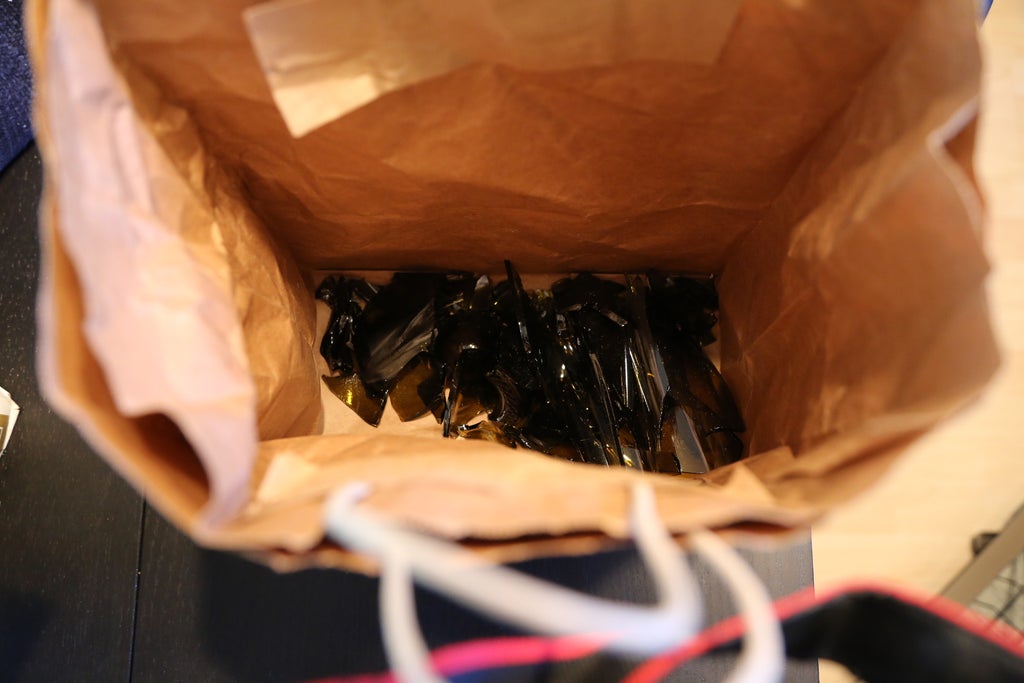
You will want to break the glass into pieces that are small enough to fit into the terracotta pot you will use for the kiln melt. Don't make them so small that they all fall out of the hole before they melt.
Step 13: Performing the Glass Casting

First make sure the kiln shelf has been properly prepared with kiln wash or other material to prevent the molten glass from sticking to the surface. I used kiln paper for this.
Next you must place a couple dam walls around the plaster mold. This is to contain any molten glass that may over flow the mold.
Place the plaster mold that will receive the molten glass in the center of the dam you formed.
Now place two more dam walls as support for the terracotta pot across the length of the dam you just built.
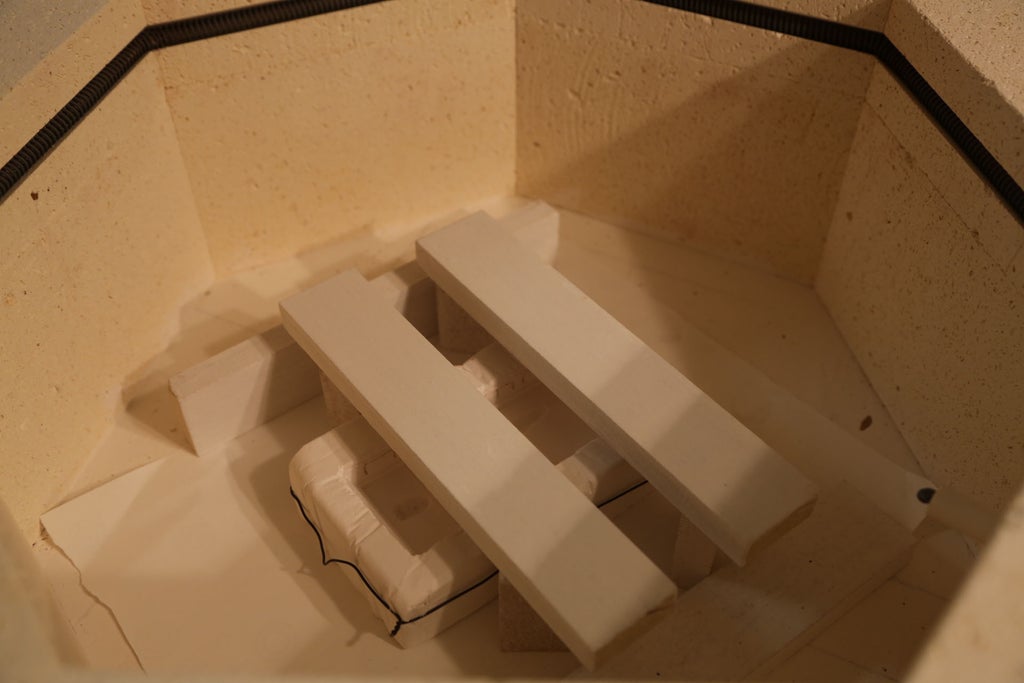
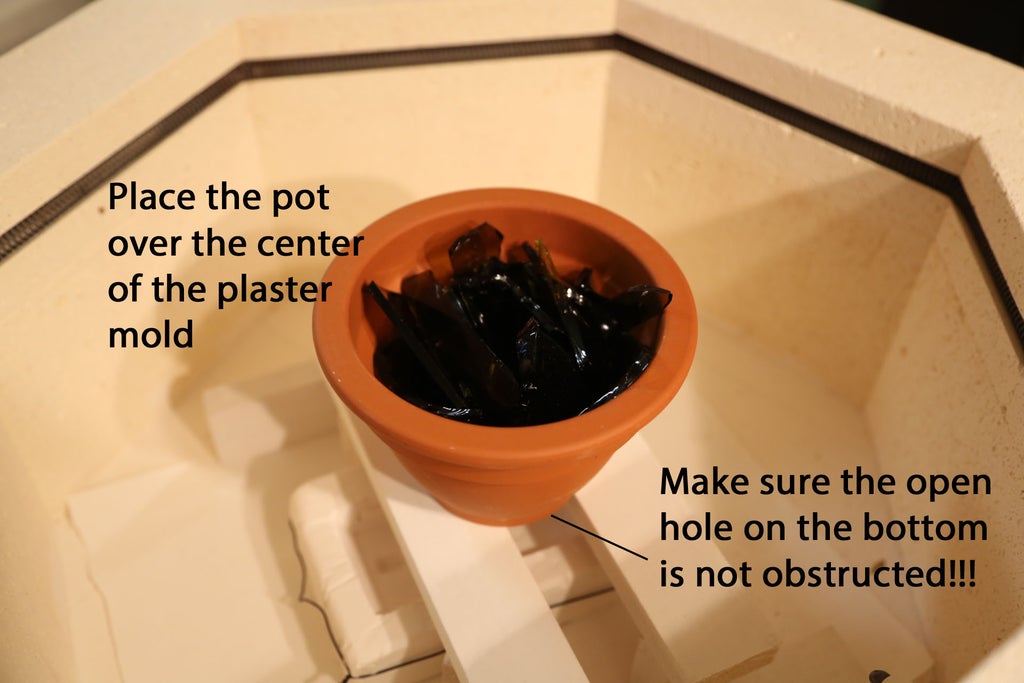
Place the terracotta pot upon the two supporting dams without obstructing the drainage hole in the bottom of the pot. The hole should align with the cavity of your plaster mold. Make any necessary adjustments to stabilize the structures and to align the pot and mold.
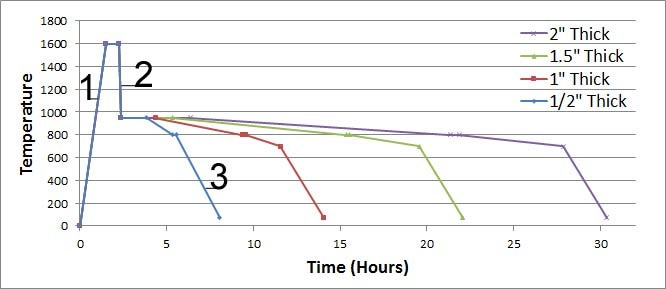
The following chart describes the firing schedules for the glass casting and was derived from the System96 website describing the annealing time necessary for S96 glass. Glass from wine bottles may be similar and therefor this chart makes a sufficient approximation of the required firing schedule. Depending on the thickness of your casted model you will need to follow a specific schedule. I chose to follow a firing schedule for the 0.5" thickness. These schedules may be overly conservative but I'm more confident about producing successful results with a slower process.
Some important notes for the chart include:
- The first labeled segment is full-heat (as fast as possible) to 1600
- The second labeled segment is full-heat (as fast as possible) to 960
- The third labeled segment is turning off the kiln and allowing the object to naturally cool to room temperature (assuming you have a firebrick kiln, not fiber.)
I have also included the following tables to help program a digital kiln controller if you are lucky enough to have one.
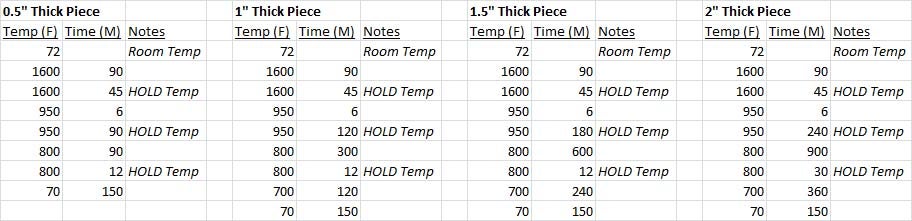
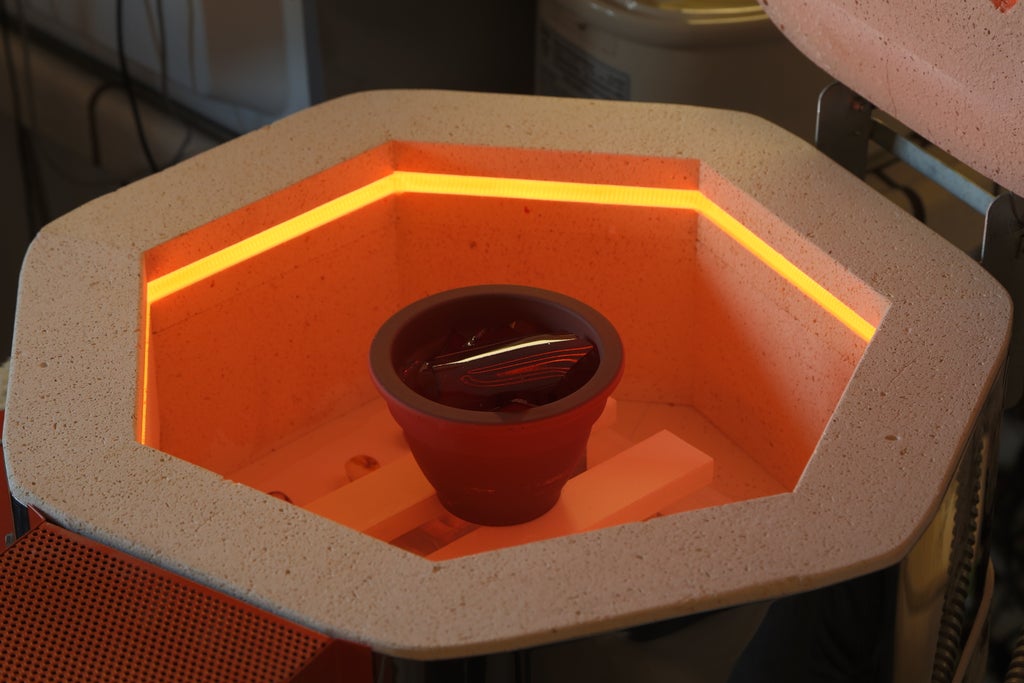
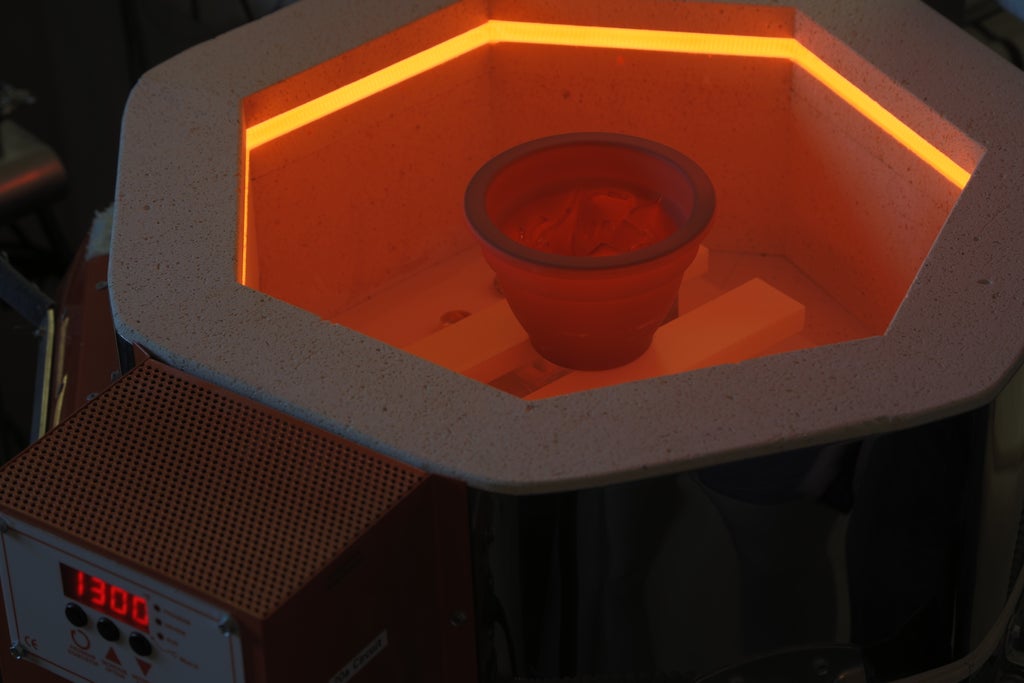
At its hottest temperature the glass will be molten and glowing (just like the title says.) You can peak into your kiln to take a look but only if you have good ventilation and have adorned adequate protective gear. This includes safety glass, and temperature resistant gloves specifically designed for working with hot glass.

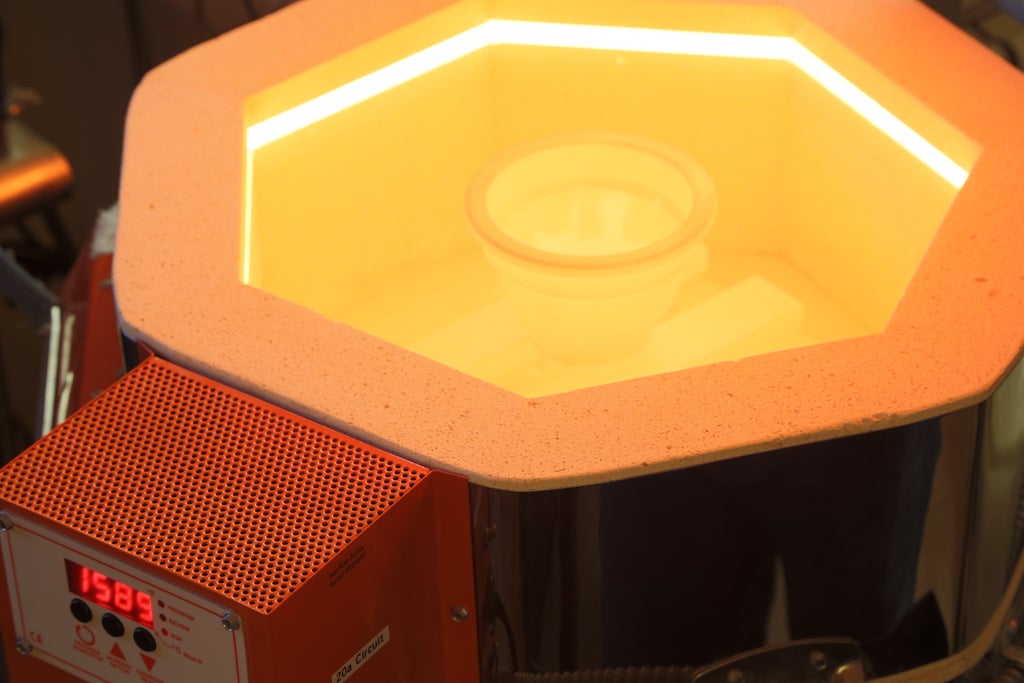
If there is not enough glass accumulated in the mold by the end of the 1600 degree hold cycle you will need to increase the time spent at this temperature. There will always be some glass remaining in the bottom of the pot so don't try to empty it all out.
Once you have programed your kiln (assuming you have a digital kiln controller) kick off the heating cycle and move on to the next step....
Step 14: Slowly Cooling the Casted Object

This is probably the most difficult part of the process. It is not so much a technical challenge (although this step is technical in nature) but more of a test of your patience. It may feel like forever before you bring the temperature down to where you can remove the piece from the kiln. Properly heating and cooling a casted glass object is essential to its stability. If not done properly the internal stresses of the glass will be locked in place as it cools making it very likely to fracture or explode.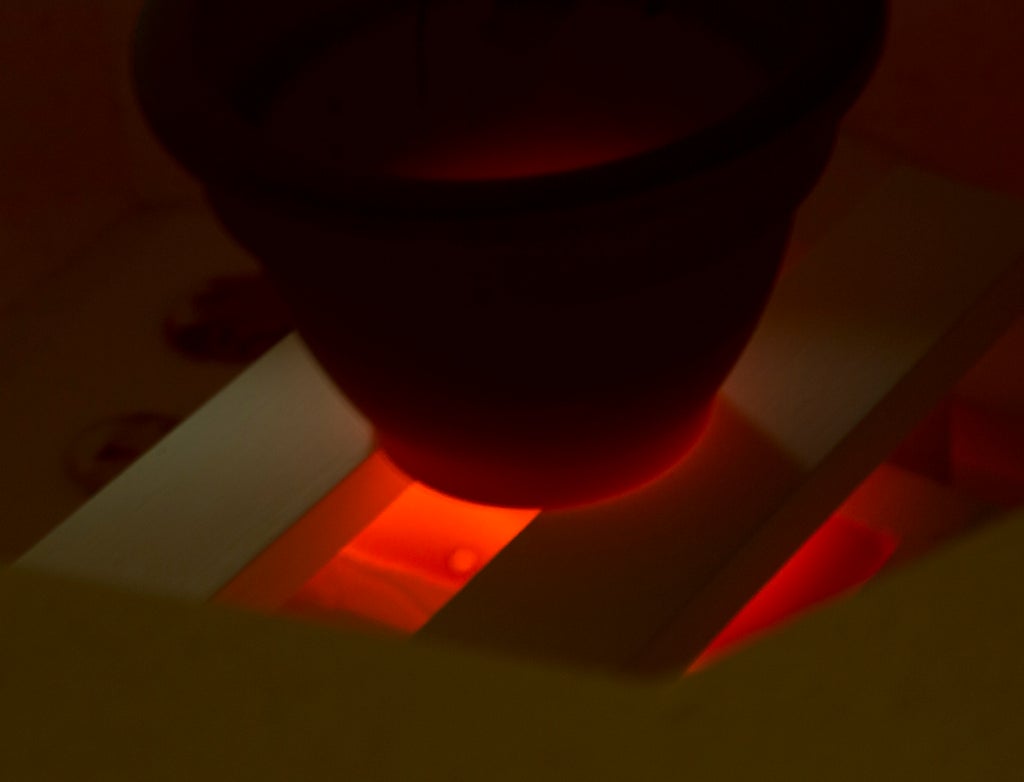
This is the molten glass after it had melted into the plaster casting mold. The photo was taken at around 1000 degrees (approaching the annealing temperature)
The process to properly cool a warm glass object is called annealing. It is a process by which you maintain a constant temperature of the glass object at a point where it is still soft enough to "adjust" the molecular alignment of the silica atoms into a state that minimizes internal stress. Once you drop below the annealing temperature the alignment of molecules becomes rigid and any stresses are locked in to the amorphous solid. Being an amorphous solid, glass does not have a clear state transition between solid and liquid states but rather changes in viscosity across temperatures. It is not a liquid in solid state as it is commonly thought of, and no, stained glass windows from ancient cathedrals are not flowing down from the force of gravity. The thickening of the glass that is observed is a result of the manufacturing process of glass from that era and an understanding that thicker glass on the bottom was more stable than thicker glass on the top.
Step 15: Removing the Completed Casted Glass Object
Now we get to take a look at the surprise waiting for us inside. When the kiln and glass have COMPLETELY cooled you can open it up to begin the extraction process. This is how my setup looked after the big melt.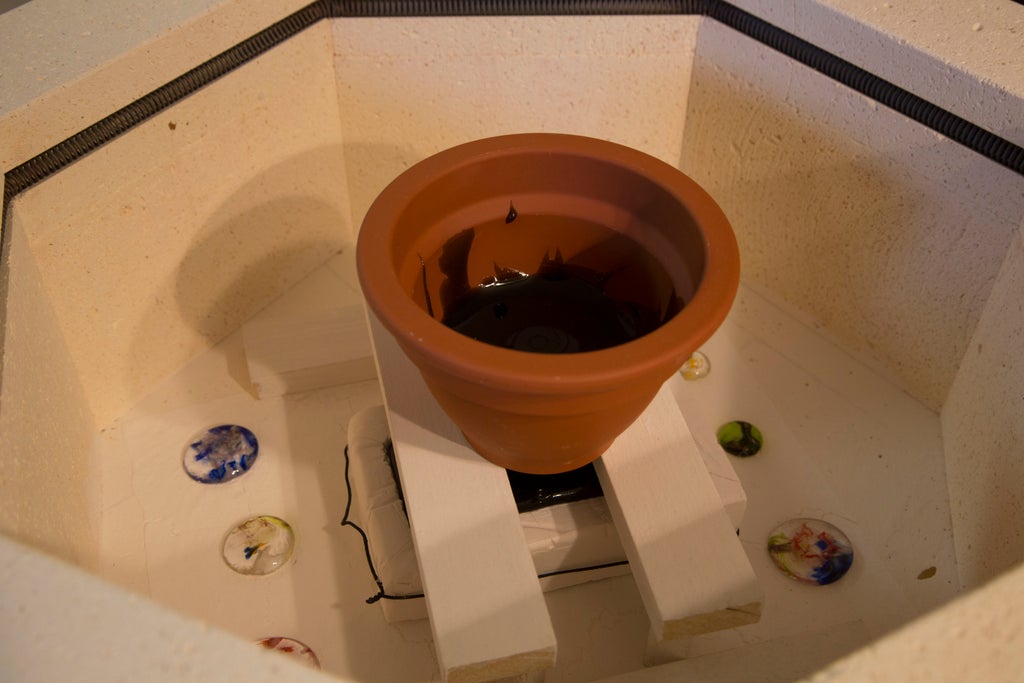
Carefully remove the glass object from your plaster mold. I recommend doing this over a plastic bag to contain the debris. Don't worry about salvaging the mold; rather focus on keeping your casted object in one piece. If the casted object does not easily release you must begin breaking apart the plaster mold into small pieces. I found it very easy to break apart the mold. 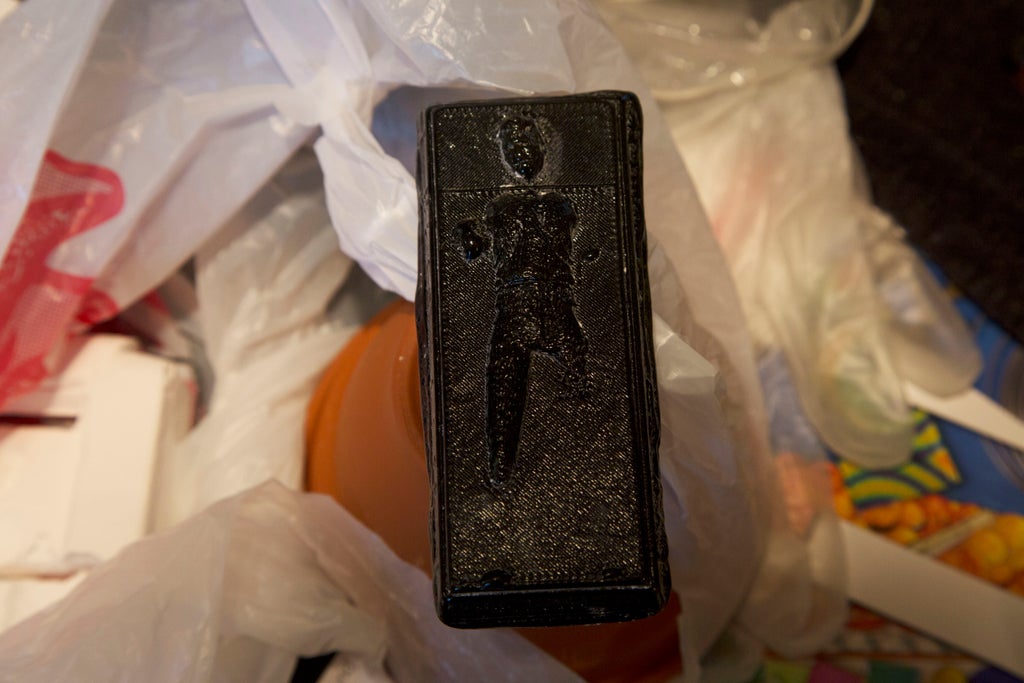
If you had a surplus of glass like me you will have a column of glass attaching your casted object to the terracotta crucible. I used my diamond emery board to saw through this column to detach the piece. You should do this under running water to flush down the tiny glass pieces into the drain. 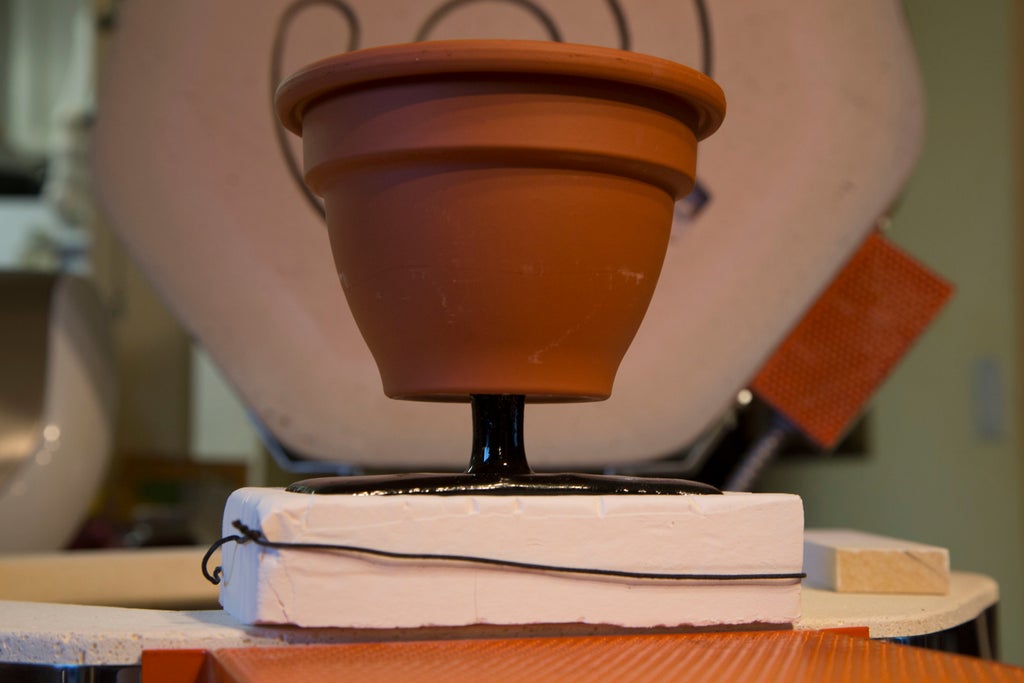
There may be some additional pieces of glass attached to the object if your casting mold was not free of air pockets. If this is the case you can use the diamond emery board (again under running water) to smooth out these parts.
Finally, using a soft bristle brush, soap and water clean up the remaining plaster around the detailed pieces of your object.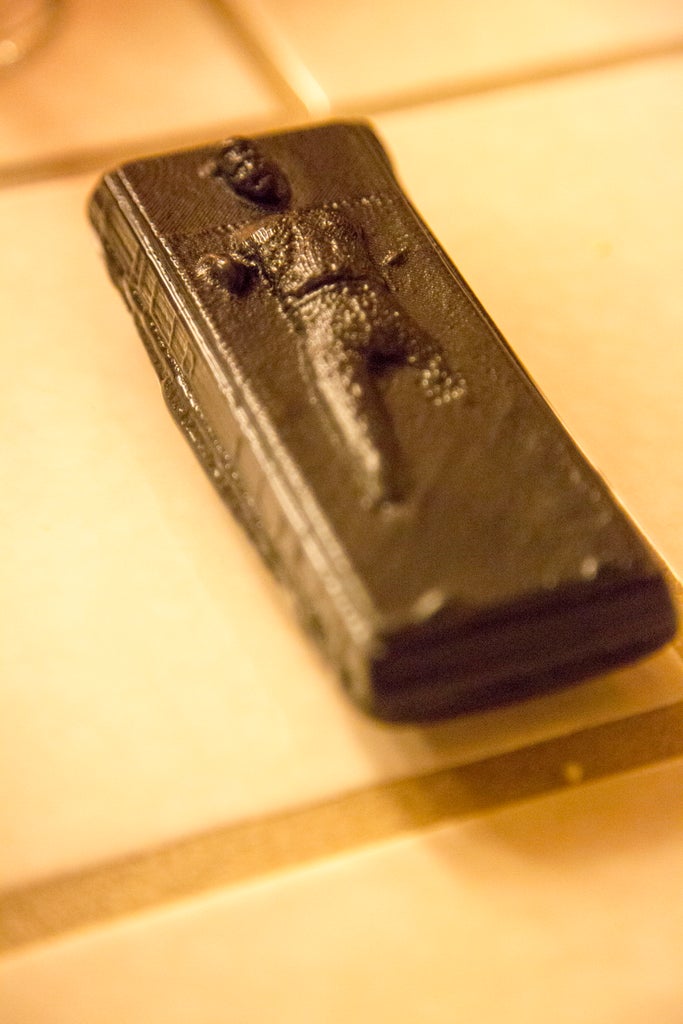
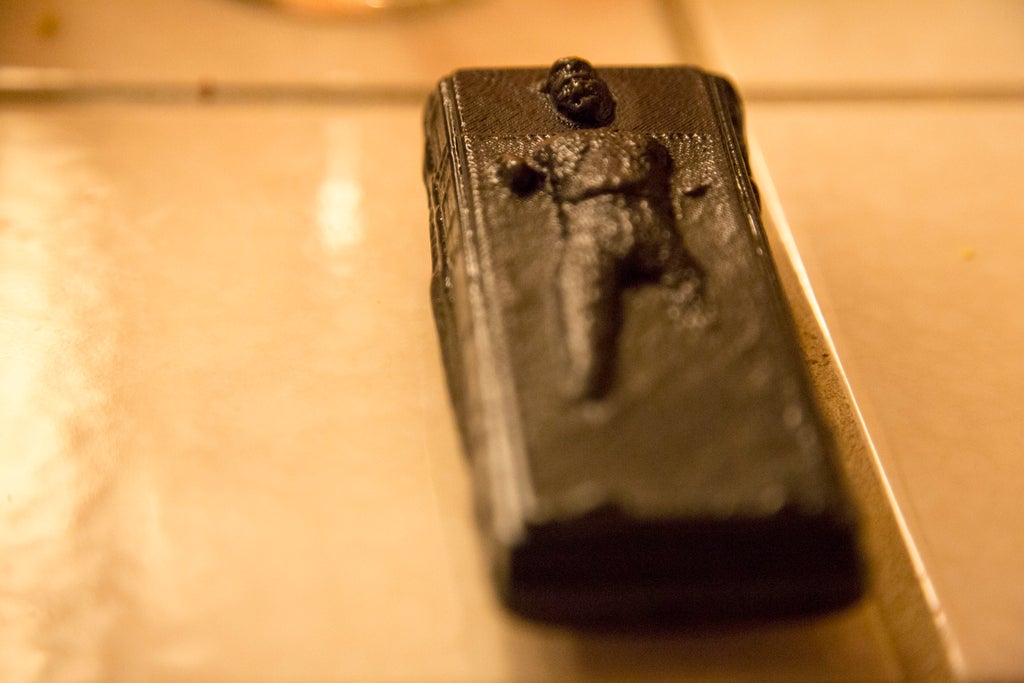
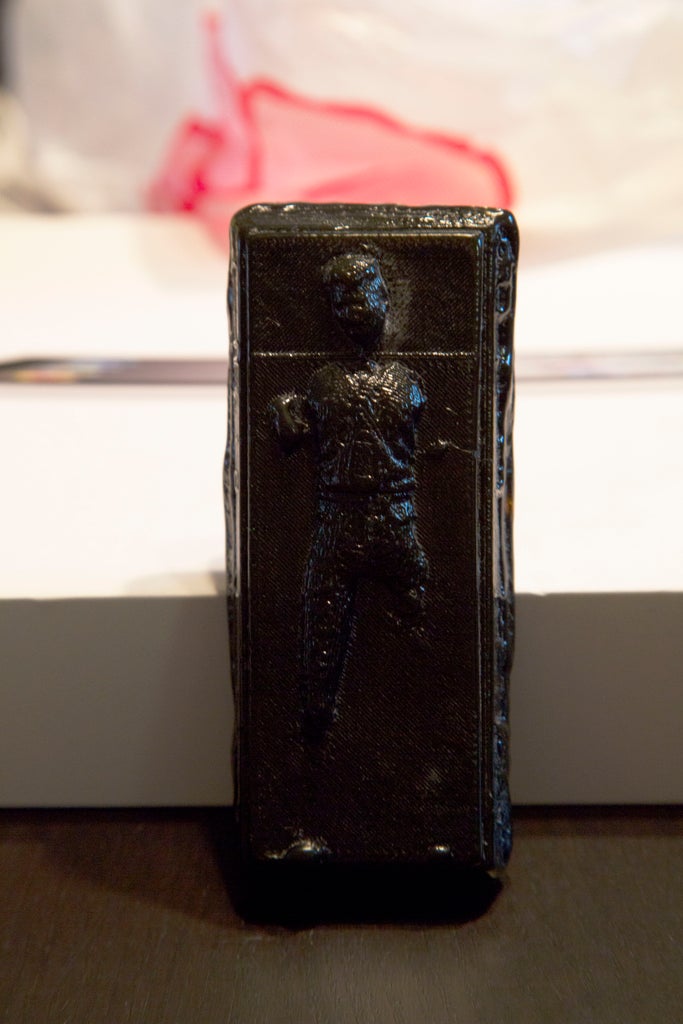
Congratulations! You should now have a completed glass casting of yourself in carbonite!

Participated in the
Halloween Props Contest


