

Introduction: How to Make a Statue (Angel of Nike)


For a production of Boeing Boeing at my college I was tasked with designing and building three statues. Here follows is the process I used to produce the statues using Trimble Sketchup and 123D make.
The same method can be used to make just about anything with a little bit of tweaking.
Thank you for reading and I hope you enjoy, any questions are welcome.
Step 1: Step 1: Design


There are several options in the design phase, to download a model, alter a model or design your own.
I chose to design my own statue using Trimble Sketchup however any program which exports an STL file can be used.
Trimble Sketchup can be downloaded here
To give Sketchup the ability to export STL files I use the plugin SKP to DXF or STL from here or a different one here
Copy the skp_to_dxf.rb file into Program Files/Google/Google Sketchup 8/Plugins file on a windows computer
If you are on a mac there are many online tutorials which tell how to install plugins in Sketchup
The statue design is based on the Greek Statue of Nike
The design must be a single group in Sketchup, then under the plugins tab at the top select the export STL option and set units to inches. Save the file somewhere it can be easily found
My angel of Nike design can be found here
Step 2: Step 2: Slice Model: Intro


The trick to fabricating the statue is the 123D Make program which can be found here
In the next steps I shall detail the exact process of using this program to make a statue cut pattern.
Step 3: Step 2: Slice Model: 1

On the left hand of the screen is a tool bar. Click the browse community button to download a model created by someone on 123d Make or push the import button to load a model of your own. Attached are two .STL files from my angel statue design to test the program immediately.
Step 4: Step 2: Slice Model: 2

When the STL file imports it will look similar to what is shown below.
If the model needs rotated slightly there is a button in the program to do that though the rotation moves in increments of 90 degrees so fine tuning should be done in the design program.
The next step is to choose the technique to cut the model out. For my statue I choose stacked slices as it gave the effect I wanted and maintained a lot of detail however you should experiment with the other modes for a different effect. More information can be found on the 123D make website.
Step 5: Step 2: Slice Model: 3

The picture above is the result of the stacked slices technique for construction.
The next step is to choose material. There is a drop down menu under the manufacturing settings tab on the left side of the screen however your material will not necessarily appear. You can create a custom material by using the input panel along the bottom of the screen. Be sure to set the page size to the size of paper you plan to print the model out on.
Step 6: Step 2: Slice Model: 4

Under the manufacturing settings tab is the object size input panel. Most likely your model will not be correctly sized as this panel appears to set itself automatically. Since the numbers are scaled to each other I set the height only, measuring it from my 3d design in Sketchup.
Step 7: Step 2: Slice Model: 5

If the model is sliced in the correct direction for your model you can skip this step. My model needed to be sliced at a different angel so I had to use the slice direction setting. After pushing the button a sphere appears surrounding the model. Drag the blue cone around the model until you find the correct slicing direction.
Step 8: Step 2: Slice Model: 6


To make sure your model does not have any serious issues as well as to view the steps in assembling it use the assembly steps setting. Across the bottom are a few input panels. The left most is the material selection. I find plywood works best for visualizing what the model looks like as it is the only one of the three which is solid. The slider across the bottom and the arrow keys move between steps in the assembly. The second image shows the model with several pieces removed.
When you think the model is ready to export use the get plans button. This brings up a screen like the third picture above. Select PDF in the file type selection box to print the file from your computer, ESP requires another program to open it. Press export and save the PDF somewhere where you can find it.
Print the PDF
The pieces are individually numbered and if they look like puzzle pieces they fit together by matching the numbers on the tabs.
Cut them out in preparation for the next step. If you leave a bit of paper outside the outline it is easier to glue them down.
Step 9: Step 3: Cut Out the Parts

Glue the pieces of paper down to your raw material (I used plywood and wood glue brushed on the wood before putting the papers on)
Cut along the lines of the model with whichever tool you like. For cardboard a razor works well, for plywood a band saw, scroll saw or jig saw works well. Each piece gets cut out individually and it takes quite a bit of time.
Sand the edges of the pieces to remove any rough spots.
Step 10: Step 4: Assemble the Sculpture


There are small square markings on the paper cutouts. If you drill through them they line up between the layers. Put a screw through the hole on the upper piece so that it barely exits the other side of the piece. Use this screw to line up the layers by finding the marking on the other piece with which it lines up. When the pieces are aligned clamp them together and screw them together.
Step 11: Step 5: Spackle and Sand

Sand any rough spots on the model then fill any holes, screw heads, or extremely rough areas with joint compound. Allow the model to dry then sand it as smooth as possible. If you like you can run joint compound over the entire model and sand to create a much smoother finish.
Step 12: Step 6: Paint!


Paint the model with 1-2 coats of primer then apply one to two coats of the final paint color. Allow it to dry and touch up any spots you may have missed. Finding the little spots works best under harsh light such as a direct work light.
Step 13: Step 7: Admire


With the model finished sit back and admire your work. My statue took me about 10 hours to complete after 14 hours of design work.
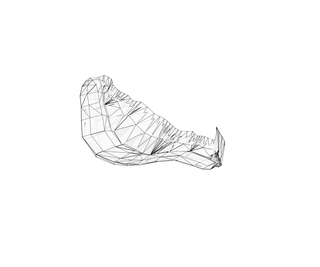
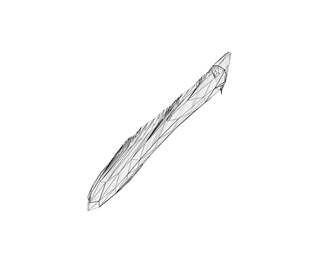
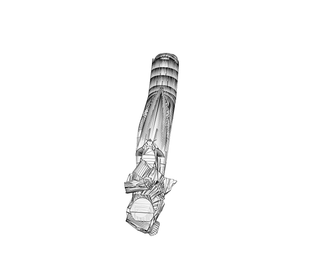
There are many possibilities for statue designs such as the ones shown above. The last one is a project I am currently working on to demonstrate my method of creating organic shapes in Sketchup.
Thank you for reading!
Attachments


Participated in the
Instructables Design Competition


