

Introduction: How to Make an Exploding Box Using Cricut Explore Air 2 - DIY Kit + Tutorial ( Explosion Box Card for Beginners )


DIY Crafts - ( Explosion Box Card for Beginners ) Anniversary / Birthday / Valentines / Wedding - Gift Box Idea
Learn how to make an Exploding Box using a Cricut machine - Step by step Tutorial
This machine is awesome :) It makes my work much easier ! Instead of spending hours on measuring and manual cutting , now I just create the designs once and I have them all my life + the machine is cutting a lot more faster and more precise than me!
Or do this cute Exploding Box using my kit on Etsy !
Just wanted to make something different, to be easier for beginners. The thing is that in this days you can buy an exploding box almost everywhere but kits are little bit harder to find.
Also, if you want a fully assembled box you can buy one here
Hope you'll love it ( please leave your thoughts in the comments section ) !
Step 1: Designing the Project in Cricut.


I've done this project in the Cricut Design space. If you own a Cricut Machine you can find the project here:
https://www.etsy.com/uk//gift-box-for-him-her-cricut-project
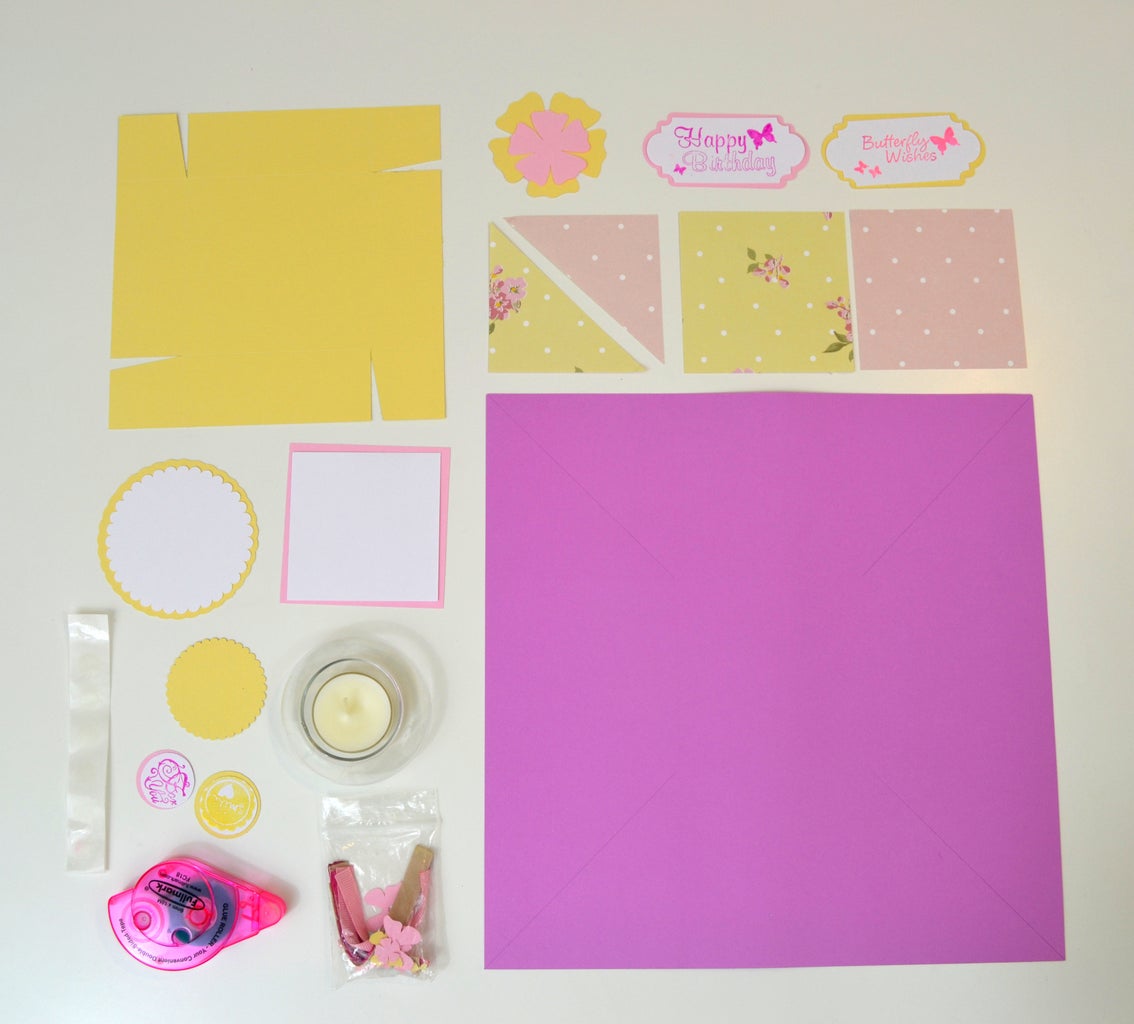
If you don't have one you can buy the kit from Etsy :) Everything that you need for the project it's included in it!
Step 2: Watch the Tutorial I Made for It!
For some people it's easier to watch a video than following step by step photos.
So if you are one of them I hope that this video will help you !
Step 3: Gather Your Tools & Supplies!
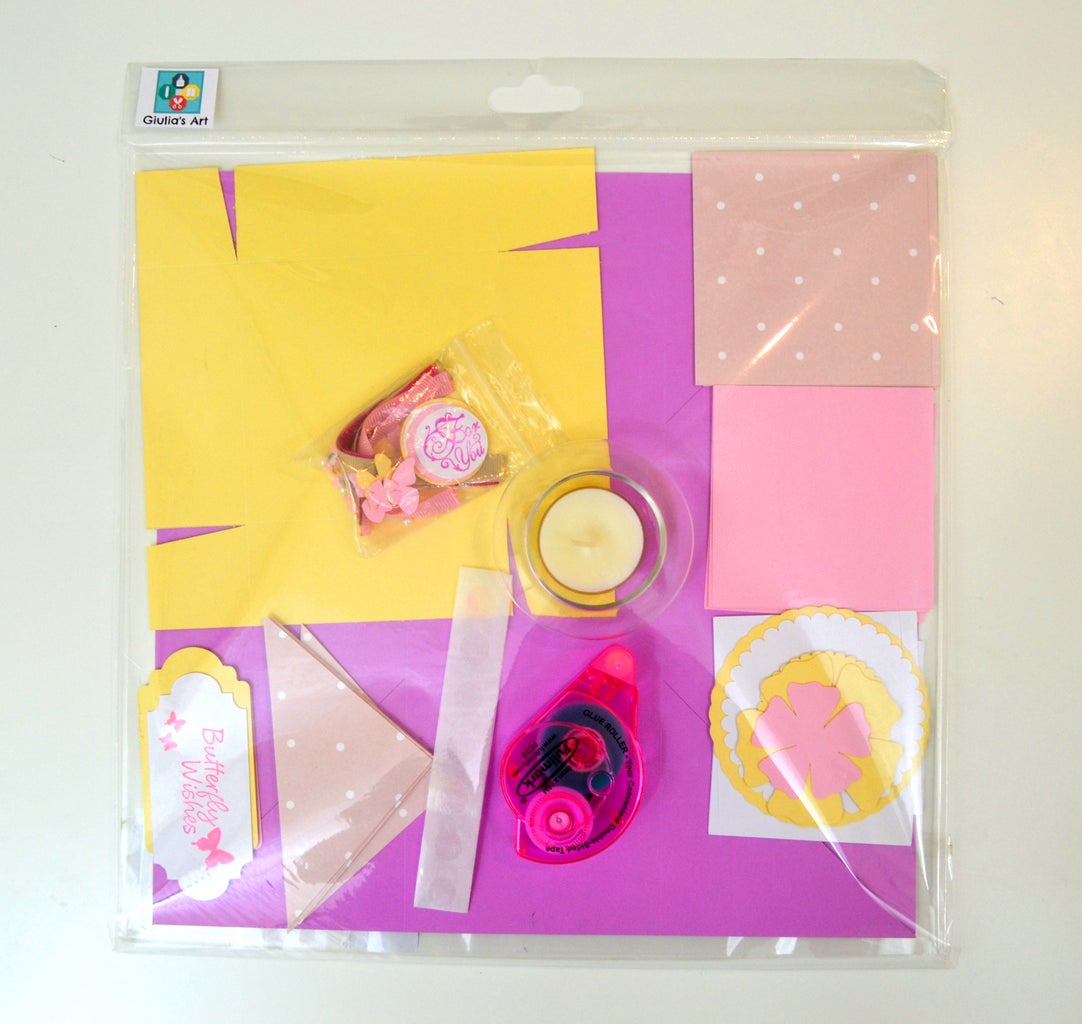
In this case you only need my kit + a bone folder and some white glue.
DISCLOSURE*
I participate in affiliate programs like amazon.com and others. That means I receive a commission when products are purchased through links here in this Instructable. (At NO additional cost to you.) Please know I will never share or even review a product that I would not personally recommend or that I do not personally like.
Step 4: Making the Base.


#1 Fold along the lines on each side.
#2 Using the glue snail stick one triangle on each side.
#3 Now add decorative paper on them.
#4 Stick the other triangles on top.
# 5 Add decorative paper on them.
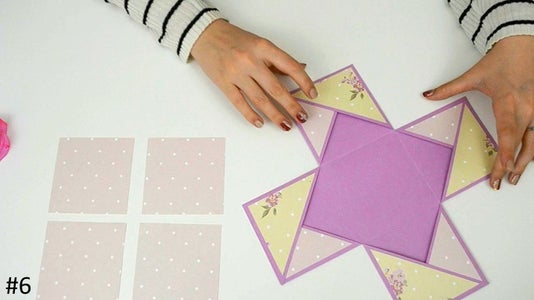
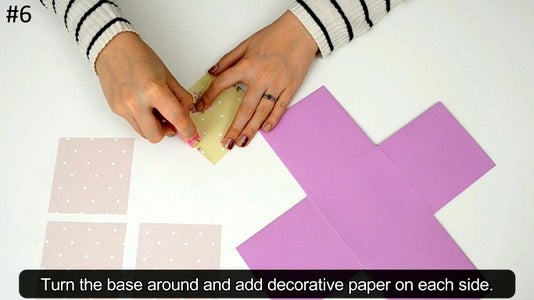
#6 Turn the base around and add decorative paper on each side.
Step 5: Decorating the Base.


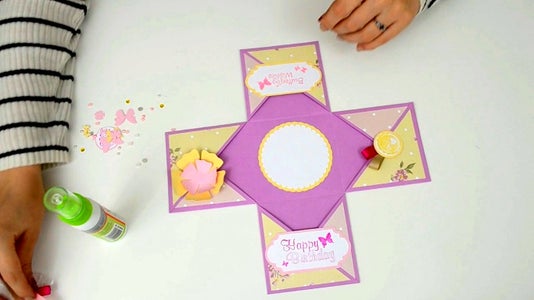

- First, I've added two circles in the middle of the box, one colored and a white one on top ( make sure that the one on top it's smaller than the other one ).
- Than, I've added two small tags on 2 sides of the box where I wrote my wishes.
- On the other 2 sides I've attached a flower and a little circle with some ribbons :)
I did it in this way but you can always change the design ;)
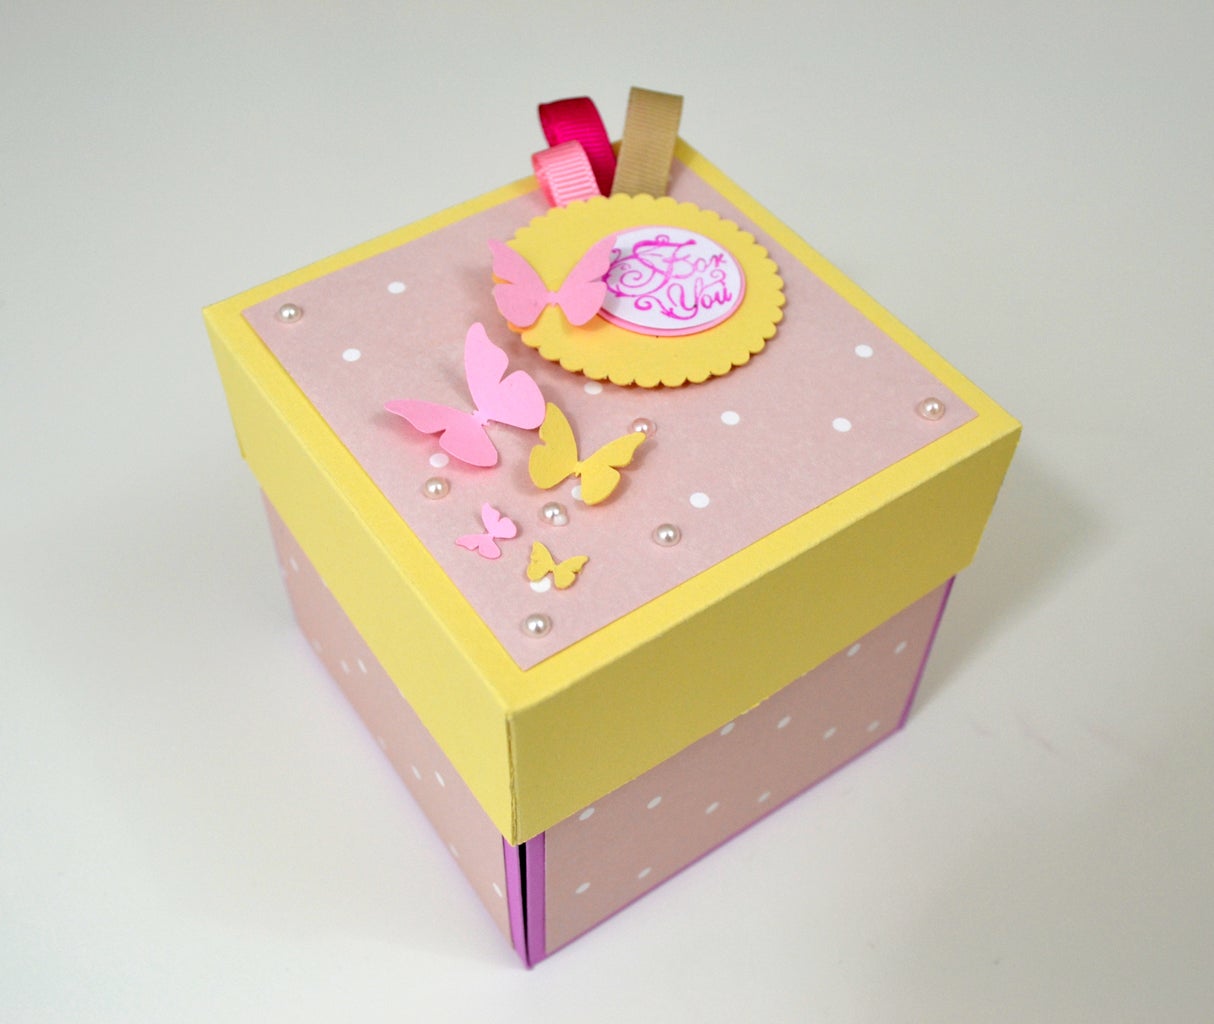
Step 6: Making the Lid.


#1 Fold along the lines.
#2 Stick the sides together.
#3 Add decorative paper on it.
Step 7: Decorating the Lid.


I decorated the lid using some little pearls, butterflies and some paper embellishments.
Step 8: Making the Tags.
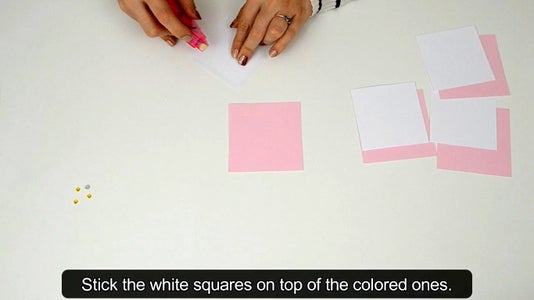


#1 Stick the white squares on the colored ones.
#2 Add some half gems on 2 of the tags.
#3 Using a circle puncher make a hole in one corner of the other 2 tags.
#4 Decorate them with some ribbon.
Step 9: That's It!


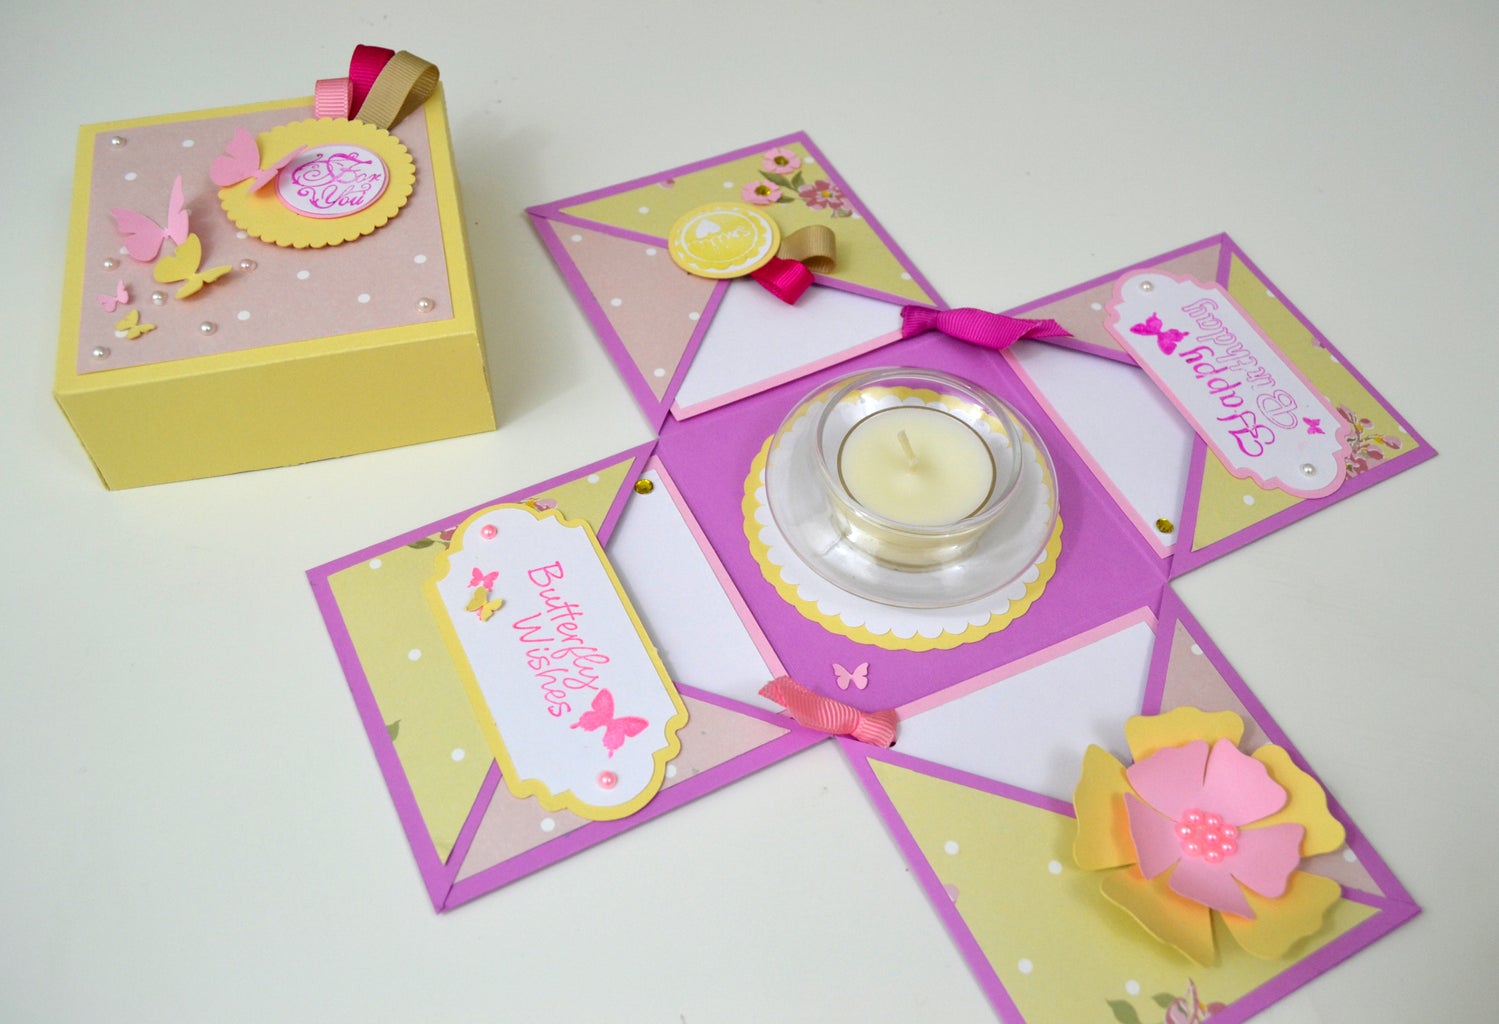
Now you know how to make this cute exploding box. You can even use this kit to create more of them , sell them and why not, open a local business :) Use your imagination!
Want to know how to make a more advanced Exploding Box that contains all kind of cool cards?
Check this Instructable HERE that I posted a while ago, to find out how ;)
Write me your comments about this project and if it helped you in any way please vote for it in the Paper Contest!
Thanks :)
Step 10: More Project Videos!
Perhaps you'll like some of my other crafts.
Check them out at: http://giuliasart.com

Participated in the
Paper Contest 2018

Participated in the
Pro Tips Challenge

Participated in the
Trash to Treasure


