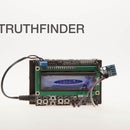
Introduction: How to Reach the Truth: Truth Voyager
I decided to go out and find the truth. Unfortunately, there were no Instructables for doing this so I decided to make one and share it with you!
I found out that all the biggest truths were located at 'standard conditions’.
In this instructable, I will show you how to create a Truth Voyager which ventures beyond your reach to the truth by approaching the standard conditions. There are many ways of finding the truth, more than I know or could describe. In this instructable, I will be showing you the balloon method.
Please take a look at my other Instructables which describe alternative methods for reaching the truth.
Step 1: Gathering Materials
Materials:
- 6+ helium balloons (will depend on the size of your payload)
- A fishing rod
- Arduino Nano
- 3DR telemetry kit
- BMP180 Barometric Pressure Sensor (or equivalent)
- Small battery (anything between 6-20V)
- Wires
- Rubberbands
- Laptop
Desirable:
- GoPro with handlebar mount
- A lot of helium
- Friend to help you navigate
Step 2: Wiring Hardware
Pease refer to the above diagram for wiring.
Some wirings deserve some explanation:
- A Bluetooth module has been used in place of the 3DR telemetry kit, this is nothing to be concerned about it has the same Tx,Rx,Vin,Grd pins which we are interested in
- unintuitively the Rx and Tx pins of the 3dr are not connected to the Tx, Rx pins on the Nano. This is because this Nano is a non-genuine board and uses these pins for serial communication via USB which makes the behavior unpredictable. I found these pins would only work when connected via USB. To get around this I used the software serial library and used digital pins 7 and 8 for Rx and Tx respectively
- Also due to the limited number of ground pins on the Nano the ground of my pressure sensor is connected to a digital output pin set to low. This replicates a ground connection but is not suitable for components which draw a high amperage (perfectly OK for this sensor)
- DO NOT connect the sensor to 5v (only 3.3v) by doing so, you will likely damage the sensor
Step 3: Writing Code
This sketch was modified from the SFE_BMP180 library offered by SparkFun, I have commented out some code regarding altitude output which you may want to include if you are more interested in this than the pressure.
You can find more resources about this sensor here
<p>/* SFE_BMP180 library example sketch</p><p>This sketch shows how to use the SFE_BMP180 library to read the
Bosch BMP180 barometric pressure sensor.
https://www.sparkfun.com/products/11824</p><p>Like most pressure sensors, the BMP180 measures absolute pressure.
This is the actual ambient pressure seen by the device, which will
vary with both altitude and weather.</p><p>Before taking a pressure reading you must take a temparture reading.
This is done with startTemperature() and getTemperature().
The result is in degrees C.</p><p>Once you have a temperature reading, you can take a pressure reading.
This is done with startPressure() and getPressure().
The result is in millibar (mb) aka hectopascals (hPa).</p><p>If you'll be monitoring weather patterns, you will probably want to
remove the effects of altitude. This will produce readings that can
be compared to the published pressure readings from other locations.
To do this, use the sealevel() function. You will need to provide
the known altitude at which the pressure was measured.</p><p>If you want to measure altitude, you will need to know the pressure
at a baseline altitude. This can be average sealevel pressure, or
a previous pressure reading at your altitude, in which case
subsequent altitude readings will be + or - the initial baseline.
This is done with the altitude() function.</p><p>Hardware connections:</p><p>- (GND) to GND
+ (VDD) to 3.3V</p><p>(WARNING: do not connect + to 5V or the sensor will be damaged!)</p><p>You will also need to connect the I2C pins (SCL and SDA) to your
Arduino. The pins are different on different Arduinos:</p><p>Any Arduino pins labeled:  SDA  SCL
Uno, Redboard, Pro:        A4   A5
Mega2560, Due:             20   21
Leonardo:                   2    3</p><p>Leave the IO (VDDIO) pin unconnected. This pin is for connecting
the BMP180 to systems with lower logic levels such as 1.8V</p><p>Have fun! -Your friends at SparkFun.</p><p>The SFE_BMP180 library uses floating-point equations developed by the
Weather Station Data Logger project: http://wmrx00.sourceforge.net/</p><p>Our example code uses the "beerware" license. You can do anything
you like with this code. No really, anything. If you find it useful,
buy me a beer someday.</p><p>V10 Mike Grusin, SparkFun Electronics 10/24/2013
V1.1.2 Updates for Arduino 1.6.4 5/2015
*</p><p>/ Your sketch must #include this library, and the Wire library.
// (Wire is a standard library included with Arduino.):</p><p>#include <sfe_bmp180.h>
#include <wire.h>
#include <softwareserial.h></softwareserial.h></wire.h></sfe_bmp180.h></p><p>// You will need to create an SFE_BMP180 object, here called "pressure":</p><p>SFE_BMP180 pressure;
SoftwareSerial mySerial(7, 8); // RX, TX</p><p>#define ALTITUDE 1655.0 // Altitude of SparkFun's HQ in Boulder, CO. in meters</p><p>void setup()
{
  pinMode(5,OUTPUT);
  digitalWrite(5,LOW);
  mySerial.begin(57600);
  mySerial.println("REBOOT");</p><p>  // Initialize the sensor (it is important to get calibration values stored on the device).
delay(10000);
  if (pressure.begin())
    mySerial.println("BMP180 init success");
  else
  {
    // Oops, something went wrong, this is usually a connection problem,
    // see the comments at the top of this sketch for the proper connections.</p><p>    Serial.println("BMP180 init fail\n\n");
    while(1); // Pause forever.
  }
}</p><p>void loop()
{
  char status;
  double T,P,p0,a;</p><p>//-------------uncomment for altitude reading-------------//</p><p>  // If you want sea-level-compensated pressure, as used in weather reports,
  // you will need to know the altitude at which your measurements are taken.
  // We're using a constant called ALTITUDE in this sketch:

//  Serial.println();
//  Serial.print("provided altitude: ");
//  Serial.print(ALTITUDE,0);
//  Serial.print(" meters, ");
//  Serial.print(ALTITUDE*3.28084,0);
//  Serial.println(" feet");

  // If you want to measure altitude, and not pressure, you will instead need
  // to provide a known baseline pressure. This is shown at the end of the sketch.</p><p>  // You must first get a temperature measurement to perform a pressure reading.

  // Start a temperature measurement:
  // If request is successful, the number of ms to wait is returned.
  // If request is unsuccessful, 0 is returned.</p><p>  status = pressure.startTemperature();
  if (status != 0)
  {
    // Wait for the measurement to complete:
    delay(status);</p><p>    // Retrieve the completed temperature measurement:
    // Note that the measurement is stored in the variable T.
    // Function returns 1 if successful, 0 if failure.</p><p>    status = pressure.getTemperature(T);
    if (status != 0)
    {
      // Print out the measurement:
      mySerial.print("temperature: ");
      mySerial.print(T,2);
      mySerial.print(" deg C, ");


      // Start a pressure measurement:
      // The parameter is the oversampling setting, from 0 to 3 (highest res, longest wait).
      // If request is successful, the number of ms to wait is returned.
      // If request is unsuccessful, 0 is returned.</p><p>      status = pressure.startPressure(3);
      if (status != 0)
      {
        // Wait for the measurement to complete:
        delay(status);</p><p>        // Retrieve the completed pressure measurement:
        // Note that the measurement is stored in the variable P.
        // Note also that the function requires the previous temperature measurement (T).
        // (If temperature is stable, you can do one temperature measurement for a number of pressure measurements.)
        // Function returns 1 if successful, 0 if failure.</p><p>        status = pressure.getPressure(P,T);
        if (status != 0)
        {
          // Print out the measurement:
          mySerial.print("absolute pressure: ");
          mySerial.println(P,2);</p><p>          // The pressure sensor returns abolute pressure, which varies with altitude.
          // To remove the effects of altitude, use the sealevel function and your current altitude.
          // This number is commonly used in weather reports.
          // Parameters: P = absolute pressure in mb, ALTITUDE = current altitude in m.
          // Result: p0 = sea-level compensated pressure in mb</p><p>//          p0 = pressure.sealevel(P,ALTITUDE); // we're at 1655 meters (Boulder, CO)
//          Serial.print("relative (sea-level) pressure: ");
//          Serial.print(p0,2);
//          Serial.print(" mb, ");
//          Serial.print(p0*0.0295333727,2);
//          Serial.println(" inHg");</p><p>          // On the other hand, if you want to determine your altitude from the pressure reading,
          // use the altitude function along with a baseline pressure (sea-level or other).
          // Parameters: P = absolute pressure in mb, p0 = baseline pressure in mb.
          // Result: a = altitude in m.</p><p>//          a = pressure.altitude(P,p0);
//          Serial.print("computed altitude: ");
//          Serial.print(a,0);
//          Serial.print(" meters, ");
//          Serial.print(a*3.28084,0);
//          Serial.println(" feet");
        }
        else Serial.println("error retrieving pressure measurement\n");
      }
      else Serial.println("error starting pressure measurement\n");
    }
    else Serial.println("error retrieving temperature measurement\n");
  }
  else Serial.println("error starting temperature measurement\n");</p><p>  delay(100);  // Pause.
}</p>
Attachments
Step 4: Setting Up Communication to Board
Setting up the communication took a lot longer than it should
When setting up my communication I followed this great instructable https://www.instructables.com/id/Radio-915MHz-3dr-...
The main differences I had to make were to accommodate for the clone Arduino Nano. Following his steps are fine for a larger board such as an Uno or Mega but for the Nano I would recommend using the software serial library so you are not messing about trying to share the serial communication with the USB. This way you can test the functionality while still being connected to your computer.
The orientation of your aerials is important. They should be parallel, not perpendicular to each other
= <== GOOD
+ <== BAD
Step 5: Getting Ready for Launch Day
Before getting your balloons scope out a suitable location and day.
Fortunately, I had a great location close to where I live, but I made the mistake of not picking a perfectly still day.
I would recommend making a checklist of thing you will need, something like this:
- Fully charged Laptop
- Camera and camera batteries
- USB telemetry dongle (I forgot this initially)
- Payload
- Helium Balloons
- Spare string, tape, rubber bands, batteries
- a friend to help you navigate
Step 6: Getting Helium Balloons
before getting Helium, Predict how may balloons you will need.
1 Litre of helium will lift approximately 1 gram. A standard balloon will hold approximately 10 liters of Helium. Hence, a single balloon should lift around 10 grams. My payload weighed approximately 38 grams. I initially got 5 to be safe and found that it was just enough to start taking it up. Consequently, I got 6 as I wanted it to move up reasonably quickly. In hindsight, I should have got more to be safe but helium is expensive!
Also, I would strongly recommend that you get plastic balloons which will hold the helium for as long as possible.
The color you choose is also important.
Step 7: Mounting Payload to Balloon
The worst thing that I could conceive happening was my balloons coming lose with my payload attached.
Make sure your payload is attached to your line and not the balloons. You also don't want your payload to pop your balloons (the nano pins are sharp). Consider attaching your payload a safe distance from the balloon.
Step 8: Pre Launch Checklist
It's nearly the moment of truth!
Before launch, do one last check:
- Is my payload battery connected?
- Is communication established?
- Is the camera running?
- is the launch site clear?
- is the payload securely attached?
- is my laptop charged?
- are the conditions good?
- are my aerials as aligned as best as they can?
- are you feeling calm and in control of the situation?
- are you prepared for the consequences of what you will/will not find?
You are ready to launch.
Step 9: Lift Off!!
Step 10: Be OK With the Outcome
Don't be sad if it doesn't work, You are pushing the boundaries of truth exploration. No one expects you to find the truth on your first try. it's more important you keep trying to find it than actually finding it.
Step 11: Repeat Till You Find It
Keep trying and congratulations for giving it a shot.

Participated in the
Microcontroller Contest 2017


