

Introduction: How to Remove and Install a Door Panel on a 1993-2010 Ford Ranger Truck


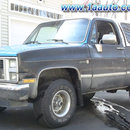


1A Auto shows you how to remove a door panel on 1993-2010 Ford Ranger truck models, and then either re-install the same door panel, or you can replace it with a new one by following the same instructions. The actual vehicle shown is a 2004 Ford Ranger. Interior door panel removal is necessary for a number of different repairs, for example door handles, window regulators, power window motors, door locks, etc., and these steps will show you how to do it.
To watch this repair being done, please watch the full video below:
Video Source: http://www.1aauto.com/content/video/how-to-remove-a-door-panel-on-a-1993-2010-ford-ranger
Tools Needed for this Repair:
Phillips Head Screwdriver
Flat Head Screwdriver
8mm Wrench
Step 1: Disconnect Negative Battery Cable

Ok, so the first thing you will want to do is disconnect the negative battery cable. This should be done before attempting any repair that involves the electrical system.
Step 2: Disengage Door Pull Panel From the Rest of the Door Panel

Remove two phillips screws located under the door pull. You can now pull on the door pull panel to disengage it from the rest of the door panel. Pull out on the bottom first and then pull out the top. You will note that there are clips on the top and bottom that hold the panel in place.
Step 3: Disconnect the Power Switches (mirror, Windows, Locks) From the Door Pull Panel

Disconnect the power switches (mirror, windows, locks) by pushing on a thumb tab and pushing the switch through to the front of the panel. Then disconnect the switch from the wiring harness by prying up on the harness connection with a regular screwdriver and working it off of the switch. You must remove two screws from the power window switch before disconnecting.
Step 4: Remove the Door Panel and Watershield

Remove two more screws from the door panel, one under the door pull panel and one at the bottom. Lift the door panel up and off of the door. To access the inside of the door carefully remove the watershield by pulling it off of the door. Lay the watershield out flat somewhere out of the way while doing your repair. That is how you remove the door panel on a 1993-2010 Ford Ranger truck. To re-install the same panel, or to replace with a new one, you will basically reverse the same steps we just went over.
Step 5: Reinstall Watershield and Door Panel

Reinstall your watershield. Position the door panel back on the door making sure that the wiring harnesses and lock are through. Make sure all the hooks on the back of the door panel are going into the proper position. Slide the door panel down onto the door. You should hear it snap into place and it should be tight against the door. Secure with the two screws.
Step 6: Reinstall the Power Switches (mirror, Windows, Locks)

Reinstall the window switch first by bringing harness through the door pull panel, connecting the switch to the harness and snap the switch into the panel. Secure the window switch with the two screws. Repeat with the lock and mirror switches.
Step 7: Reinstall Door Pull Panel Onto Door Panel

Press the door pull panel in at the top first and then bottom. Secure with the two phillips screws. That is how you install the door panel on a 1993-2010 Ford Ranger truck.
Step 8: Reconnect the Negative Battery Cable

Lastly, don't forget to reconnect the negative battery cable.
That is how you remove and install a door panel on a 1993-2010 Ford Ranger truck.


