

Introduction: How to Tape a Color Guard Rifle


Extend the life of your color guard rifle by taping it properly. Taping is a precaution that can protect your rifle from splintering or cracking from falls on hard surfaces. Read on to learn how we tape a color guard rifle at Rancho HS. You will need to know the parts of a rifle in order to understand where to tape what, so make sure to review the image with the labeled parts before going on!
Step 1: Begin by Removing All of the Old Tape on the Tip, Leaving Behind Only the Cushion.

The old tape will most likely be stuck onto the pad underneath. Try to remove the tape as gently as possible, so as to not cause damage to the cushion and rip it off.
Step 2: Add 3 Strips of Black Tape to the Tip.

One strip should be running vertically down the middle, and there should be one strip on either side of the middle strip.
Step 3: Cover the Edges of the Black Tape Using Strapping Tape.


Go around the circumference of the tip only once. Do not overlap the ends or go around with the tape twice because here is a fun fact: overlapping ADDS to the weight of the rifle! Notice that the purpose of wrapping the tip with some strapping tape is to prevent the tip from splintering when the rifle is dropped.
Step 4: Cover the Strapping Tape With White Tape.

Again, unless you want a heavy rifle, do not overlap the tape any more than necessary.
Step 5: Now That You Have Finished Taping the Tip, Move Onto Taping the Swivels. Start by Removing Any Old Tape From the Rifle.

Step 6: Take the Strapping Tape and Wrap It Around Each Swivel Only Once.

Unlike electrical tape, strapping tape is not very pliable. However, do try your best to keep it as smooth as possible (no grandpa rifles please!).
Step 7: Then, Take the White Tape and Cover the Strapping Tape. This Marks the End of This Part. Now, Move Onto Taping the Body Underneath the Bolt.

Step 8: First, Take a Screwdriver and Unscrew the Bolt From the Body of the Rifle.


Step 9: Then, Take Off All of the Old Tape.

Step 10: Take Some Strapping Tape, and Wrap It Once Around the Upper Portion of the Bolt. (See Picture Below for Clarification.)

Step 11: Then, Take Some Strapping Tape and Add It to the Inside Curve.


Again, strapping tape can easily get pretty wrinkly, especially when an activity demands it be curved, such as this one. I like to keep the tape that will be visible as smooth as possible, and the parts that might wrinkle up on the inside, since the bolt will cover the rugged parts of the tape. Do your best to limit the amount of ridged spots on your rifle!
Step 12: Next, Continue Adding Strapping Tape to the Rest of the Neck. (See Pictures and Video for Clearer Instruction).


I have found that the best way to do this as neatly as possible is to add strip by strip until reaching the end of the rifle's neck. See the video above for more clarification on what I mean.
Step 13: Once You've Covered the Entire Neck in Strapping Tape, Cover It in White Tape Using the Same Strip-by-strip Method Used When Applying the Strapping Tape.
Take advantage of the fact that electrical tape can be stretched! Use it to maneuver your way around curved edges, or to get it in that tricky spot you just can't reach with the strapping tape.
Step 14: After Having Taped the Neck, You Might Notice That You Taped Over the Holes Where the Screws Go.


To make things easier for you when it comes time to screw the bolt back in, use one of the screws to poke through the tape and make the holes visible again.
Step 15: Once You Have Done All of This, Screw the Bolt Back Onto the Neck and Move Onto Taping the Butt.


Make sure the screws go in straight! It is a tight fit for a reason, and forcing them in when they are crooked or not aligned to the holes will result in damage. Such damage will loosen the screws and make it a hazard to you or somebody else if your bolt flies off while you are working with the rifle.
Step 16: Remove Any Old Tape From the Butt.


Again, be careful and do not rip off the cushioning underneath, as well as loose pieces of wood. They tend to appear more on this end of the rifle than on the tip. Watch out for splinters!
Step 17: Add 3 Strips of WHITE Tape to the Butt of the Rifle.

1 strip running vertically down the middle, and 1 on each side.
Step 18: Cover the Edges of the White Tape Using Strapping Tape, Going Around the Circumference of the Butt Only Once.
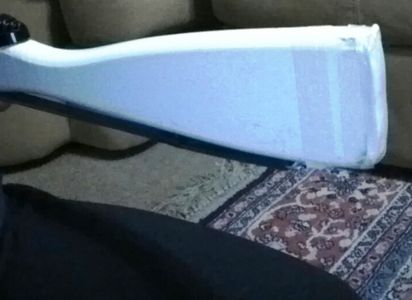
Step 19: Cover the Strapping Tape With White Tape.

Step 20: Once You Have Taped the Butt, There Is One Last Part of the Rifle That Needs Taping. You See Those Two Flat Screws on the Strap?

You're going to need to tape those as well, because you do not want your strap coming apart when you might need it the most. I cannot speak highly enough about the importance of doing this. I once borrowed a rifle without any tape covering these flat screws for a rehearsal. It fell apart as I was doing a strap toss and the rifle hit my head, ouch! Not something you want happening to you.
Step 21: To Tape the Flat Screws On, Take Some Black Tape (or White, If Your Strap Is White) and Go Around Each Flat Screw Once or Twice to Secure Them in Place.


Step 22: Once You Have Done This and the Previous Steps, You Are Done Taping Your Rifle! Congrats! :D
You should now have a smooth, freshly taped rifle in front of you that is sure to wow your instructor and the judges. Best of luck!


