

Introduction: How to Thread the Axles on a Power Wheels Ride-on


Today I'm going to show you how to thread the axle on a kids' BPRO (battery powered ride on). This will eliminate the need for crappy push nuts, is cheaper than shaft collars and allows side-load adjustment.
You're going to need:
Pliers (to get the push nut off)
7/16" Die (I have a tap/die set similar to this one on amazon)
Cutting Fluid / Lubricant (secret ingredient)
Socket ( to put the new nut on)
Step 1: Remove Push Nut

Just grab the thing and pull it off. It's a push nut. So its going to be just as bad coming off as it was bad at holding the wheel in place... Push nuts suck, destroy this one.
Step 2: Work the Die Onto the Axle


Carefully but forcefully start the die onto the axle rod. Apply a small amount of cutting/tap fluid and continue to work the die onto the rod. If it's getting bound up, you can back track the die a bit to clean out shavings - apply another drop or two of fluid and continue threading.
Step 3: Attach the Wheel With New Nut


Slip the wheel back over the axle and start the nut. Use a washer if you need the extra diameter. Tighten with your socket to your desired side load.
I used 7/16" 20p nyloc nuts to hold the wheels on. They're around 60 cents each at the local hardware store, or $11 for 100 on amazon
Step 4: Video of Threading
If the above steps didn't quite illustrate it, here's a short video show how I threaded the axles.
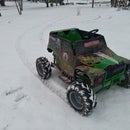
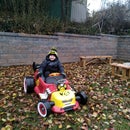
Step 5: Go Play

There it is, got all 4 wheels threaded in less than 15 minutes. Cheaper, stronger and more precise than both push nuts and shaft collars, Once you get the hang of it, you'll never go back.


