

Introduction: How to Use a Cheap 3$ Multimeter to Test Voltage or Amperage


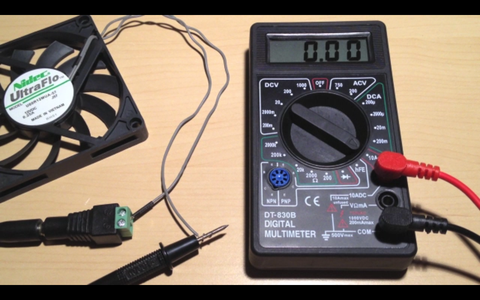
There are a lot of videos about multimeters, but I wanted to make a quick step-by-step guide for dummies using my DT830B! It’s easy to measure the voltage input or the amperage (current drawn) by any electrical device. In this example, I’m using a simple circuit composed of a 12V DC power supply and a computer fan to illustrate these different reading modes. You can also use this cheap digital multimeter for battery testing or for any project that requires working with electricity. This is the cheapest multimeter I could find online. I bought mine for about 3$.
I hope this tutorial will help you in your electronic projects!
--------------------
Material required:
-Multimeter DT830B (eBay.com, CA, UK, DE, FR) (Aliexpress) (Amazon)
--------------------
Check out my other youtube videos
Subscribe to my youtube channel
Check out my Science Improved website
--------------------
Warning and disclaimer: Experiment at your own risks. I am not responsible for any accidents or damages.
Step 1: Voltage Testing


It's the most simple measurement. You don't have to unplug anything and you can measure the voltage directly by applying the probes to their corresponding wires.
You should set the multimeter according to what you want to test. Use DCV for DC current and ACV for AC. The black probe of the multimeter should also be connected to the COM port and the red probe to the V-Ohm-mA port.
In this example, I'm using a 12V DC power supply so I selected the DCV20 reading mode. The 20 indicates that it can effectively read voltage values around 20V. If you're expecting a voltage substantially smaller or greater than that, be sure to adjust the multimeter accordingly. You can now apply the probes to the wires or the connectors and read their actual voltage. As expected, I obtained a value of 12.15V which roughly corresponds to my power supply specs.
Don't worry if you don't know which wire is the positive and which one is the negative. If you invert the probes, you will only obtain a negative value.
Step 2: Amperage Testing


For amperage testing, it's a bit more complex but you can use a multimeter to read the current drawn by a device using DC current.
You should first set the multimeter according to what you want to measure. If you are not sure how much current will be drawn, use the highest value or in this case the 10A reading mode. It's important that you connect the red probe of the multimeter to the 10ADC port instead of the V-Ohm-mA port used for the voltage test.
It's also crucial that you don't touch the wires as you did to measure the voltage. Instead, you have to include the multimeter in the circuit. To do so, you have to disconnect the red (+) wire of the device and connect it to the black probe of the multimeter (Turn power off first!!). You can now turn the power on and touch the positive connector of the power supply with the red probe of the multimeter. When the contact is made, the circuit is complete and the device is powered. The LCD screen should now indicates how much current is drawn by the computer fan or any other device.
Check the video for more information or see my post about the DT830B digital multimeter on Science Improved.


