

Introduction: How to Control a DC Motor to Run in Both Directions


More by the author:


About: Hi all, I'm a college student in the copenhagen technical college. I'm currently working with 3D printers and I'm building my own RepRap.
Those H-bridges are very useful and smart, but if you just want to control the direction of the motor with a switch (manually), there is a much simpler and cheaper alternative.
This little circuit is perfect for newbies. I've known this circuit for several years now, but I didn't got the idea of posting it until now.
This little circuit is perfect for newbies. I've known this circuit for several years now, but I didn't got the idea of posting it until now.
Step 1: Parts Needed


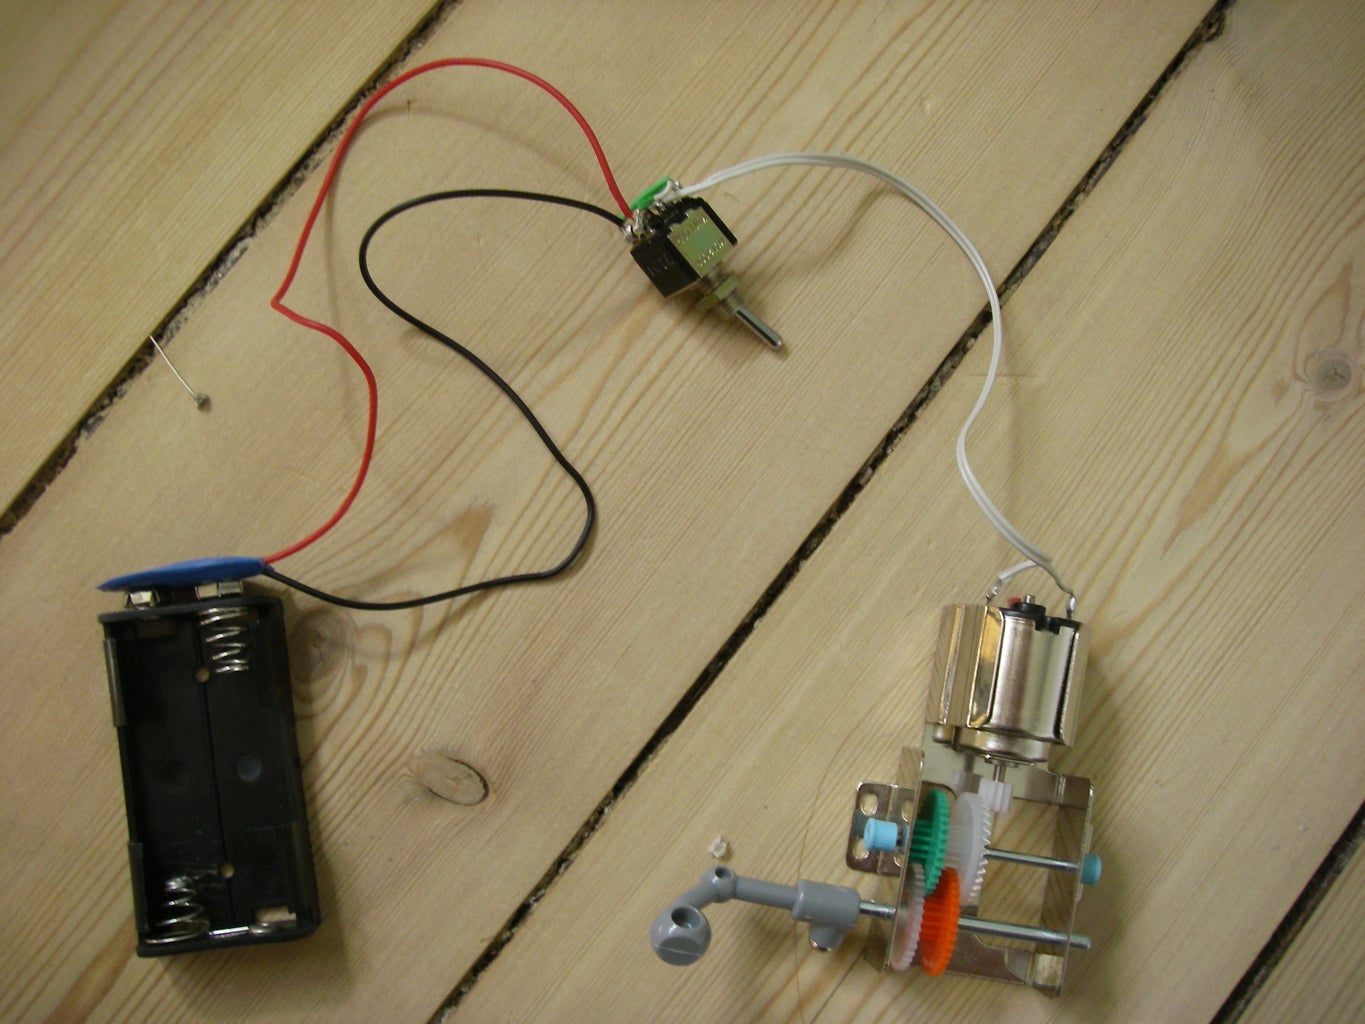
The parts, you need to make this can be found in any electronic store, or even lying around in your workshop (if you have any).
You'll need:
You'll need:
- A DC motor.
- A Double pole a.k.a. DPDT switch. preferably one with a center OFF position, so you can control the motor like this: Forward, stop and backwards.
- A Power supply that suits the specs of the motor (has the voltage and amperage as the manufacturer of the motor recommends). In my case it was 2 AA batteries.
- A Batteryholder (if you use batteries).
- Some wire.
Step 2: Assemble It


I don't think, this could be easier. Just follow my pictures.
Step 3: Applications
When I learned to make this circuit (I think I was 9 years old) I made a simple, little car that could drive forwards and backwards.
Now all you newbies out there: go make some creative with this circuit and post some pictures of it.


