Introduction: How to Make a Leather Pauldron (or Spaulder)
Every time I go to a Ren Faire I seem to come away with something that I need to make. After one trip I decided that I needed a leather pauldron. I would have loved to buy one of the gorgeous pieces there, but I just couldn't afford to and fortunately it ended up being a whole lot cheaper to make one. I checked out a couple there to see how they were constructed and went home to try and duplicate it myself.
Note: I didn't do a very good job of documenting this process with pictures. A lot of the pictures will simply be detail shots of the completed project. I hope this is still useful to you. I figured if I can't show the step in progress I can at least show what I'm talking about.
Step 1: Planning
There are a lot of different ways that you can make a pauldron. Different materials, different styles, etc. I definitely wanted it to be leather. I also decided to make it fairly simple. Just three segments and the straps. I liked the idea of being able to wear it on either shoulder so I decided it should have two buckles on the strap so whichever way I wore it I could still reach the buckle. I also decided that since I had never done any leather stamping I should keep any detail work simple.
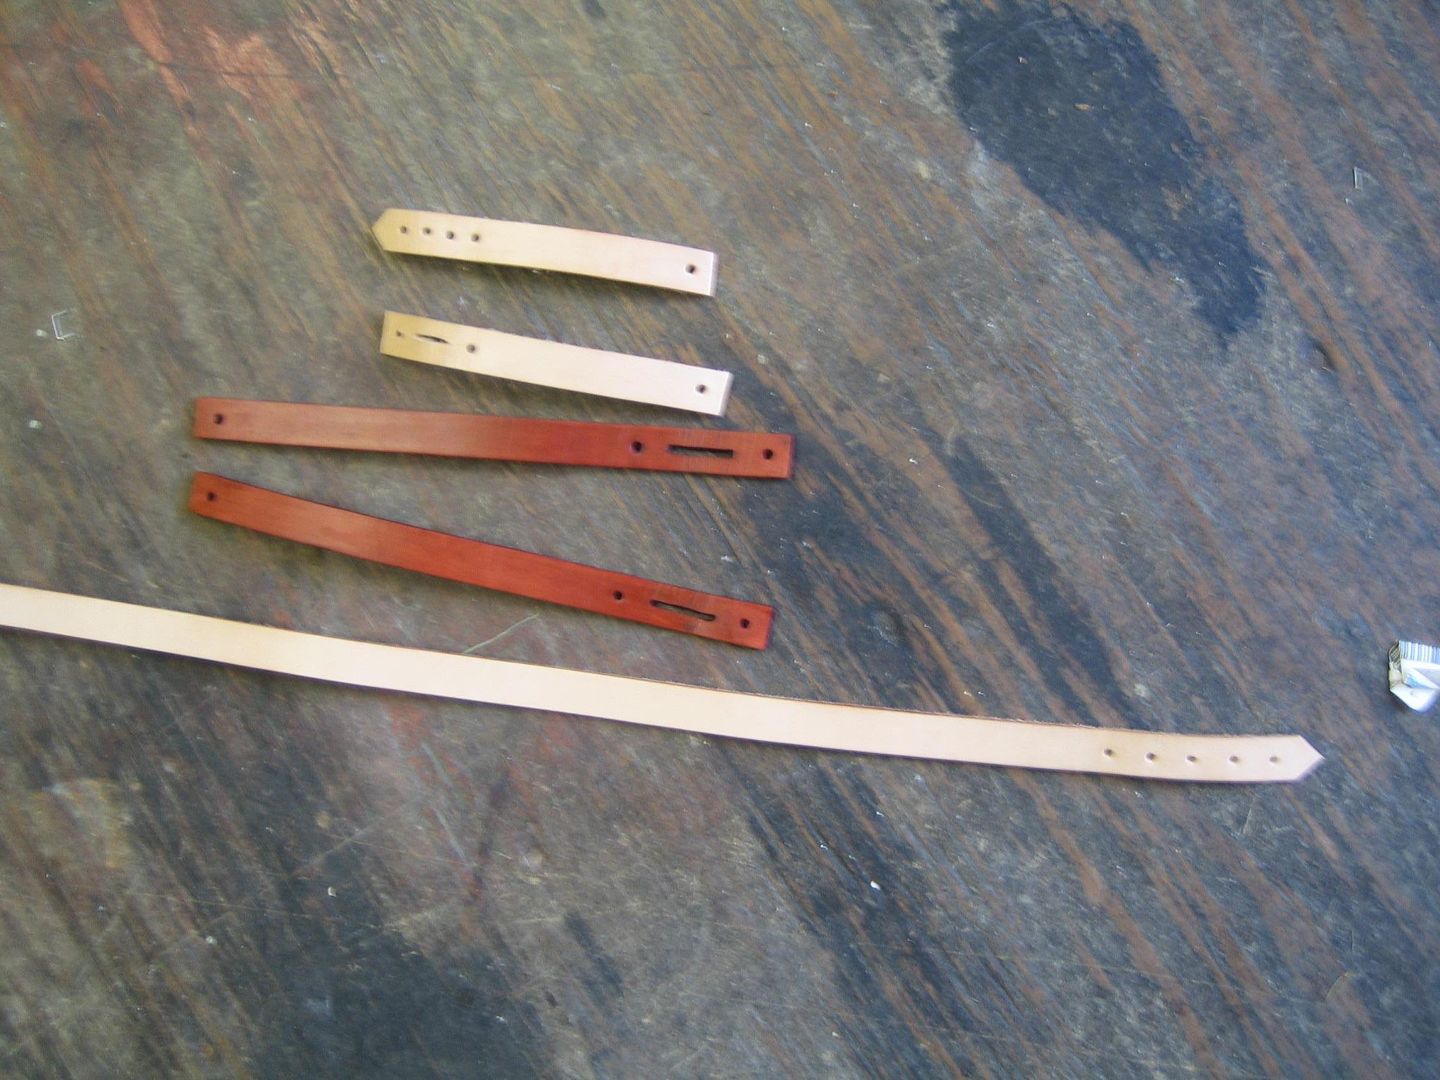
I took some measurements of my arm and shoulder widths, made a simple paper mock-up, and then used it as a pattern to transfer it to the leather. In total there are eight pieces. Three segments for the body of the pauldron. Three straps for the buckle across your chest. Two straps for the buckle that fastens it to your arm.
For the straps that go to the center of the chest and back I measured from the corner of where the pauldron would sit to the center of my chest. For the strap that would connect those two I measured from the center of my chest, around my side to the center of my back. For the arm strap lengths I just figured about half the diameter of my arm. Then I added some length since they would all need to be attached and buckled together.
Step 2: Supplies
First things first: Leather.
This leather was around the 4-6oz weight. Honestly it's not that big of a deal, just pick something you're comfortable with. If you want it armor grade, pick a thicker leather. If it's more for show and you want it comfortable, pick something a little lighter weight. I think the piece of leather I got was a belly piece. They run around $65 but sometimes you can find some pretty sweet deals on them. The nice thing about this project is that you don't actually need to buy a big piece if you can find scrap pieces that are big enough to accomodate the individual pieces.
You can make your own straps by cutting them from the main piece of leather with a special tool but I don't own one and I don't trust myself to do it well without it. Instead I bought some long straps that were the width I wanted.
Other Supplies:
-Buckles (3)
-Rapid Rivets (you can substitute Chicago screws if you don't have a rivet setter)
-Stain (I'll let you choose the color)
Tools:
-Knife, for cutting the leather out. You can use a utility knife, an xacto knife, or even a good hardy pair of scissors.
-Leather Punch
-Rivet Setter
Optional:
-Edge Beveler
-Edge Slicker
Depending on any detail work you want to do you may need more tools.
Step 3: Cutting It Out
After transferring the pattern to the leather, cut it out. It's a pretty simple step. You'll also need to cut the straps to the right lengths. Remember to leave allowance in the straps for attaching to the pauldron, and for attaching buckles. You'll probably need at least a couple extra inches in each one.
Tip: To make sure my straps were long enough I attached the buckle on the end first and then cut the other side to the correct length. This way I didn't have to guess at how much extra length I needed to attach the buckle. When I attached the buckle I used Chicago screws so that I could take the buckle back off when it came time to stain it.
Step 4: Punching Holes and Detail Work
Each of the main segments needs four holes; one punched in each corner... or at least sort of in each corner. In the third picture (and also the first picture in the last step) you can see how the rivets at the bottom of each piece are placed in the corners but the rivets at the top of the two bottom pieces are placed further down. They need to be slightly offset so that the armor plates won't swivel completely around, but will instead flex a little before catching on each other (see what I mean in the second picture).
Four of the straps needed a hole punched for them to attach to the pauldron. That part was pretty straightforward. Three of them required a buckle to be attached on the other end. For that I needed to cut a slot for the buckle prong to fit through and then punch a hole on either side for the rivet. I also used my knife to skive the leather thinner where it would fold over on itself. Then I had to add holes to the fourth strap as well as the long strap for the belt prong to hook into.
For the detail I decided to just do a simple line going around as a border. There always seems to be a moment in my projects where I cheat a little and this would be that part. Instead of using a specialised tool to create a border I ended up using a pair of slip joint pliers and a screwdriver. I needed the line to have equal spacing around the whole shape so I set the slip joint pliers at the width I wanted the border to be and ran it along the edge with the longer side of the pliers hanging over the end and the shorter side pressing into the leather. Once that was done I just ran a flathead screwdriver along the line to make it deeper. In order for the line to really set the leather needs to be wet when you do this step.
Step 5: Staining
Once all of the parts were done (but before they're all attached) I stained it. I used these little daubers with wire handles that I got from Tandy Leather, but you can use lots of different things. As I rubbed the stain on I kind of buffed it lightly with a paper towel. The reason is that it tends to streak when you lay the stain on and the buffing motion smooths out the finish. I let it pool a little in the line around the border so that it came out a little darker.
This is the part where you should put a sealer on it. I didn't because I didn't have one and I thought it would be fine. Some of the stain actually rubbed off on the wall in my closet where I had it hanging. Put a sealer on it.
Step 6: Putting It Together
Once everything was stained and had dried I riveted everything together. Setting rivets in leather is actually a pretty simple process. All you have to do is push the post of the rivet through the two holes you want to attach together, set it down on a hard surface, and then put the rivet cap on top of the post. Then you use a rapid rivet setter which is basically just a metal post with a concave end. Place the concave end on top of the rivet cap and pound it a couple times with a mallet. Done.
If you want to see a less than riveting video of the riveting process (har har) check out this link:
In fact, Tandy Leather has tons of videos that show how to do all kinds of things. I would recommend perusing their channel and website if you have an interest in honing your leatherworking skills.
Step 7: Finished
You're done! You just created a piece of leather armor from scratch. Wear it with pride. Lay seige to a castle! You're invincible now... or at least one of your shoulders is!

Runner Up in the
Leatherworking Contest

Participated in the
Halloween Costume Contest


