

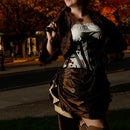
Introduction: How to Make a Victorian/Steampunk 4 Gore Underskirt


Please check out my other tutorials, and vote for me in the Halloween Costume Challenge!
For more of my costumes please visit
www.littlewingsdesign.com/costume.html
My store
www.etsy.com/shop/ibukij
Photos by M.G. Norris Contemporary Photography
www.mgnorris.com
Sometimes these patterns can be a bit tricky so I've made this instructable
so you can see in a more visual way how to put it together
Step 1: What You Will Need

4 2/3 yards of silk or taffeta fabric
Dritz tracing wax paper (get the vintage stuff it's Waaaay better)
3-4 spools of thread
Ruffle foot for your sewing machine
Sewing Machine
Serger (optional)
Truly Victorian 4 gore underskirt pattern TV261
pins
scissors
ribbon
Roll wheel
Iron
Step 2: Cutting Out Your Pieces

Cut out all the pieces as instructed paying attention to grain lines fold instructions
listen on the pattern.
Serge around the outside of every piece to prevent fraying.
Step 3: Marking You Pattern Marks


Slip the colored side of the paper in facing the wrong side of your fabric
behind the dark marks on the pattern.
Roll along the marks on the pattern with the wheel nice and hard to
make sure that the marks transfer onto the fabric.
Flip the paper and do the same on the wrong side of piece 2.
Repeat for all parked pieces including the stars on the back pieces
Step 4: Skirt 1


Pin darts together on wrong side of the fabric
matching marks. Stitch along marks.
DO NOT BACKSTITCH at the points
instead tie the two loose strings together at the point and trim
This will gibe you a nice crisp dart.
Turn to right side and press.
Then stitch skirt front to skirt sides leaving 4 inches at the top for the fastening on one side
right sides together and press.
Step 5: Skirt 2

Turn under the seam for the fastening side and stitch down.
Press flat with iron
Step 6: Skirt 3


Match pleat marks on the back and pin
you are folding down towards the bottom.
Stitch in place then sew side back to back pieces on both sides
right sides together.
Step 7: Skirt 4


Pin the waistband to the skirt leaving 2-3 inches over the edge of the skirt
on one side pleat the back to fit, stitch down and press.
Then fold the waisband over and turn the seam under pin and stitch down.
Fold the ends in and stitch down so all raw seams are inside the waistaband.
Step 8: Skirt 5


To create the bustle cut 2 strings about 17"
and 1 about 26"
Stitch just under the waistband the long at the very center of the back panel
and the other two on either sides lined up with your star marks on the inside of the skirt.
for each star grab the fabric at the star and pull up about an inch to 2 inches depending on how drastic you want
the bustle and then pin it to the ribbon and hand stitch. you should have 2 stars per ribbon
then cut 2 more ribbons about 26" and sew to the side back about where the pleats end.
Tying these together gives your bustle some poof.
Step 9: Skirt 6


Sew your ruffle pieces together at the sides wrong sides together.
this will give you one giant circle.
press seams open
Fold down 1 inch top on wrong side and bottom, pin and stitch down.
Use ruffle foot to pleat the top i tend to use it on 6
Step 10: Skirt 7


Pin ruffle to right side of the skirt at desired height.
Stitch down!
Now you have your skirt
(shown worn over a petticoat)

Participated in the
Halloween Epic Costumes Contest


