

Introduction: How to Make a Custom Bow Tie


Things you will need:
33"-42" of nice Material (depends on neck size)
Rotary cutting wheel
Cutting mat
Chopstick
Sewing Machine with thread
Bow tie template, printed on paper or acrylic
Step 1: Measure Your Neck

Grab a cloth tape measure and wrap it around your neck. It should be in the 15"-23" range, give or take a few. You will use this to make a bow tie that is custom fit to your own neck. This is a picture of Drake getting his neck measured.
Step 2: Align Template and Cut the Fabric


Lay out the fabric you have chosen for the bow tie on a long cutting mat.
Bow tie templates can be found online, there are all sorts of styles out there. consider the measurements though before cutting any fabric. I use an acrylic template because it is repeatable and accurate and I know I will get a nice bow tie every time. It also makes things go a lot faster. If you have ever traced paper onto fabric, you will understand.
With the template I used, I took my neck measurement and divided it in half. This will correspond with a number on the rectangle part of the template (as seen in the second picture). I like to trace the template with a pen onto the fabric and then use the rotary wheel to cut it out. I leave a little rectangle in the middle of the bow tie where the hole is going to be to reverse the bow tie after sewing. If you use an acrylic template like the one in the picture, be sure that everything lines up nicely and the pattern of the fabric, or "grain", is how you want it. You will need two pieces that are exactly the same, one is the front, and one is the back of the bow tie.
The template I am using is clear acrylic, but I left the protective backer on it so it would show up better in pictures.
Step 3: Sew Both Pieces Together

I pinned both of my pieces together, forgot to take a picture, and then sewed them together, leaving a 1/4" seam allowance all the way around. I left a gap in the seam right where the small rectangle bump is in the middle of the bow tie. Remember, this is where we are going to turn the entire thing inside out. It will seem very narrow, but trust me, it will work.
Step 4: Turn the Bow Tie Inside Out
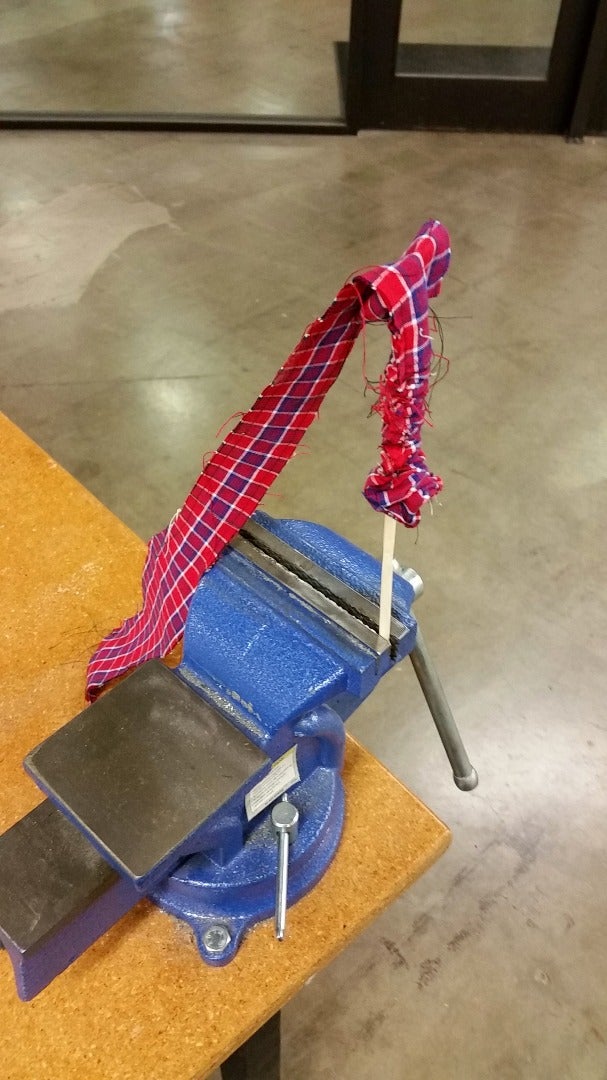
I first tried to turn it inside out using the chopstick in one hand and trying to force it inside out. This did not work. Next, I put the chopstick in a vice, put one end of the bow tie over it, and then forced it inside out. The vice method worked a lot better, and I was done in a matter of 30 seconds.
Step 5: Iron Your New Bow Tie

To make the bow tie look nice, you should iron it. Make sure the settings on the iron are appropriate for the material you are using. I set mine a little too high and it got a little scorched.
Step 6: Learn to Tie a Bow Tie

Now you must learn to tie a bow tie. I like this video for that. It took me a couple tries to learn, you'll be a pro in no time.
Step 7: Find an Event to Go to or Ask Someone Out on a Date
If you ask someone out, be sure to be wearing the bow tie when you do ask. Now get out there and look fancy!

Participated in the
Crafting 101


