

Introduction: How to Make a Doormat Out of Recycled ROPE!


Hello Everyone! In this instructable, I will show you how to make a dootmat entirely out of rope! Here is a list of the materials that you will need:
13 - 1 inch diameter pipe; 24' in length ( I used left over copper pipe.)
70-100 feet of synthetic rope. ( The rope must be able to be melted together.)
1 - 2x3 or 2x4; 32 inches in length.
1 - piece of partical board/scrap wood/plywood; roughtly 1'6"x4'
2 - Clamps or folding chairs. ( A table or work bench will also be needed if using clamps.)
1 - Lit candle
1 - Pair of Strong cutting shears.
1 - 1 inch diameter drill bit
1 - yard stick or equivilent.
2 - 2 inch screws
And some various tools ( pencil, drill, etc.)
Step 1: Create the Jig

First, We will create the jig that the door mat will be made on. Grab your drill, 1 inch drill bit, yard stick, pencil, and 2x3/2x4. Take the yard stick and make a line down the middle length wise on the 2x3/2x4. Now mark the line every 2 inches until you have 13 marks. Next, take your 2x3/2x4 and drill holes all the way through the board on each of the 13 marks. Make sure that your drill is AS LEVEL AS POSSIBLE. (A drill press will make this much easier.) This will make your mat come out MUCH nicer. You should now have a 2x3/2x4 with 13 holes evenly spaced on the board. Now screw you 2x3/2x4 near the edge of you 1'6"x3' piece of wood. Your jig should look something like the photo below.
Step 2: Setting Up the Jig and Inserting the Pipes

Now take your 2 clamps or folding chairs. If using clamps, clamp your jig to a table or work bench. or set your jig on 2 folding chairs. Once your jig is set up, Insert a pipe into each of the 13 holes. Your jig should now be complete and ready to use.
Step 3: Where I Got My Mass Amounts of Rope.

I live in the MidCoast Maine area where the majority of the locals are lobstermen. ( they go out on fishing boats with traps and catch lobster) They once used rope called float-rope. But it has since become a law that they can no longer use float-rope to fish with because whales were getting caught in it and dying. So they have reverted to sink-rope (go figure) So now what are the lobsterman to do with they unusable float-rope? Well, there really are not many other uses. So many people that I know are giving me truck loads of their old float-rope for free. Since this stuff was made to go into the ocean, it is very durable stuff. And it even floats!
Obviously most people will not be able to get hold of this stuff, but as long as you have synthetic rope that can be melted and fused, it should work.
Step 4: Makeing a Doormat!


In order to construct doormats, you use a "weaving" type method. You weave the rope in between each pipe; working your way to higher levels. See the photo below for more clarification.
Step 5: Fusing 2 Pieces of Rope.


No matter what, You will need to fuse rope at least once while making a door mat. Or you may fuse 6 or more times depending on how many different pieces of rope you use. You take a lit candle and the 2 ends of the rope and hold them 1-2" away from the flame. DO NOT let the ends catch fire or they will become black and show up on the mats. plus it smells bad. When the ends appear melted, stick them together and hold them for 15-20 seconds. The fuse should be hard enough to work with by then. Use the photos to get a better understanding.
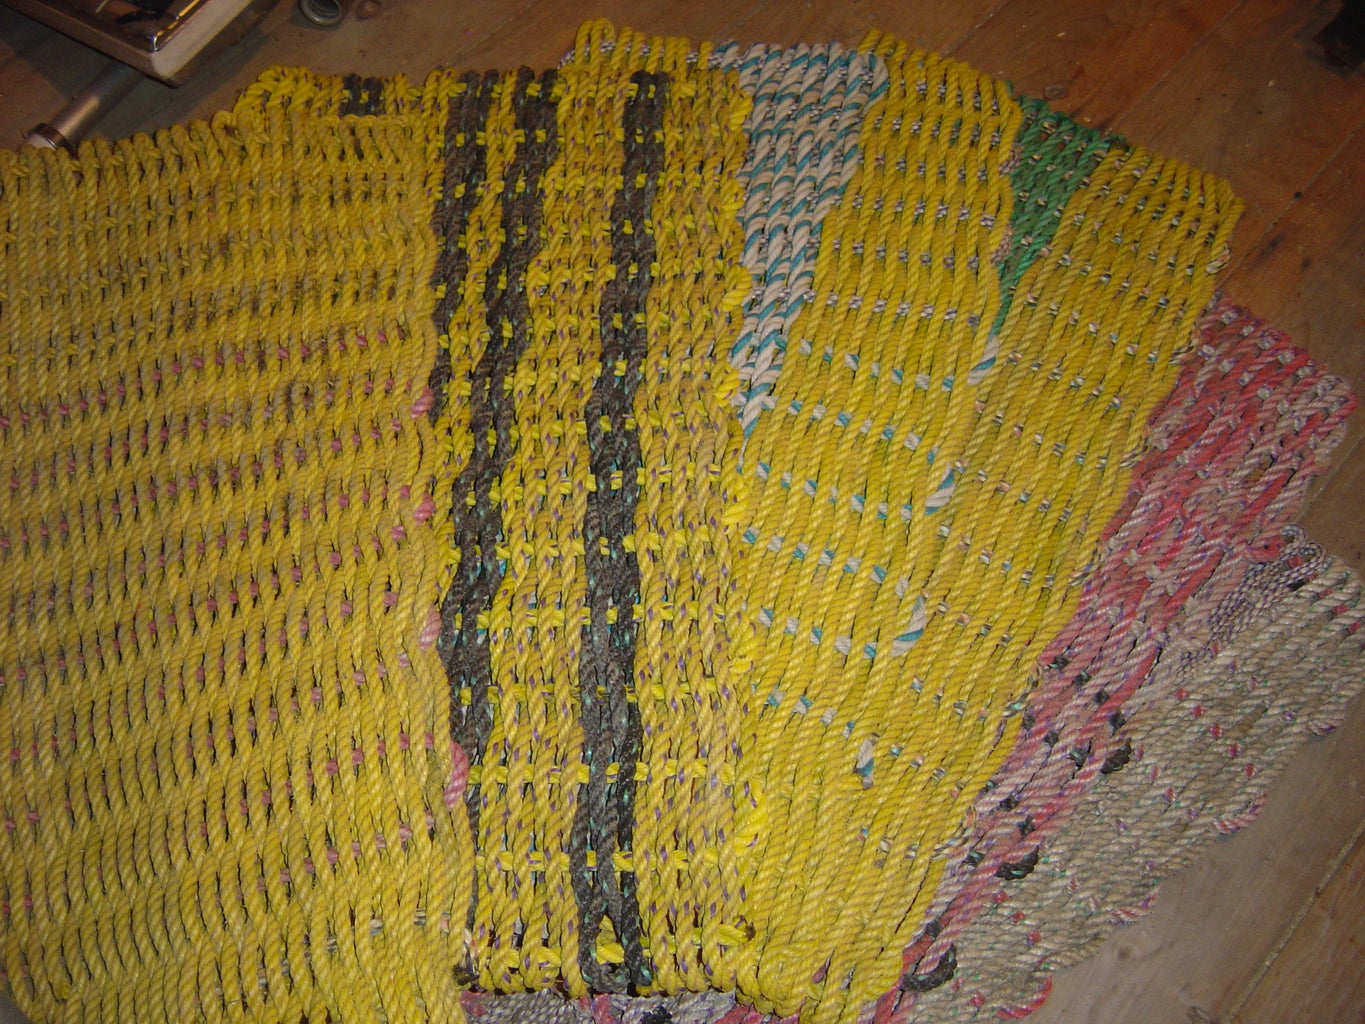
Step 6: Removing the Door Mat From the Jig.


Once you have gotten the mat 20-26 rows high, it's about time to remove it from the jig. To remove it, remove your jig from the chairs or table, and place it on the floor. Now step on the board and pull on the pipes to remove them from the holes. You should start at one end and work your way to the other. Be careful not to pull the pipes from out of the rope. You should be left with what looks like the image below.
Step 7: Removing the Pipes


Now to remove the pipes from the mat. First, take the end of your rope. make sure you have a good 15 feet to work with. fuse more rope on the end if needed. Ending up short at this part is a real pain. You want to make sure that the ends of your rope are OPPOSITE of each other. If you're unsure what I mean, see the picture in step 6. Now feed the end of the rope through the end pipe (see photo below) and pull completely through the pipe. Now pull the pipe out of the rope "levels" and pull the rope back out through the pipe. Now pull the rope taught but not too tight. You want the mat to stay as rectangular as possible. see pictures below.
Step 8: Almost Done!


Now with all the pipes removed, The door mat is almost complete. You will want to cut off any extra rope with your cutting shears. now you will also want to pull the rope you weaved through (in my photo, it's the yellow piece) and pull it a little tighter than you did the other sections. Then fuse to 2 ends together and loosen the section again. See photos to understand better.
Step 9: Finished!

Your door mat is now complete. If made correctly, this thing can handle alot of abuse. It could safely be used on a sail boat aswell. If it were to ever fall off, it would float and could be easilly retrieved.
Participated in the
Joby Transform It! Challenge


