

Introduction: Quilting Basics : Flying Geese


Flying geese are a widely used subunit in patchwork quilts. Each flying goose consists of a goose triangle (across the width of the block) and two sky triangles (at each side of the block). This instructable shows 3 methods of how to make flying goose blocks.
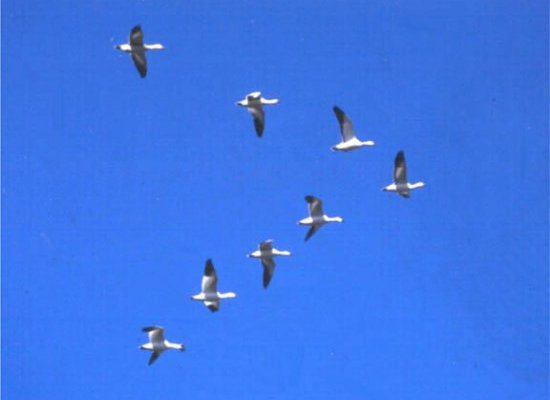
I don't know where the name comes from but I would think it is the way a skein of geese lines up as they fly across the sky http://www.aerospaceweb.org/question/nature/formation/snow-geese.jpg .
Step 1: Materials and Tools

2 or more contrasting fabrics, quilters usually use 100% cotton
a rotary cutter and plastic ruler - or marking pen and scissors
sewing thread
sewing machine
scissors
iron & ironing board
washable or air-erasing marking pen
Step 2: 3 Easy Methods
There are 3 widely used methods:
1) Using a rectangle and two squares to make a single goose
2) Traditional piecing where each triangle is cut before being sewn together
3) Speed piecing where the cutting is done after the sewing
Method 1 has left over (or waste) fabric, but you can make individual flying goose units
Methods 2 & 3 leave no left over fabric, but make up to 4 flying geese
Method 2 will yield 4 flying geese where the goose fabric is the same, but you could use different sky fabric for each unit
Method 3 yields 4 identical flying goose units - good if you want to make lots the same.
Step 3: Method 1 - Single Geese


Iron your fabric before cutting - this makes everything so much easier!
A standard flying goose unit is twice as wide as it is high once sewn into the quilt, this is it's finished size. It's unfinished size is 1/2" bigger in each dimension.
For a flying goose A by 2A finished size you need to cut one goose rectangle A+1/2" tall by 2A+1/2" wide, and two sky squares A+1/2" on each side.
My units will be 3" x 6" finished so my goose rectangle will be 3 1/2" tall and 6 1/2" wide, my sky squares are each 3 1/2" square.
Turn each sky square over and mark a line diagonally from one corner to another.
Place the goose rectangle with the right side of the fabric uppermost and put a sky square on top of it right side down, matching the cut edges, with the drawn line going out to a corner as shown. Pin in place if you wish to ( I usually don't pin for short seams) and then use your sewing machine to sew along your drawn line. Sew from the long side of the rectangle to the corner - this stops your sewing machine "eating" the pointy bit.
Take your part sewn unit and press the seam then cut 1/4" away from the sewn line. Make sure you cut off the triangle towards the short end of the rectangle as shown. Then press the seam open towards the darker fabric (so that the darker fabric gets folded and cannot show through the paler fabric).
Then place your second sky square as shown, once again matching the cut edges, so that the drawn line is at right angles to the seam you just sewed and pressed. Again sew along the drawn line and then press, cut and press open as before.
Tada! You now have a flying goose unit ready to put into a quilt.
Step 4: Method 2 - Geese by the "traditional" Method


Iron your fabric before cutting - this makes everything so much easier!
NOTE: In this method you are sewing along bias edges (cut at 45° to the direction of the threads) which are very stretchy, so it is very important not to distort the fabric by pulling on it as you sew and press the seams.
For four flying geese units A by 2A finished size you need to cut one square of goose fabric 2A +1 1/4" on each side, and four sky squares A+7/8" on each side.
My units will be 3" x 6" finished so my goose square will be 7 1/4" on each side and my sky squares are each 3 7/8" square.
Cut the goose square into 4 triangles along the diagonals as shown, and each sky square in half along a diagonal.
Take one goose triangle and a sky triangle and match the points, right sides together as shown, turn the "sandwich" over, then sew carefully, without stretching the fabric, leaving a scant (mean) 1/4" seam allowance. Press the seam while it is closed, let it cool and then press open towards the dark as before.
Place the second matching sky triangle as shown, again matching the points and again sew a 1/4" from the edge then press, cool and press open. If the fabrics will not show through you can press one seam each way, this reduces the bulk at the point of the goose.
Trim off the "dog-ears" and ensure your unit is squared up to 6.5" x 3.5"
Repeat until you have used all your triangles - you will have 4 flying geese units
Step 5: Method 2 - Fabrics With a Directional Print


If you use fabrics with a directional print it is important to think about this BEFORE cutting your squares along the diagonals.
Each goose square will yield 2 triangles where the print runs horizontally and 2 where it runs vertically. When cutting the sky squares you will need to cut the diagonals as shown to yield matching sky triangles - you will get one pair horizontal and one vertical as shown. Take care not to mix your triangles up if the direction is important in your quilt.
Step 6: Method 3 - Speed Piecing


Iron your fabric before cutting - this makes everything so much easier!
For four flying geese units A by 2A finished size you need to cut one square of goose fabric 2A +1 1/4" on each side, and four sky squares A+7/8" on each side.
My units will be 3" x 6" finished so my goose square will be 7 1/4" on each side and my sky squares are each 3 7/8" square.
If you have 1/4" foot for your sewing machine mark a central diagonal on the back of each sky square. If you do not have a 1/4" mark two lines each a scant 1/4" (often I mark at 3/16" to allow for the width of the tip of the pen) from the central diagonal.
With the goose square right side up, place 2 sky squares right side down along the diagonal as shown, matching corners and cut edges. Sew 1/4" on each side of the central line or on both sewing lines, depending how you marked your squares. Press the seams and then cut along the diagonal between your sewn lines as shown, then press your sky triangles away from your goose triangle.
Place your next square on the goose triangle, matching the corner and edges as before and again sew 2 parallel lines of stitching 1/4" from the diagonal. After sewing both lines of stitching press the seams and then, again, cut along the diagonal between the lines of stitching. Press the second sky triangle away from the goose and trim the dog-ears. Repeat for each piece until you have 4 flying geese.


