

Introduction: How to Make Stackable Pin Headers for Arduino on the Cheap

Do you love Arduino?
You want to make a stackable board but don´t have stackable headers?
Then this instructable is for you.
Stackable pins are great, but they are not easy to find at local stores.
I´ll show you how to make ones for your Arduino with parts you can find easily.
If you like Robots and electronics visit my youtube channel: TCRobotics at youtube Thanks!!
Step 1: The Parts You Need
These are the parts you need:
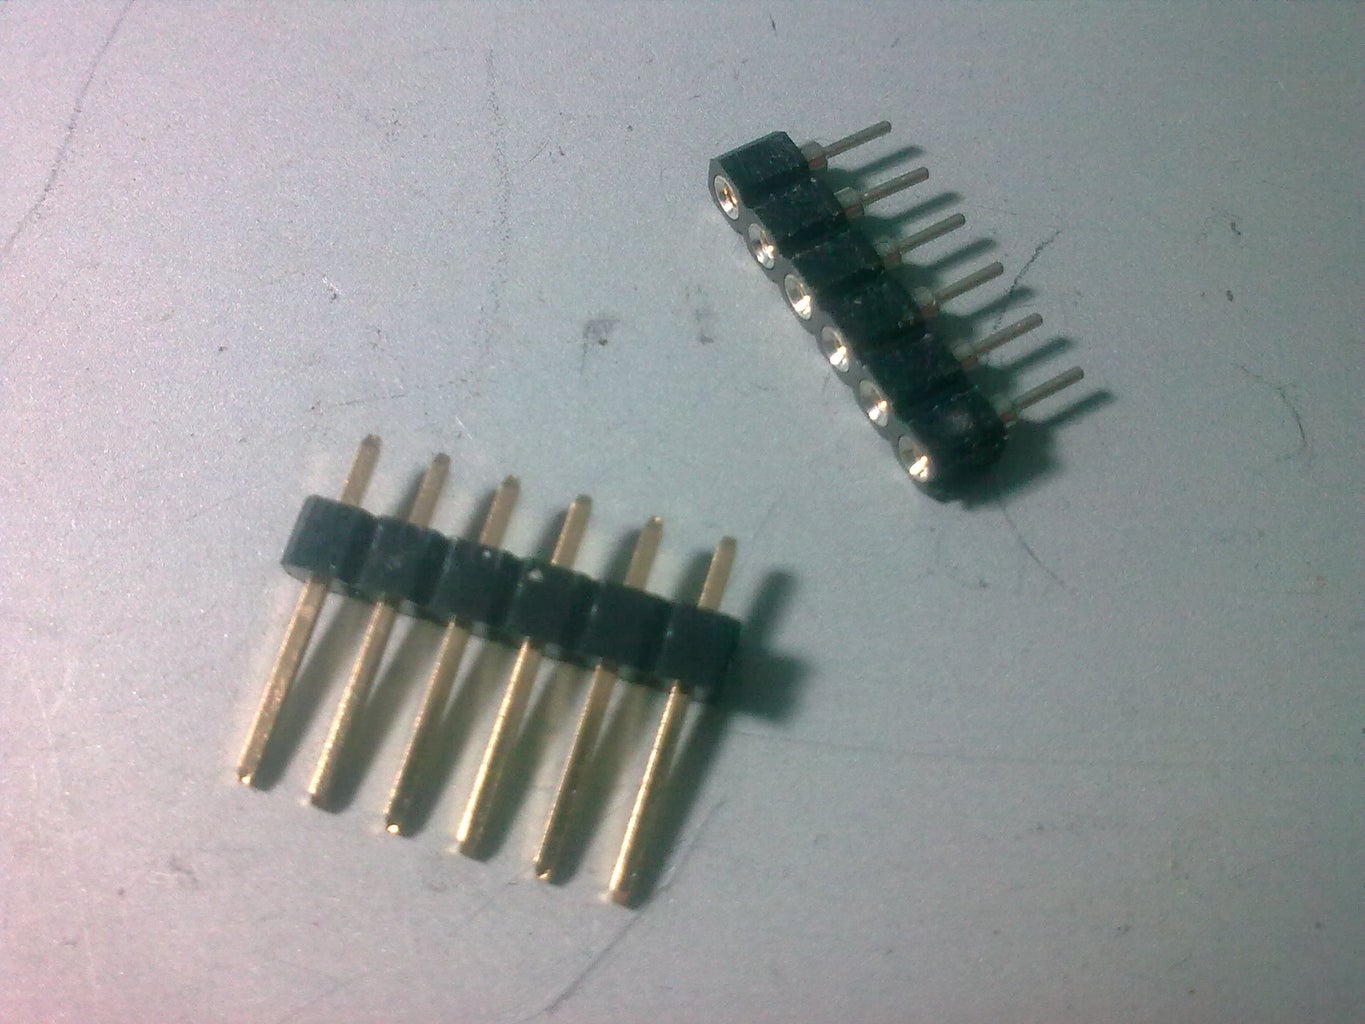
1x Straight break away headers (you need 28 pins for an Arduino Duemilanove )
1x Female Break away headers (or machine pin)
Some tape
Solder and soldering iron
Step 2: Soldering Both Sides


Ok, i´ll show you my technique:)
-Strip your headers for your needs.
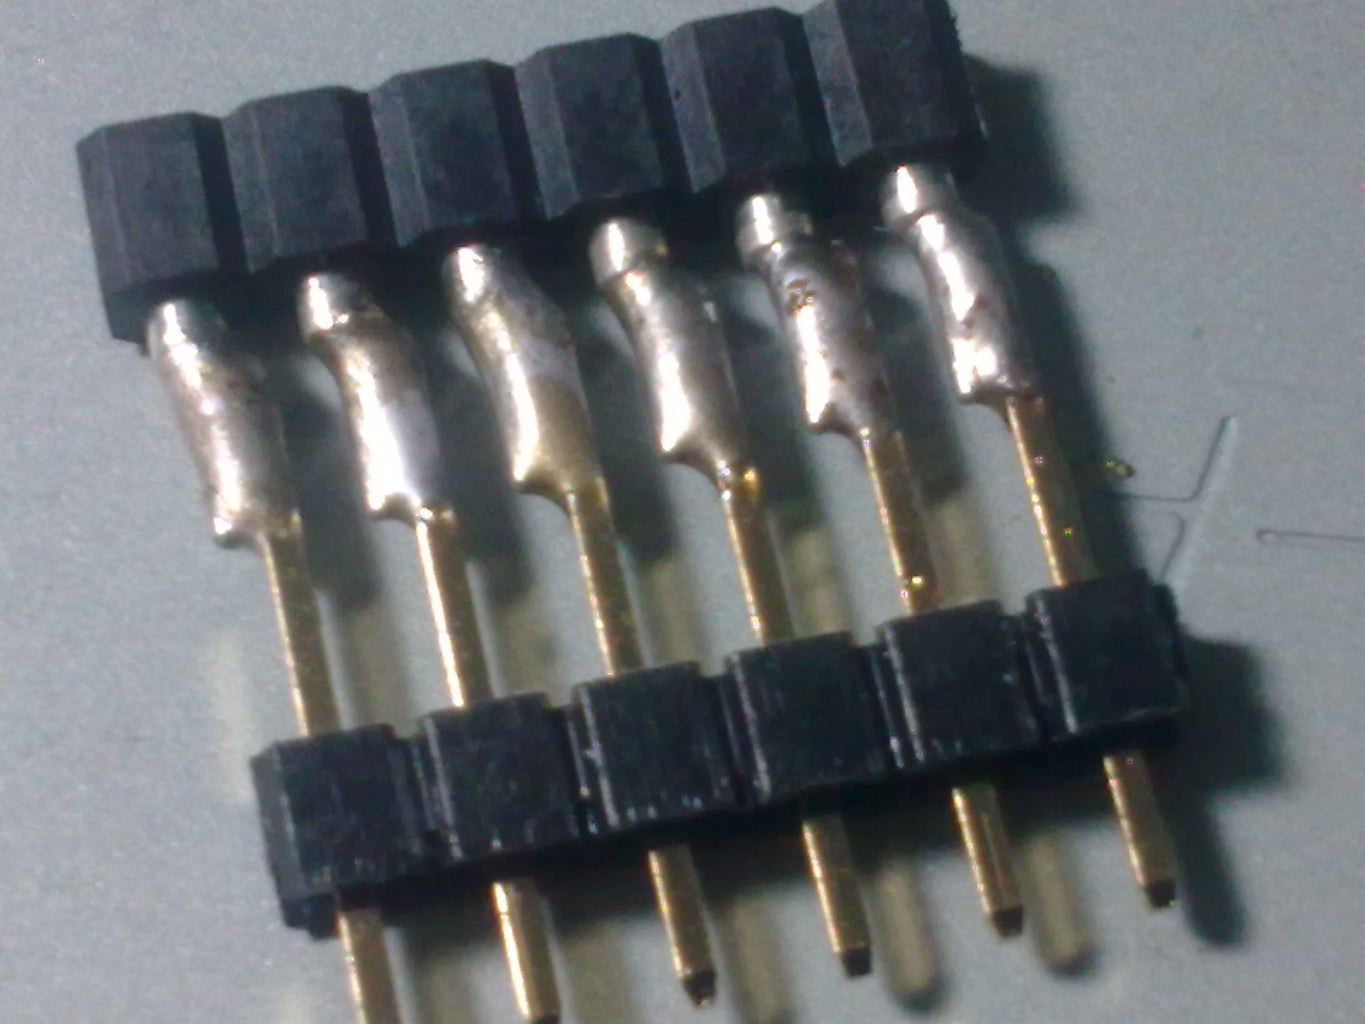
-Now to solder the pins, place them flat and side to side as shown at the photos with some tape.
-Place the tip of your soldering iron at the first joint and apply solder.
-Repeat till all the row its complete.
-If you turn the pins you will see that at this side the joint needs more solder, look at the fifth pic.
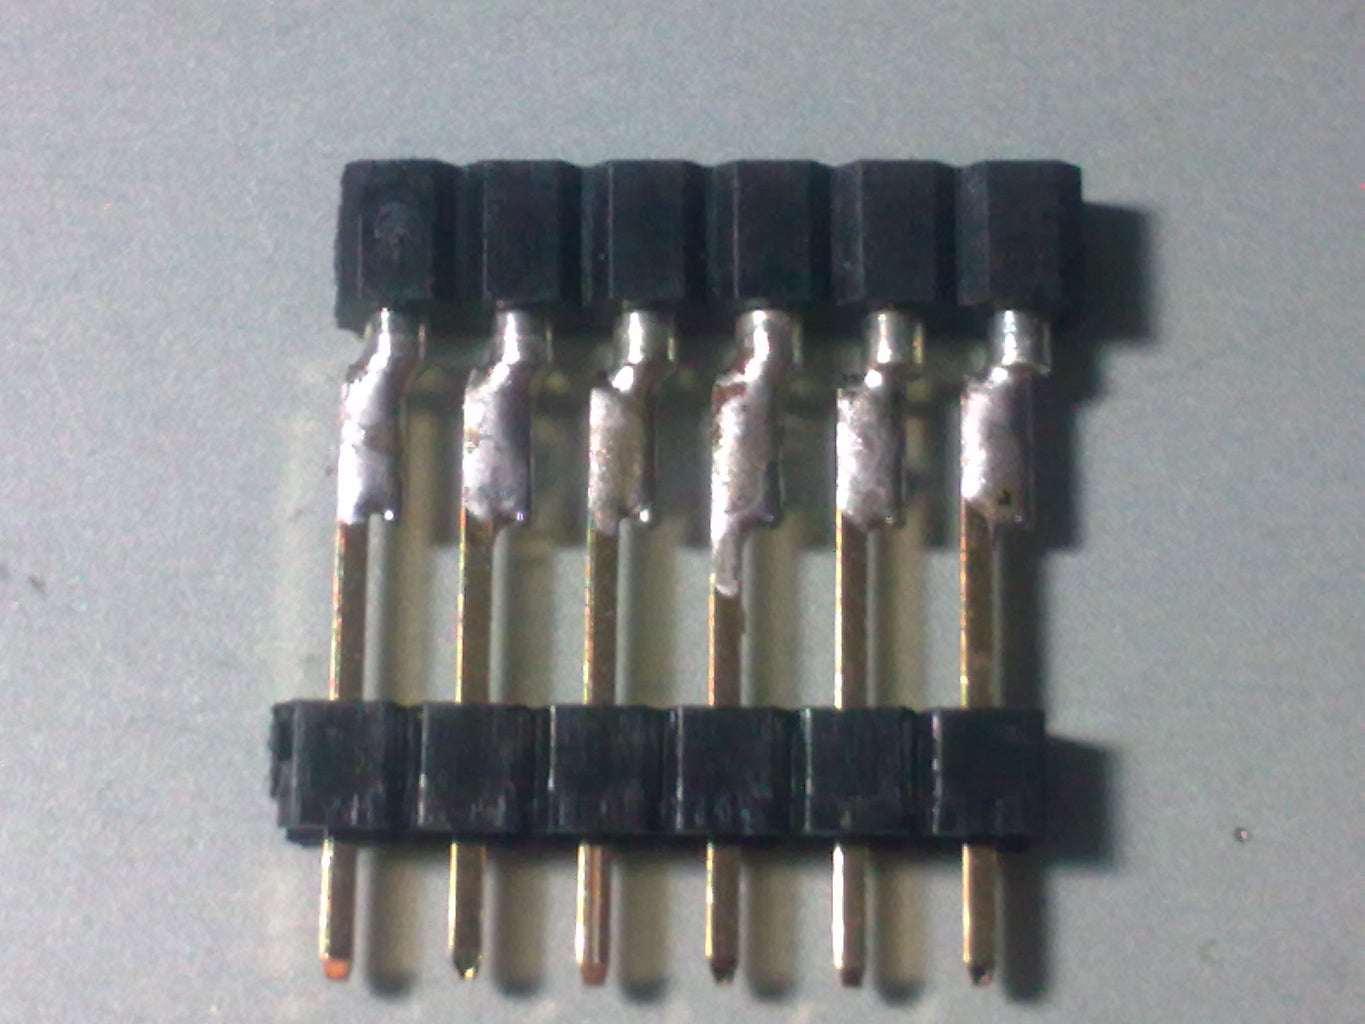
-Re-solder all pins. Wait till the joints cold and pull out the black plastic of straight header.
Now you´re done:) this is the first header. With this technique make all the headers you need.
Step 3: Solder in Your Board
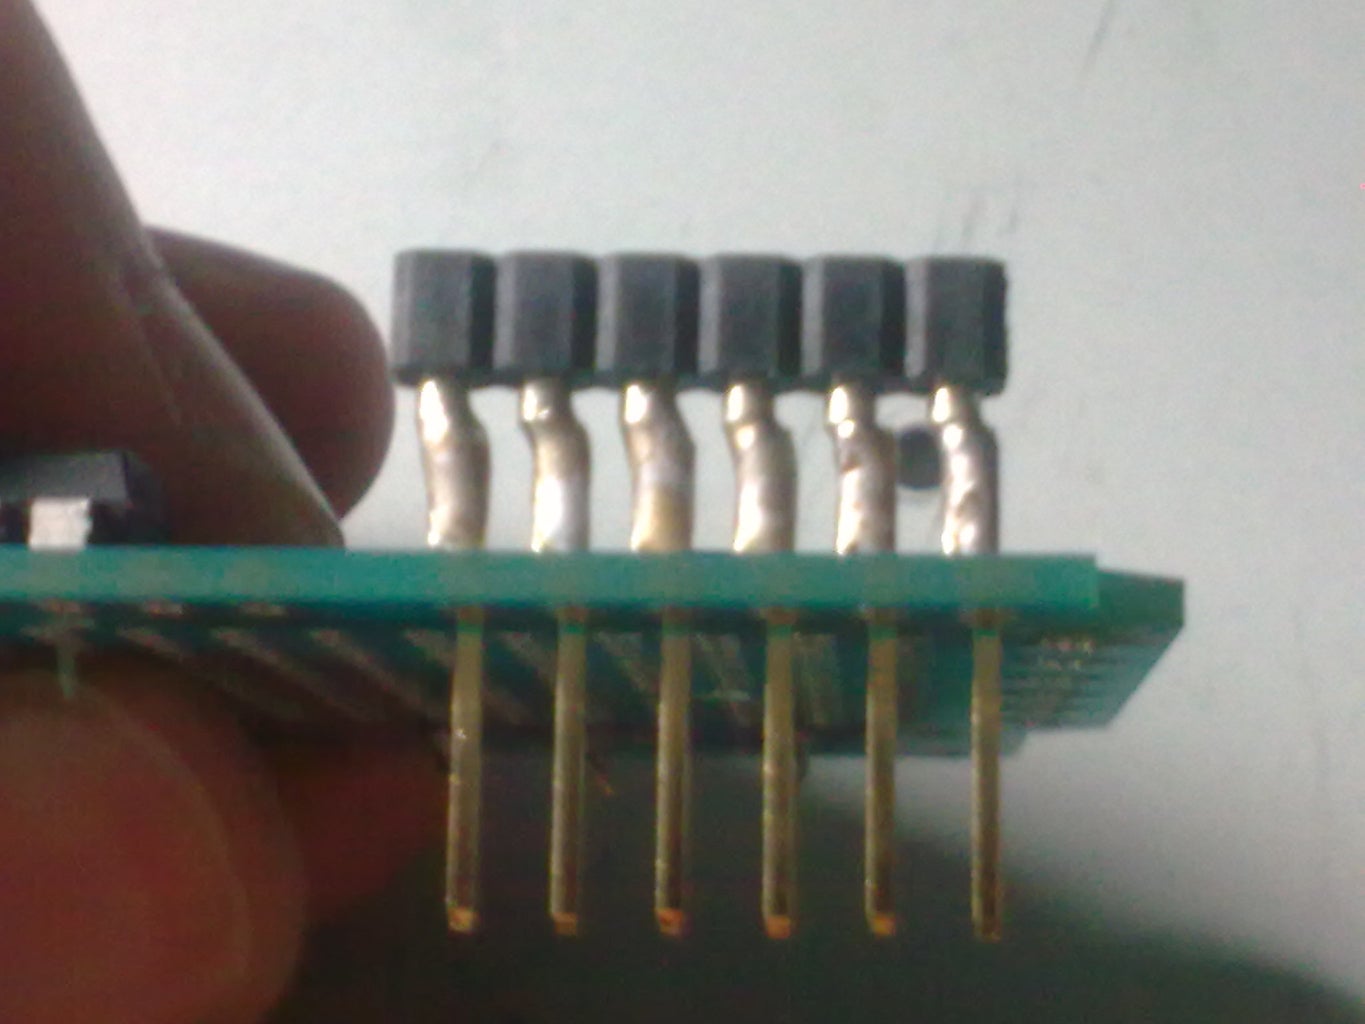


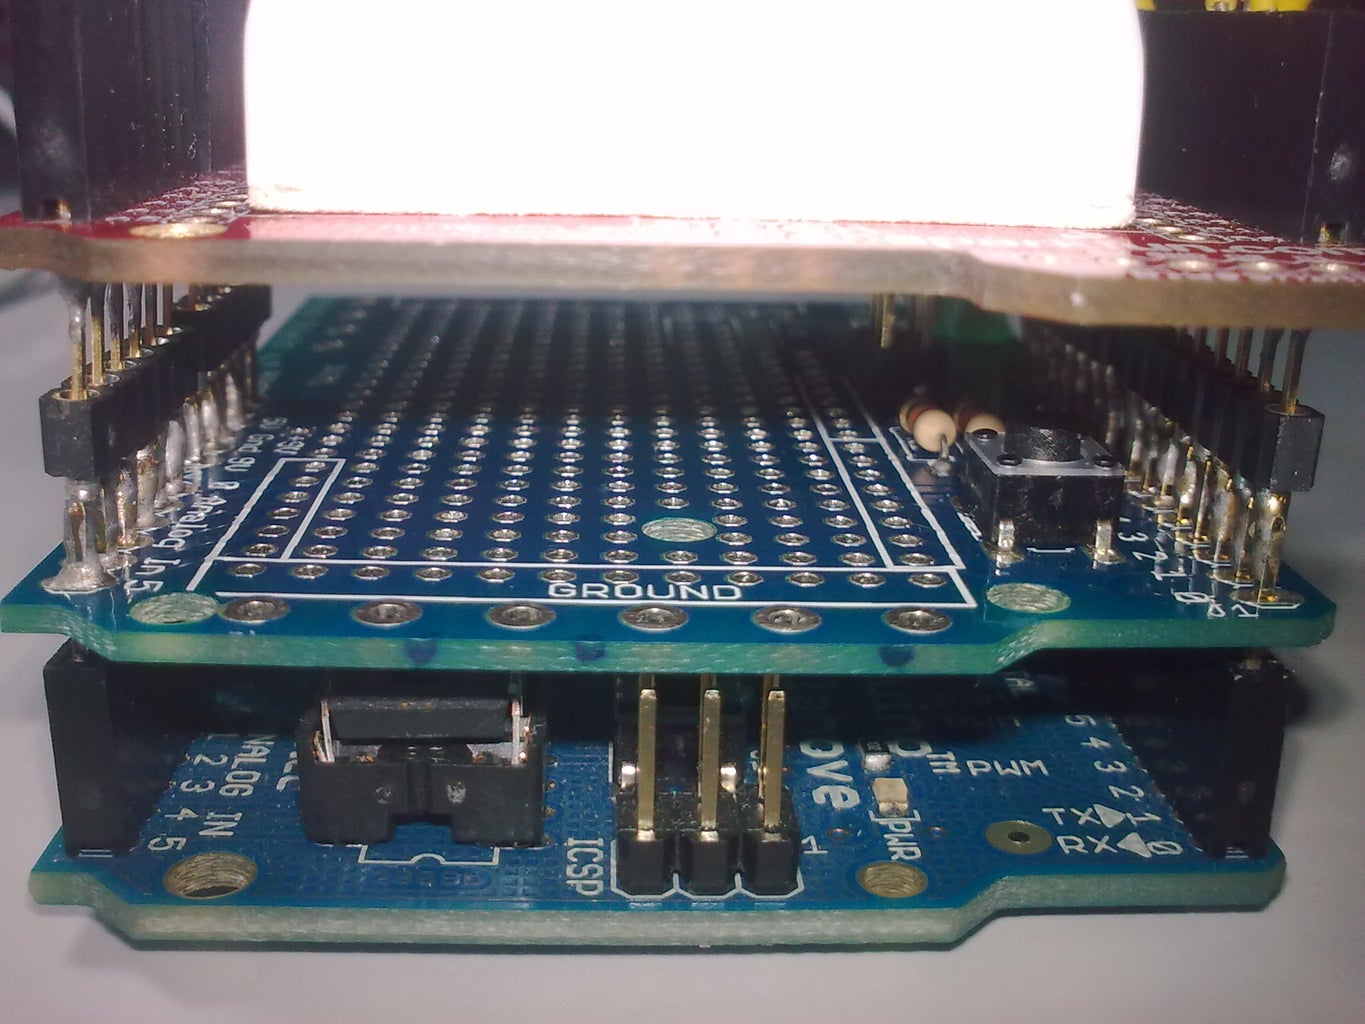
Note that the headers have a little offset, put all headers at the same way, so they match with any arduino compatible board.
To solder the headers to your board take the first one and solder it with the help of some tape.
Then if you have another board insert the headers to get the same angle to solder them.
Step 4: Ready to Use!!
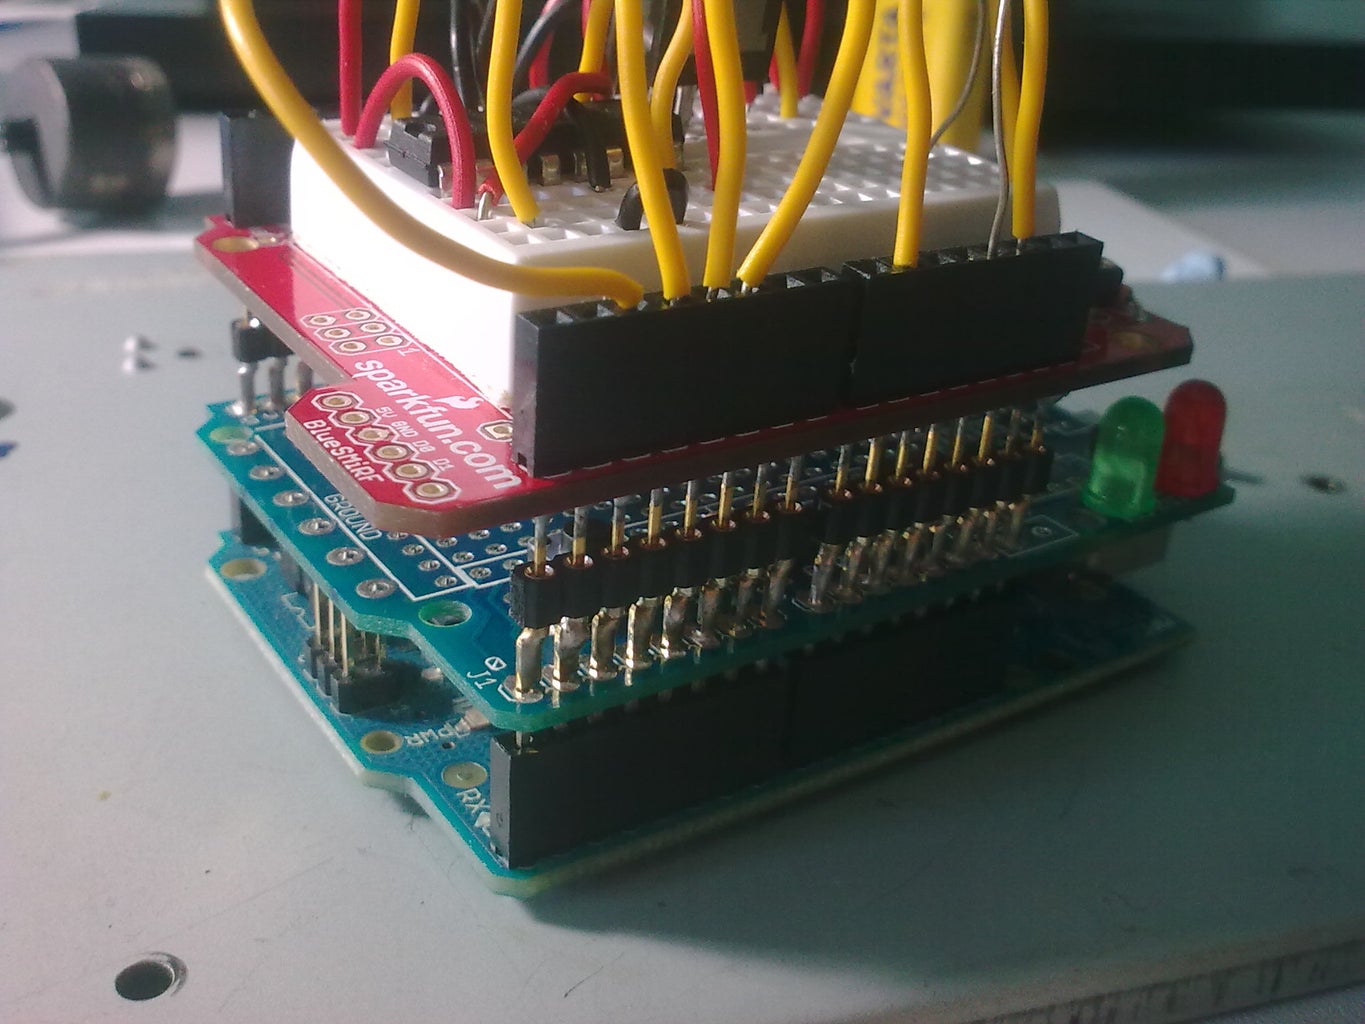
Now you have an arduino compatible stackable board!
The joints are very hard and durable.
If you are working with a prototype perforated board you can switch one heather to get the Arduino´s drill distance.
Enjoy it!!!


