

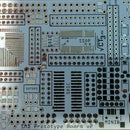
Introduction: How to Use Arduino ISP Shield 2.0


Check out my kickstarter campaign for the new model !
Turn our arduino into an ISP programmer to burn boot-loaders and upload code to Attiny85, Attiny84, Atmega328, Atmega1624, Attiny4313..
How To Burn Bootloader
In order to upload sketches via serial port you first need to burn the bootloader on atmega 328 or 168 chips.
Plugin your arduino uno to the PC.
Open Arduino IDE software.
Open File > Examples > ArduinoISP.
Select the items in the Tools> Board and Serial Port menus that correspond to the board you are using (uno or Leonardo) as the programmer (not the board being programmed).
Upload the ArduinoISP sketch. (CTRL+U).
Place ISP shield on the Arduino Uno with the chip installed.
In the Tools > Board menu, select uno if using 328 chip or deomletive if using 168 chip.
Select Tools > Programmer > Arduino as isp.
Tools> Burn booloader. Please be patient as it will take about 10 seconds. Programming light on the shield will turn on.
Done.
Now you can use serial programmers to upload sketches. Or replace your faulty chip on on anther uno board.
To Upload the sketch without burning the bootloader on atmega328 chips
Using isp shield you can also upload sketches directly to the chip without burning the bootloader.
Plugin your arduino uno to the PC.
Open Arduino IDE software.
Open File > Examples > ArduinoISP.
Select the items in the Tools> Board and Serial Port menus that correspond to the board you are using as the programmer (not the board being programmed).
Upload the ArduinoISP sketch. (CTRL+U).
Place ISP shield on the Arduino Uno with the chip installed.
In the Tools > Board menu, select uno if using 328 chip or deomletive if using 168 chip.
Select Tools > Programmer > Arduino as isp.
Open the sketch you want to upload on the chip (Eg. Blink sketch led=10).
Upload it using File > Upload using programmer. CTRL +SHIFT + U.
Done.
To upload sketch to Attiny85
This tutorial shows you how to program an ATtiny45 or ATtiny85 micro-controller using the Arduino software and hardware.
Software
You’ll need the Arduino software and a plugin to add support for the ATtiny45/85. Installation instructions for the Arduino software are available for Windows and for Mac OS X Linux
Download: http://ct3.eu/en/index.php?controller=attachment&id_attachment=2
The ATtiny45 / ATtiny85 Micro-controller
Here’s the pin-out of the ATtiny45 and ATtiny85:
attiny_44_84_Pinout
Installing ATtiny45 / ATtiny85 support in Arduino
* Ensure the Arduino IDE is NOT running.
* Download the Arduino-Tiny archive (ZIP-file).
* Locate the Arduino Sketchbook folder. This is the folder where the Arduino
IDE stores Sketches.
* Ensure the “hardware” folder exists under the Arduino Sketchbook folder. For
example, if the Arduino Sketchbook folder is…
C:\Projects\Arduino\
Ensure this folder exists…
C:\Projects\Arduino\hardware\
* Extract the contents of the archive into the “hardware” folder. For example,
if the Arduino Sketchbook folder is…
C:\Projects\Arduino
After extracting, the following files / folders should exist…
C:\Projects\Arduino\hardware\tiny\avr\license.txt
C:\Projects\Arduino\hardware\tiny\avr\platform.txt
C:\Projects\Arduino\hardware\tiny\avr\Prospective Boards.txt
C:\Projects\Arduino\hardware\tiny\avr\README
C:\Projects\Arduino\hardware\tiny\avr\bootloaders\
C:\Projects\Arduino\hardware\tiny\avr\cores\
The following folder should contain the source files for the Arduino-Tiny
core…
C:\Projects\Arduino\hardware\tiny\avr\cores\tiny\
* Create a new file named “boards.txt” in the tiny\avr directory. Following
from the examples above, the file would be here…
C:\Projects\Arduino\hardware\tiny\avr\boards.txt
* Open the “boards.txt” file and the “Prospective Boards.txt” file using your
favourite text editor.
* Copy board entries of interest from “Prospective Boards.txt” to “boards.txt”
(or copy the entire contents of “Prospective Boards.txt” to “boards.txt”).
Board entries are delineated by a long line of pound-signs.
* In the “boards.txt” file, change the “upload.tool” entries to the
appropriate value for your setup.
* Save and close “boards.txt”. Close “Prospective Boards.txt”.
* Start the Arduino IDE and ensure the new boards of interest are listed under
the [Tools] [Board] menu…
“ATtiny84 @ 16 MHz (external crystal; 4.3 V BOD)”
“ATtiny85 @ 8 MHz (internal oscillator; BOD disabled)”
etcetera
You are now ready to use Arduino-Tiny!
Uploading Sketch for ATTINY
Plugin your arduino uno to the PC.
Open Arduino IDE software.
Open File > Examples > ArduinoISP.
Select the items in the Tools> Board and Serial Port menus that correspond to the board you are using (uno or Leonardo) as the programmer (not the board being programmed).
Upload the ArduinoISP sketch. (CTRL+U).
Place ISP shield on the Arduino Uno with the chip installed.
In the Tools > Board menu, select Attiny85 @ 8mhz
Select Tools > Programmer > Arduino as isp.
Open the sketch you want to upload
Upload the sketch. (CTRL+U).
Done.


