Introduction: I2C Between Arduinos With Potentiometer and LED
By Caleb Crockett and Logan Dykes
This circuit is designed to let one board communicate to another. This one is designed to send a value from one to dim or brighten the other LED.
Step 1: Materials
You will need these items:
1) Breadboard
2) 2 Arduino Uno
3) One LED
4) Potentiometer
5) 220 Ohm resistor
6) Wires
Step 2: Connecting the Breadboards
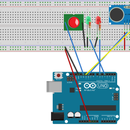
Connect the two Arduinos with wires going from A4 to A4 and A5 to A5. And also connect the grounds to the grounds. These are analog pins.
Step 3: Connect to LED
Place an Led on the bread board. Make sure you connect the anode to the ground and the cathode to the pin 11. pin 11 has pulse width modulation and can disburse electricity with different pulses. Also. place a resistor between the cathode and the pin 11.
Step 4: Arduino to Potentiometer
First, connect the left pin on the meter to ground and the right pin on the five volt power supply. Next, connect the middle to pin A0.
Step 5: Code for the "Slave Reciever"
// Include the required Wire library for I2C
#include
int LED = 11;
int x = 0;
void setup() {
// Define the LED pin as Output
pinMode (LED, OUTPUT);
// Start the I2C Bus as Slave on address 9
Wire.begin(9);
// Attach a function to trigger when something is received.
Wire.onReceive(receiveEvent);
//bit rate for data transfer over Serial communication
Serial.begin(9600);
}
void receiveEvent(int bytes) {
x = Wire.read(); // read one character from the I2C
}
void loop() {
//potentiometer value from sensor
int ledPWM = map(x, 0, 255, 0, 1023);
analogWrite(LED, ledPWM);
Serial.print("X is: ");
Serial.println(x);
Serial.print("PWM is: ");
Serial.println(ledPWM);
delay(1000);
}
Step 6: Code for the "Master Sender"
// Chapter 7 - Communications
// I2C Master // By Cornel Amariei for Packt Publishing
// Include the required Wire library for I2C
#include <wire.h>
int x = 0;
int sensorPin = A0;
int sensorValue = 0;
void setup() {
// Start the I2C Bus as Master
Wire.begin();
Serial.begin(9600);
}
void loop() {
sensorValue = analogRead(sensorPin);
Serial.println(sensorValue);
Wire.beginTransmission(9);
// transmit to device #9
Wire.write(sensorValue);
delay(1000);
Wire.endTransmission();
// stop transmitting
}
Step 7: End Result
Now both of the Arduinos should be connected and ech should be hooked up with the LED and the other to the potentiometer. Make sure you have the right code uploaded to each. The slave is the LED and the Master is the meter.


