

Introduction: Import McMaster-Carr Components Into Tinkercad


Tinkercad is a wonderfully simple 3D rendering program that comes with a wide variety of 'in-house' shapes that you can use to build your creations. These creations can then be 3D printed OR turned into Minecraft mods.
I recently did an instructable for how to make a 3D printed bobblehead in Tinkercad and I needed to create a specific size of 3D printed spring in order for the head to bob correctly. I found that the Tinkercad 'in-house' spring didn't 3D print very well, so I decided to figure out how to import a different spring file to try.
Enter McMaster-Carr. McMaster-Carr is an online supplier of EVERYTHING hardware. It's the BEST place to buy nuts, bolts, fasteners, fittings, springs, etc. They can be a little more expensive than other suppliers, but I find their exceptional customer service and easy return policy makes that extra expense worthwhile. Anything I order from them, usually arrives the very next day. Can't beat that!
The other great thing about this site (that is relevant for my project and this tutorial) is that they also provide downloadable 3D CAD models/files for many of their hardware parts! The only downside for Tinkercad users is that they don't provide the models in either of the two 3D file types that can be imported directly into Tinkercad (.stl or .obj).
In this instructable, I'll show you how to get around this by using Autodesk's Fusion 360 – a software that's FREE for students & educators as well as hobbyists & small businesses to download – as a file translator so we can save the McMaster parts in a file format that Tinkercad can import.
Let's get started!
Step 1: Find Your Part & Number

The first thing to do is visit the McMaster-Carr website and find the part, or parts, that you'd like to import into Tinkercad. There are so many fun ones, this may take awhile... :D


You can do this by clicking on the categories listed on the left side of the main page, or by typing the part category into the search bar.

Once you're at the category page, there will be a list of available styles and sizes. Find the size you want and click on the part number that is highlighted in blue.
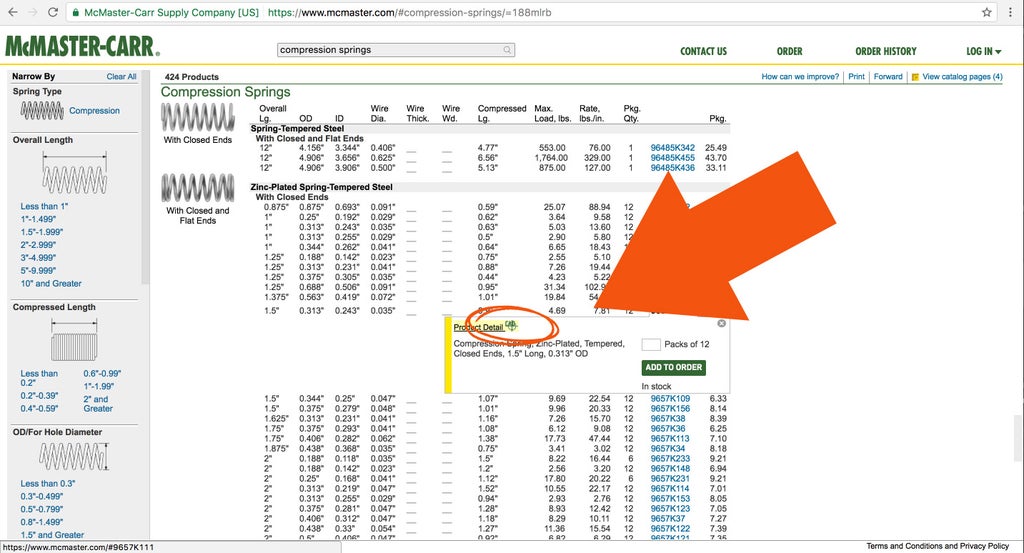 This will bring up an inset box with more information. If there is a CAD symbol (the letters CAD inside a 'crosshairs' style circle and crossed lines graphic) to the right of the words 'Product Detail', this means that there IS a 3D CAD file available for that part. If there is no symbol, then there is no file.

If there is indeed a symbol for the part you want to import into Tinkercad, you can click on the Product Detail link to see a drawing of the part (scroll down a bit) to make sure it's what you want. If it is what you want, write down the part number along with its dimensions and a description of what it is.
Repeat this for any other parts you want to import.
Step 2: Download, Install, and Open Fusion 360
Now that you have your list of McMaster-Carr part(s) to import, it's time to download, install, and open Fusion 360 (if you don't already have it).
Remember that this program is FREE and that even though we are only using it to translate the part file(s) into those readable by Tinkercad, it's a great program to have and one that you may want to start exploring as a natural next step, if you're ready to develop your 3D rendering skills beyond Tinkercad.
Or of course you can just keep it on hand as a file translator!
How to download and Install Fusion 360


Click the category below that best describes you, to sign up for free: as a Hobbyist / Enthusiast / Startup or as a Student or Educator.
- Follow one of the links above to download the app (don't use the App Store on Mac).
- Enter your email and download the free trial.
- Install and setup a free Autodesk ID account.
- When you open Fusion, select the Trial Counter in the upper toolbar (it tells you how many days are left on your trial).
- In the next dialog box, select "Register for Free Use".
- Sign up as a Start-Up or Enthusiast (Free). You can also Sign up as a Student or Educator (Free) if you're a student or educator at a registered institution. This will give you free use of Fusion 360 for as long as you need it (not just a 30-day trial).
- Select the "I accept Terms and Conditions" checkbox and click Submit.
- Click on the downloaded file and follow the installation instructions.

Once you've installed the program, go ahead and open it. It will ask you to login, and once you have, the screen pictured above will appear.
NOTE: Once we're done using Fusion for this instructable, if you're interested in learning how to use it for more than just file translation, check out my teammate JON-A-TRON's free class on 3D Printing and how to get started rendering in Fusion 360.
Step 3: Generate Your McMaster-Carr Part File for Tinkercad Using Fusion 360
Now that you have a Fusion 360 window open, it's time to insert your McMaster-Carr part for file translation!

Follow the arrow above and click on the INSERT drop down menu.

Choose 'Insert McMaster-Carr Component'.

A mini browser window will appear in the middle of the screen that takes you to the McMaster-Carr website. Type your part number into the search bar and hit enter.
NOTE: The reason that I had you find your desired parts on their website before this step is that there is no back button, so if you click on the wrong part, you have to start all over again with the insert process. Having the part numbers ahead of time helps prevent this from happening.
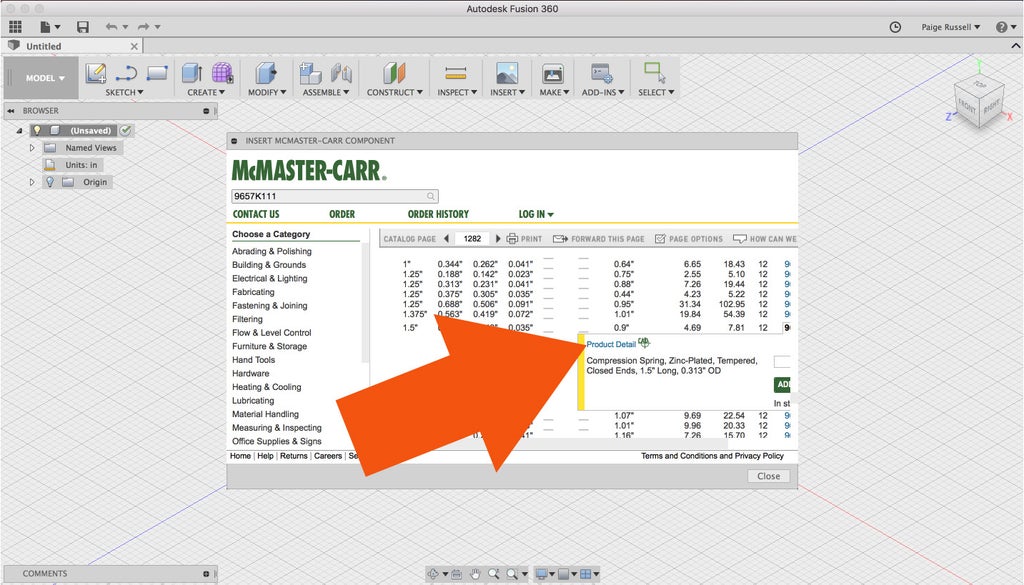
Entering your part number and hitting 'enter' will bring up the inset part info box. Click on the 'Product Detail' link.

The default file setting for the McMaster parts is '3-D Solidworks'. Use the dropdown menu to change this to '3-D STEP'.

Click save.

This will insert the part right into your Fusion workplane. Click OK on the window that pops up with it. This will de-select the part and close the unneeded window.

There are just two more quick steps to converting the .STEP file to a Tinkercad friendly .stl file.
First, click and drag your curser over the whole part to select it. It should all be blue if you do this correctly. If only some of the part is blue, try selecting again. The entire part must be blue.

Next, click on the 'Make' drop down menu.

Choose '3D Print'.

This will bring up a window on the right side. Make sure the 'Send to 3D Print Utility' button is deselected (not selected).

Finally, click on 'OK'. This automatically saves a 3D model .stl file of the part to your desktop that you can upload to Tinkercad!!
Repeat this process for any other parts you would like to upload.
Step 4: Import Your McMaster-Carr Part Into Tinkercad
Now that you have an .stl file of your McMaster-Carr part(s), the import process into Tinkercad is super simple.
I'm working off an assumption that if you're interested in this instructable, you already have some Tinkercad experience. If this in NOT the case, then I recommend checking out my co-worker's great class: Easy 3D Printing that shows you the basics of Tinkercad and 3D printing before trying to import the parts!
Ok, let's get to business.
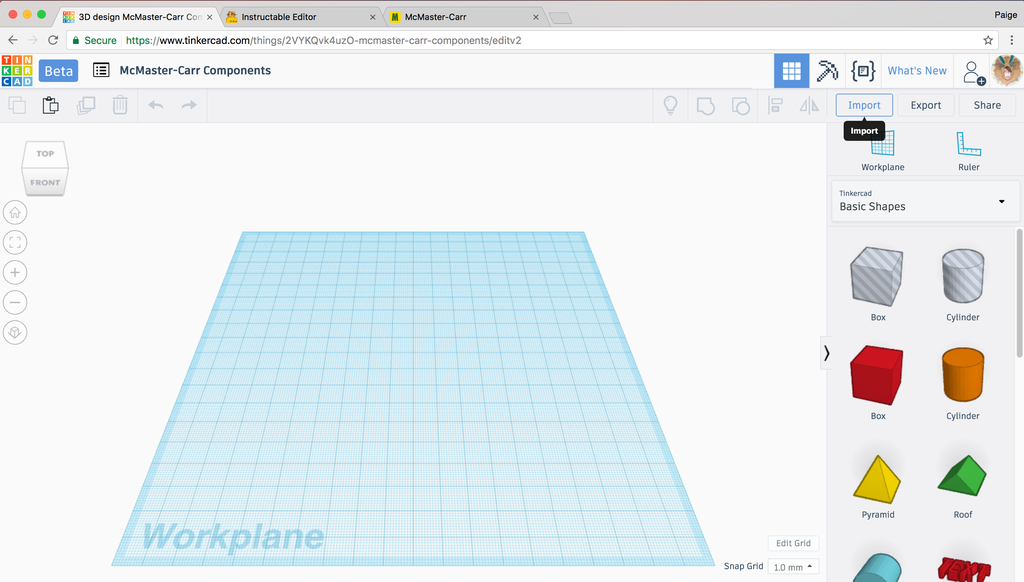
Open up Tinkercad and create a new design.
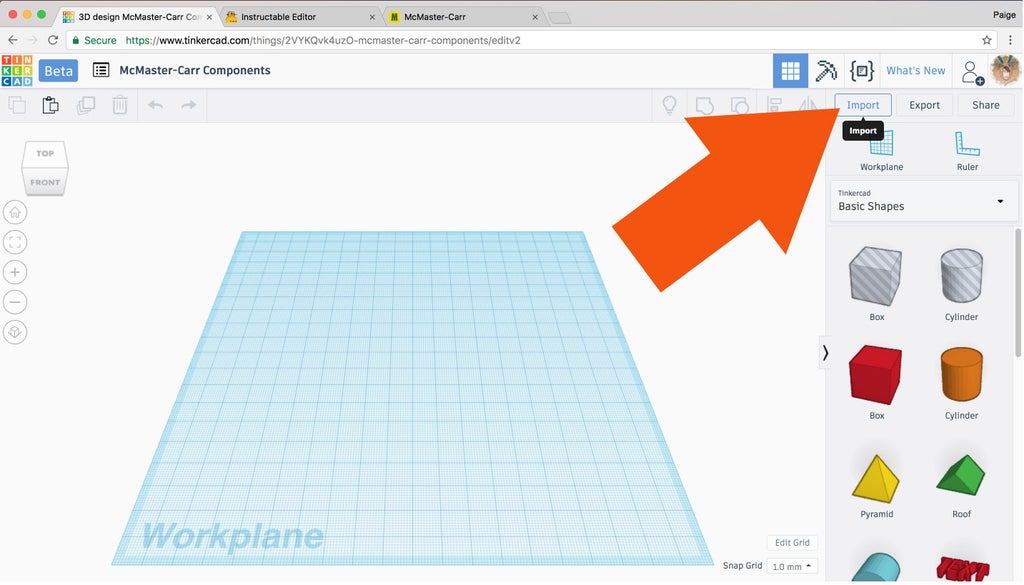
Click the 'Import' button that's in the top right corner of the window.

This will bring up a window that provides a browse button so you can upload your part file.
NOTE: It also lists the types of files (and maximum file size) that you can upload into Tinkercad.
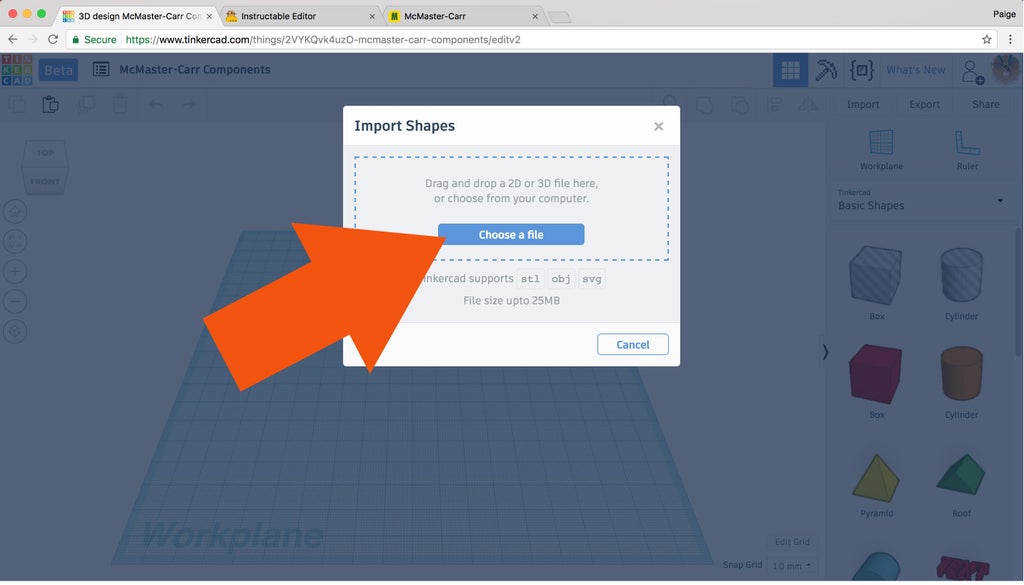
Click the browse button.

Select your part .stl file and click 'OK'.

Another window will pop up that shows you the file name, scale percentage, and dimensions. Click 'OK'.
Something to keep in mind is that Tinkercad's measurement default is millimeters. So if when you saved your file in Fusion, and it was set to inches, your imported part will be REALLY tiny!
This is A-OK, because we can scale it without losing quality. We can either do that by increasing the import scale percentage before hitting 'Import', OR do what I do in the above video and just hold SHIFT to maintain the object's proportions and scale it once it's in the Tinkercad workplane.


Ta da! Now you can use your part to make new designs by either:
- Incorporating the new part into existing Tinkercad shapes to be 3D printed
- OR by designing around it, and then ordering the actual McMaster-Carr part to add to your 3D printed design once it's printed
(This is why you would want to write down the dimensions of the part, so you can scale it properly in Tinkercad and have it line up with any 3D printed parts.)
Have fun with all the new imported shapes everyone and please let me know if you have any questions!! I would also love to see screen grabs of what you make with your new skillz!!
Happy making!
Paige


