

Introduction: Indoor Automatic Plant Watering System

This simple automatic watering system for indoor plants is very adjustable, looks great, is easy to make, and was relatively cheap. Some of the items used are probably in your house or apartment right now.
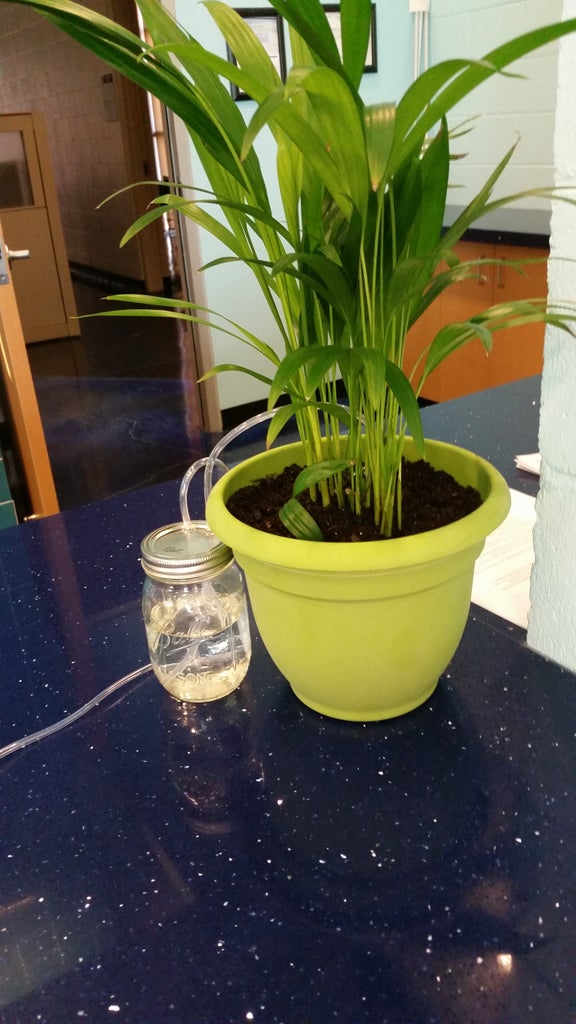
Air, supplied by a small fish tank air pump, travels through a tube and into a jar. As pressure builds, water is forced out through another tube and into your plant's pot.
The most expensive thing and the only thing I didn't have on hand was the timer. I bought one that I could adjust by the minute. ($5)
Required materials
- Plant
- Pot
- Soil
- Timer (able to set minutes)
- Fish tank airline tubing (1/4 irrigation tubing should also work, but won't look as nice)
- Fish tank aerator pump
- Jar
- Hot glue gun
Step 1: Pot Your Plant
Find a nice pot, and plant your plant.
Step 2: Drill Holes in the Top of Your Jar
I drilled my holes close together, but not so close that there was any change of the metal bending or breaking. I ended up using a 7/32 inch drill bit for my tubing. Remember, this is a thin lid of a jar, and the seal around the rim won't be great if it's bent. So take your time, slowly working your way through the metal, only applying slight pressure. It will take a while. You also get very smooth edges around you holes, instead of jagged ones.
Step 3: Insert Your Tubes and Seal the Holes


Insert your tubes through the two holes you just made.
The tube that water will flow up and out of the jar must be at the bottom of the jar. You can use a small amount of glue to keep the tube on the bottom of the jar if necessary.
The tube that air will flow through can either be at the bottom or at the top completely out of the water. If it is at the bottom, you get bubbles when the air is pumping, but you will need a back-flow valve ($2 at Petsmart). If your air tube isn't in the water, you shouldn't need a back-flow valve unless your jar is ever knocked over.
It took me few tries get get a good seal around these holes with hot glue. It might be easier to use epoxy or silicone. I finally got a good seal with hot glue when I quickly glued around the top side while the glue on the bottom side was still hot.
Sealing the holes perfectly isn't completely necessary, but it does help. A dripper that is flow limited (a 1 GPH dripper) will keep the water flow consistent. We'll talk about this in the next step.
Step 4: Assemble Your Dripper

Putting the dripper on the tube is straightforward, but adjusting the amount of water that gets to your plant can be difficult. It is best to buy a timer (mentioned later) that you can adjust by the minute for this reason.
Make sure that your dripper(s) are close to the base of your plant. If you want to add additional drippers, go ahead! Just like you would in a garden. Just remember that your air pump probably isn't very powerful, so make sure it can handle the extra load. 1/2 GPH drippers are probably the best.
Step 5: Set Set Up Your Air Supply


I used the cheapest pump I could find. If you plan on using a bigger jar or watering more than 2 plants, you should take a step up to the 10 or 15 gallon tank model. You can find these at Walmart for cheap.
The gang valve I had pictured may not be completely necessary, but it can slow down the flow of air, and therefore water. It works best with a good seal around your holes in the top of your jar.
The holes on the top of the jar won't ever seal perfectly, metal just doesn't like to stick to things. So the best way to go is to let the air pump push all the air it can into that jar, and to have a dripper that limits water flow, preferably a 1/2 GPH dripper. You can adjust the amount of water given to your plant by adjusting how long your timer is on. Once again, a timer that can be set by the minute is the best.
Step 6: Set Your Timer

Figure out how much water your plant needs daily. Then, see how long it takes your dripper(s) to put out this water. Set your timer accordingly.
Step 7: Supervise Your Plant!
This set-up with a regular mason jar will last my plant about 4 days.
Make sure you don't over or underwater your plant, and adjust airflow and the timer accordingly.
Worst case scenario, you dump a jar full of water in your plant. Probably no office or counter flooding.


