

Introduction: Inexpensive Macro Lens for Your Cell Phone or Tablet


There have been many different Instructables about this subject and none so far have been the same as what I have been doing for the past four years, so I thought I would let the maker community in on my secret.
With the maker's habit of acquiring and tearing apart disposable cameras, I have been using the various parts for projects, even used the flash units by embedding them into a painting, connecting them to a micro-controller and motion detectors; which flash in a random sequence when a view steps in front of the piece. I have made stand alone motion detectors connected to the flash units, triggered when motion is detected, I might do an Instructable on that project someday. The components I recover from these cameras include small springs, lenses, gears, capacitors, flash units, circuits that can be re-tasked. I have even used the circuit boards from these cameras to drive electroluminescent wire.
I discovered that when the objective lens of the disposable cameras is placed over the lens of my cell phone, I was able to take stunning macro pictures. This led me to hours of macro photography with a cell phone. Having a couple of patient dogs helped in this obsession, and having my phone with me at all times, meant that I was ready to do a macro shot at a moments notice.
My first attempt was with a Blackberry; since that was the phone I had at the time. The Blackberry did not have an auto focus feature, so getting the focus was a bit trickier than it is with my current Iphone. Getting a in-focus picture was not too hard but was trickier; there are ways of getting the right focus with any phone which has a camera and no auto-focus, which I will describe later.
Items needed for this project are:
1 Disposable camera Free
1 Museum putty $1.79 approx.
1 Paperclip optional (for distance gauge)
1 masking tape optional (for distance gauge)
1 Cell phone or table with camera
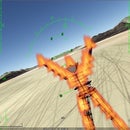
The image of the bee was one of the first quality pictures I captured of a moving bee.
Note: Images attached to this instructable are under copyright Mark S. Drummond 2013
Step 1: Disposable Camera


When I first started using the parts from disposable cameras I used to get them from Costco's photo lab, they were recycling them and did not care and I was not there all the time taking them; the pickings are harder now that they have discovered there is a use or that people have found a use for them.
Removal of the lens from the camera is simple and can be done by hand. Be careful however, if using your bare hands because there can be sharp edges to the plastic. If you use caution when disassembling you can recover the very fine springs, what you do with them is left to your imagination.
Remove the battery, and the circuit board is held in place by very small plastic tabs and a spring or two so it is easy to remove. I
keep all springs, lenses, gears, batteries, and the circuit boards.
NOTE: The capacitor may have a charge still in it, so do not touch its leads without discharging it first. Most would tell you that it carries a deadly charge, but they are small capacitors and though the voltage is around 220V, the most damage would be a small shock and a bit of surprise if you do discharge it accidentally.
Pop out the lens housing and remove the lens. There are different sizes of objective lenses and it is more of a preference than anything else when selecting one.
In just a few moments, you will be photographing everything around you with your eye set to macro photography.
Step 2: Attaching to Phone or Tablet


This is so simple it is almost embarrassing to write this part. Using a small piece of Poster Tack, place a bit on the underside of the lens on its edges. Some of the disposable camera lenses have wider flange around the edge which is ideal for placing the putty.
Do not worry if it is not clean or perfect, as long as the lens stays put and the putty is not obscuring the view, it will work.
Tips on photography:
Good lighting is important, however the camera in the phone cannot handle bright reflections of highlights so avoid shiny surfaces and reflections, or you end up with digital burning.
If your phone does not have an auto-focus feature, you can use a paperclip to gauge distance. First measure the distance between the phone and an object when it is in focus, then bend the paperclip so that it is "L" shaped with an arm that extends the length of the focal distance. By taping the short arm to the back of the phone it can be held flat until you need to use it for measuring, at that point, just rotate the arm out for distance measure.
Bracing is very important specifically if there is not an auto-focus feature on your phone. Good luck taking pictures, it is more fun than you might think. I have taken thousands of pictures this way and always have a lens on hand should there be any macro worlds worth exploring.
Note: Images attached to this instructable are under copyright Mark S. Drummond 2013 All were photographed with a cell phone camera.

Participated in the
The Photography Contest


