

Introduction: Insulated Bamboo Walls


This Instructable describes an innovative way to build walls using bamboo or wood saplings and bags of insulation. We’ll be using bamboo for this Instructable since it is rapidly renewable, low cost and readily available in many parts of the world. Let’s start with some background information to better understand what is involved.
People often wonder how to build interior walls on earthbag and strawbale homes, which are about 18” wide once plastered. These building methods create strong, stable walls that are ideal for exterior walls, but they take up too much space for interior walls. Thinner walls are preferred.
There are numerous ways to build interior walls. The most common method -- wood framed walls -- has numerous drawbacks. Lumber is expensive and, at least in the U.S., is often harvested from unsustainable sources that devastate forests and then shipped hundreds or even thousands of miles. Awareness of this issue is creating a growing demand for more sustainable and lower cost alternatives. (Plus, a lot of the wood being sold nowadays warps and twists badly.)
The following suggestions may not meet building codes where you live. Always check with local building authorities before you begin any building project. There are still quite a few areas with minimal codes, and this article is written for those who are free to build as they please. Join the discussion on Counties with Few or No Building Codes.
Here’s a short list of low cost, sustainable interior wall options:
- wood pallets or recycled wood: they can be filled with straw/clay (straw mixed with a slurry of clay) or other types of insulation for soundproofing
- locally sourced peeled wood poles milled on one side, possibly using a chain saw milling guide or power jointer
- wattle and daub: mud-covered woven branches is one of the oldest building methods known to man. Straw can be added between the branches for soundproofing.
- insulated bamboo walls (the method discussed in this Instructable)
Insulated bamboo wall summary: The general process involves tying or lashing bamboo frames together – one frame for each side. Burlap or poly bags with insulation are sandwiched between the frames and tied together. The finished wall is plastered with earthen plaster or lime plaster. Here's a short YouTube video that shows the main steps.
Primary benefits: Extremely low cost (could be built almost for free if you have a source of bamboo and free or recycled bags); simplicity of construction (only a few tools are required, and the process is simple enough that anyone can do it); soundproofing between walls using rice hulls or other types of insulation in the bags; non-toxic (no offgassing of toxic fumes); finished interior walls match plastered earthbag walls; you can run electrical wiring through the wall and attach electrical boxes to the sides of bamboo poles.
Tools and supplies: Saw, tape measure, level, galvanized wire or baling twine, wire cutter pliers if you use wire, knife if you use baling twine, insulation, polypropylene or burlap bags, 1”-2” diameter bamboo or saplings, deck screws and drill
The photo shows a small prototype.
Step 1: Build the Frames

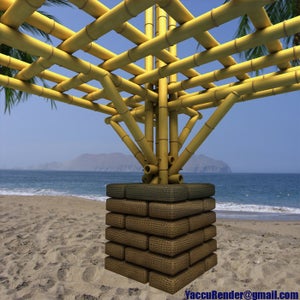
Once you’ve decided where to put your walls, the first step is to build the frames. A good size for interior walls is 1-1/4” vertical bamboo by ¾” horizontal bamboo. Use larger 2” bamboo on exterior walls. Measure and cut the bamboo to length, and assemble the walls on the floor or preferably on sawhorses with boards set up between. Cut the bamboo about ½” shorter than the space it’s going in so you can tilt the wall into place. The drawing shows the frame tied together with a space left for a door. (We’ll cover the door in the last step.) Build the frames using a convenient spacing that matches the size of your bags. In this case we’re using bamboo set on a 24” x 24” grid to match 24” wide bags. Note: inset perpendicular bamboo pieces about 2” around the perimeter to allow space for lashings.
Tie frames together with twine or wire.
Twine method: Use a knife and baling twine or cord. Twine or cord is easier to use than wire. Lash the bamboo together with square lashings as explained on Wikipedia . The second photo below shows a square lashing on wood poles (always peel the bark off first).
Wire method: Use wire cutter pliers and approximately 16 gauge galvanized wire. Twist the wire until every joint is tight.
Note: The drawing shows lashings as "short ties."
You’ll also need to add longer ties for joining the two frames together. Space the long ties in a grid about 2’ apart, and make sure you allow enough length to tie knots. Twine length will depend on the width of the wall and the tying method. Experiment a bit to see what works best for you. Assembling the walls on sawhorses makes it easier to tie the frames together, which is discussed in Step 3.
Step 2: Add Bags of Insulation

Add the same quantity of insulation to each bag. Use a bucket or other measuring device so walls are a consistent thickness. 2”-3” of insulation should be adequate for interior walls. You can use rice hulls, perlite, cellulose, loose straw, among others. You could use flakes of straw, but it would be awkward securing them in place. Use what is low cost, sustainable and locally available.
You can adjust the level of insulation in the bags. For instance, you could add extra insulation on bedroom walls and exterior walls, or use little or no insulation on others. It’s best not to insulate plumbing walls so you always have unhindered access to the plumbing for future repairs.
Step 3: Tie the Frames Together

One good method is summarized as follows: a) attach the twine to the first frame; b) place the bags of insulation; c) set the other frame on top; d) working from below (under the sawhorses) pass the twine up and over the 2nd frame and tie to the first frame. This makes it easy to cinch the frames tightly together to make a stronger wall. Make sure you build the walls square so they fit correctly. The key step is making the diagonals – the distance between the opposite corners – the same length. (Some details omitted for brevity. Consult a carpentry book if needed.)
Step 4: Set Walls in Position and Build Door Headers

Draw plumb layout lines on the walls with a level and then snap lines in between on the floor and ceiling. This helps ensure the bamboo walls are in one plane.
Now you’re ready to tilt the walls into position and secure in place with screws. Get a helping hand with this step. One person steadies the wall, while the other person pre-drills and adds screws. (Two cordless drills works best.) Adjust the wall as you go so it aligns with your layout lines.
Build the header over the door after the walls are screwed in place. Simply add a few pieces of bamboo above the door to join each wall together. Make sure the door opening is plumb, square and the necessary size so the door will fit correctly. Then install the door buck. Make the door buck the same size as the finished wall thickness, allowing for plaster thickness on each side. In other words, the final plaster will be flush with each side of the buck. You can also curve the plaster to meet a narrower buck if you prefer rounded edges.
The last step (not shown) is to add plaster mesh and coat the walls with earthen or lime plaster. Attach plaster mesh (chicken wire, fishing net, etc.) to the bamboo with small nails or staples. A staple gun works best. You can add optional trim around the door and floor, but it’s not necessary if you do a neat job.
Step 5: Conclusion
For more information, my YouTube Channel has dozens of short videos showing every step of earthbag building. And our Earthbag Building Blog , the number one blog on the subject, covers every aspect of building with bags in detail.
One final note. This insulated bamboo wall building system can be used on exterior walls. In fact, that’s how I initially conceived the idea. It sprang from my work with architects Diego Lastres and Daniella Corvetto to develop post-tsunami bamboo housing in response to the Asian tsunami. If you’re interested in this possibility, you can order the back issue from The Last Straw journal :
Article title: Post-Tsunami Affordable Housing Project: Bamboo Design
by Owen Geiger, TLS Correspondent, Diego Lastres, Daniella Corvetto


