

Introduction: Intermediate Milling


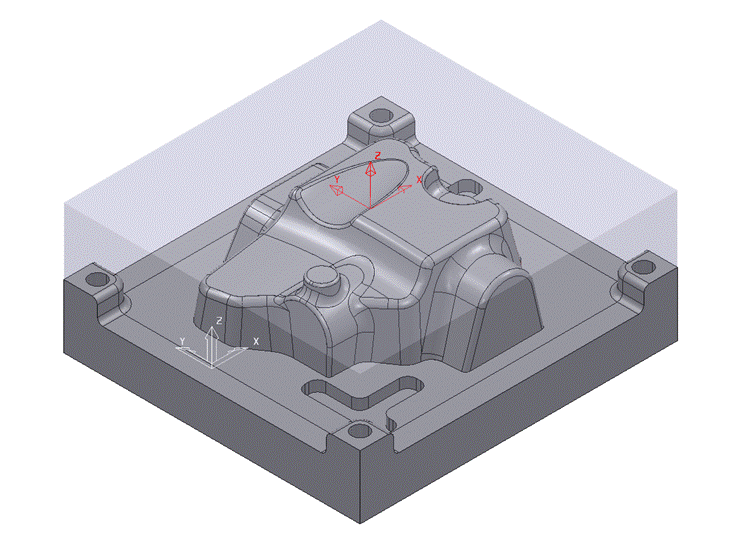
In this second lesson, we will take a deeper look at some of PowerMill's traditional roughing and finishing strategies, while also exploring the world of 2.5D milling in PowerMill. While this part differs in many ways from the last, we will continue to utilize the same workflow to systematically approach the programming of this part.
Step 1: Setup
- Open
PowerMill, and drag and drop model into the graphics area
- Model file will need to convert

We need a new workplane to help us machine this part.
- Box select the entire model
- Select
the Create Workplane drop down menu from the home tab
- Select the Top of Selection Workplane
- Activate the new workplane and name it Top
We need to create a block to machine our part from.
- Select
the block option from the home tab
- Calculate the block size
- Expand
the block 5 mm in the z-direction
- Lock the x and y minimum and maximum values
- Lock the z minimum value
- Enter an expansion of 5 and recalculate the block
- Accept the dialog box
Let’s calculate the safe area for our tooling.
- Open
the toolpath connections dialog from the home tab
- Select calculate on the right-hand side of the dialog box in the safe tab
- Apply the changes and close the dialog
Now that our setup is complete, we are ready to begin creating tools and toolpaths to program our model!

Step 2: Roughing
First, we’ll need to create a roughing tool for the first roughing pass.
- Create
a Tip Radiused Tool
- Diameter: 25 mm
- Tip Radius: 2 mm
- Length: 35 mm
- Add appropriate shank by selecting the shank tab and pressing the add shank button
- Name the tool D25TR2 and close the tool dialog
Now that we have our tool for the first roughing pass, we can create the necessary toolpath.
- Create
a Model Area Clearance strategy and name it D25TR2-RGH1
- Offset all
- Stepover: 10 mm
- Stepdown: 8 mm
- Lead in: select Ramp for the first choice
- Ramp
Options:
- Follow the toolpath
- Max zig angle: 4
- Circle diameter: 0.65 TDU
- Click accept
- Lead out: same as lead in
- Calculate the toolpath
- Run a ViewMill simulation of the roughing strategy.
- Right click on D25TR2-RGH1 and select simulate from start. Click the red circle in the ViewMill section of the simulation ribbon to turn on ViewMill.
- Click the play button to run the simulation

- After the simulation has completed, select the store button in the ViewMill section to store this snapshot of the machining process for later
- Mode
- No Image
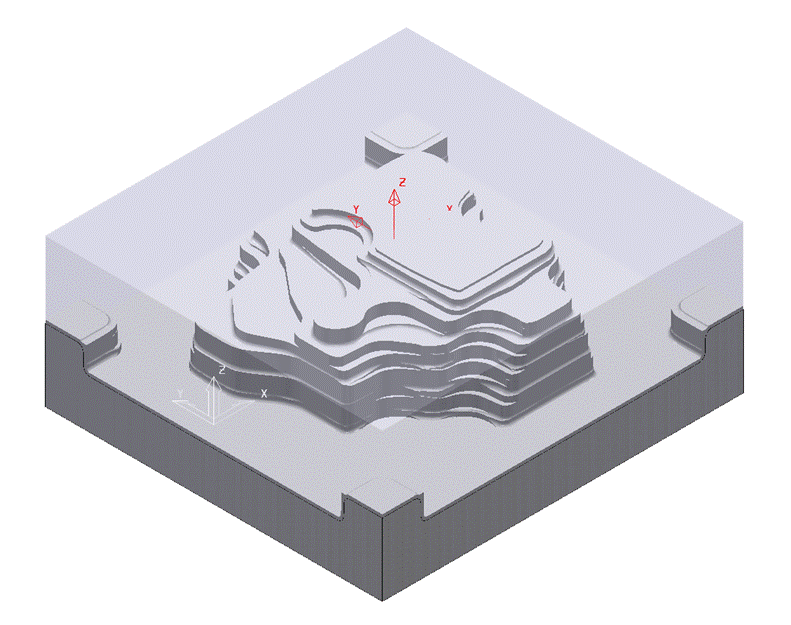
If the first roughing pass looks good, let’s move onto the second roughing pass.
Step 3: Rest Roughing
We’ll need to create a smaller roughing tool for the second roughing pass.
- Create
an End Mill
- Diameter: 15 mm
- Add appropriate shank
- Name the tool EM15 and close the tool dialog
Now that we have our tool for the rest roughing pass, we can create the necessary toolpath.
- Create
a Model Rest Area Clearance strategy and name it EM15-REST-RGH
- Offset all
- Thickness: 1 mm
- Stepover: 5 mm
- Stepdown: 5 mm
- Rest
- Rest
machining: toolpath
- D25TR2-RGH1
- Detect material thicker than: 0.333 mm
- Rest
machining: toolpath
- Calculate the toolpath
- Perform a ViewMill simulation for our second roughing
pass.
- Right click on EM15-REST-RGH and select simulate from start. Change the mode in ViewMill to rotatable and click restore.
- Click the play button to run the simulation
- After the simulation has completed, select the store button in the ViewMill section to store this snapshot of the machining process for later
- Mode
- No Image
Now that our part is properly roughed, it’s time to focus on finishing the part.
Step 4: Finishing
In order to get our part to have a clean finish, we can run a finishing pass across the block.
First, we’ll need to create the necessary tooling:
- Create
a ball nosed end mill for finishing the part
- Diameter:8 mm
- Length: 35 mm
- Add an appropriate shank
- Name the tool BN8 and close tool dialog
Now let’s create a finishing toolpath using our ball nosed end mill.
- Create
a Steep and Shallow finishing strategy and name it BN8-FIN
- Check the spiral option for shallow
- Stepdown: .5 mm
- Stepover: .5 mm
- Tolerance: 0.1 mm
- Go
to the limits section in the local explorer
- Check the z minimum value
- Click the icon left of the text box and select the top edge of the pocket
- Calculate and close the dialog
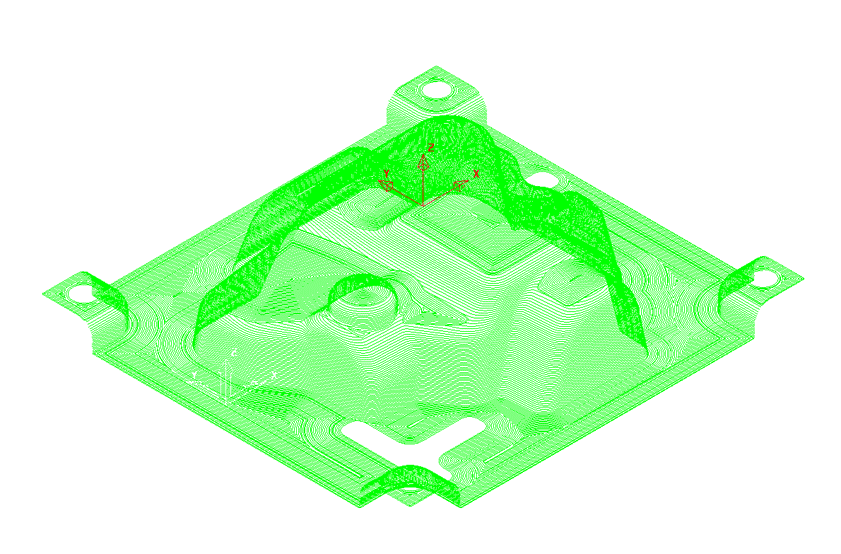
Let’s run a simulation of the finishing toolpath.
- Right click on BN8-FIN and select simulate from
start. Change the mode in ViewMill to rotatable and click restore
- Click the play button to run the simulation.
NOTE: this simulation takes a long period of time. Once you feel you’ve seen enough of the simulation, you may pause it. DO NOT STORE the simulation once you have stopped it.
Machining around the pockets and machining the holes took a significant amount of time; we can edit these to shorten the machining time.
Let’s revise the toolpath to hopefully make it more efficient.
- Right
click on the toolpath BN8-FIN and select settings
- Select the recycle button to enable editing
- Go
to the limits section
- Lower the z minimum to -36.42 (0.15 less than the previous)
- Recalculate the toolpath
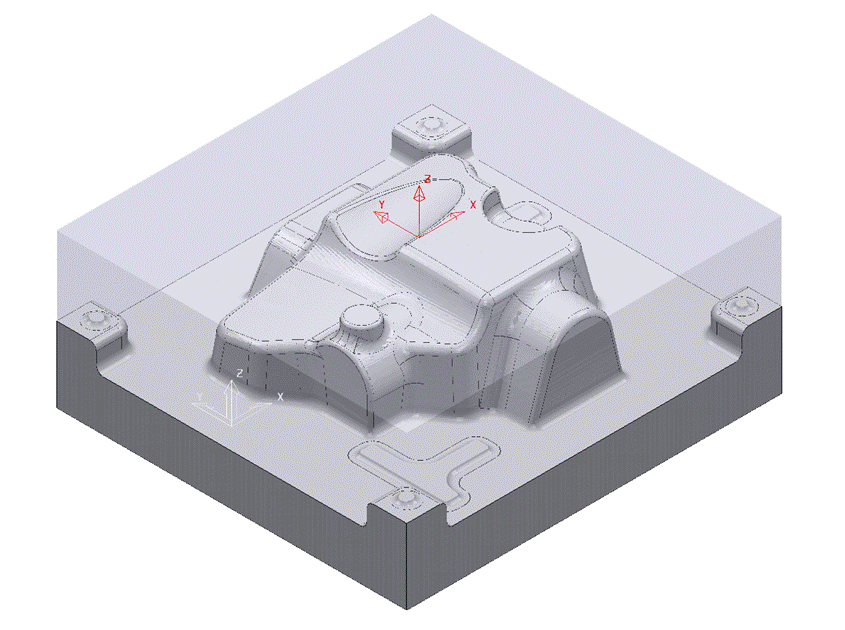
Notice how the toolpath around the pockets is less complicated; this will shorten the time.
Now we can address the holes.
- Hide the Leads and Links by selecting the toolpath tab on the top ribbon and deselecting leads and links
- Hide the block and model, so that only the toolpath is visible
- Select the portions of toolpath that would be machining the holes by viewing the model from the top
- Right click on the selected portion, then select edit then delete selected components
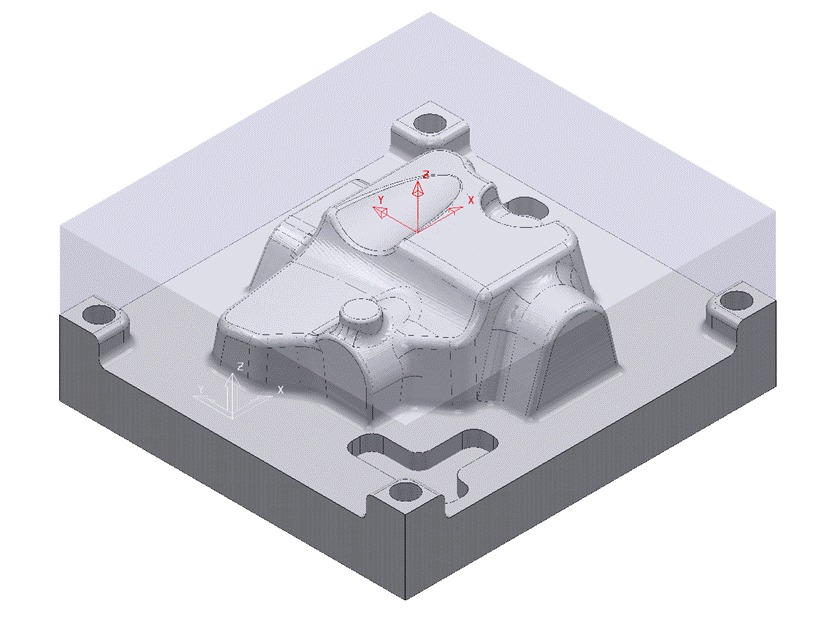
The toolpath will now look like this:
Now that we have successfully revised our toolpath, we can run another ViewMill simulation.
- Click the simulation tab
- In the ViewMill section, change the mode to rotatable and select restore to return the block to after the second roughing pass
- Right click on BN8-FIN and select simulate from start
- Play the simulation and once complete, store the new block and change the mode to no image
The new simulation was significantly shorter than our initial one, which shows that editing toolpaths in PowerMill can be very effective.
Step 5: 2.5D Machining - Holes
We’ll start with drilling the holes on the corners. We will perform both a center drilling and a drilling operation.
- In
the global explorer, right click on hole feature sets and select create holes=
- Name the feature set: HOLES
- Keep the default Create From option: model
- Check only Use Active Workplane Only
- Check Find Holes Going Down
- Box select the entire model
- Click apply and close the dialog
First, we need to create a tool for the center drilling process.
- Create
a spot drill that has a larger diameter than the holes
- Diameter: 10 mm
- Length: 25 mm
- Taper Angle: 45⁰
- Add an appropriate shank
- Name the tool SD10
Now we can create the toolpath for our center drilling operation.
- From
the toolpath strategies dialog box, select drilling, and then select single
peck and click ok
- Name the toolpath SPOTDRILL
- Operation: Centre Drill
- Depth: 4 mm
- Leave all else as default
- Click
the select button at the bottom of the window
- Click the 8 mm diameter from the left textbox and press the right arrow between the textboxes
- Click select at the bottom of the feature selection dialog and close the dialog
- Calculate the toolpath and close the dialog box
- Next, try simulating the toolpath on your own using the ViewMill option. Remember, you can always go back and review the simulation process.
Now, we’ll create the tool for the final drilling operation.
- Create
a drill with the same diameter as the holes
- Diameter: 8 mm
- Add an appropriate shank
- Name the tool DRILL8
Let’s create the final drilling toolpath by cloning the previous toolpath.Right click the spot drilling operation and open the settings.
- Clone the toolpath
(symbol next to recycle button).
- Name: BREAKCHIP
- Tool: DRILL8
- Cycle type: Break chip
- Operation: Through Hole
- Peck Depth: 5 mm
- Check the select window again to ensure only the holes are selected
- Calculate the toolpath and close the dialog
Repeat the simulation process you followed with the center drilling process. The block should appear like this after the holes have been drilled:

With our drilling of the holes complete, all we have left is machining the two pockets on our part.
Step 6: 2.5D Machining - Pockets
Now we’ll create the pockets features.
- Select the feature group tab in the top ribbon
- In
the detect section, select the features button
- Mode: single
- Hover over each pocket and select both by clicking
- Once both pockets are selected, click accept to create the feature group
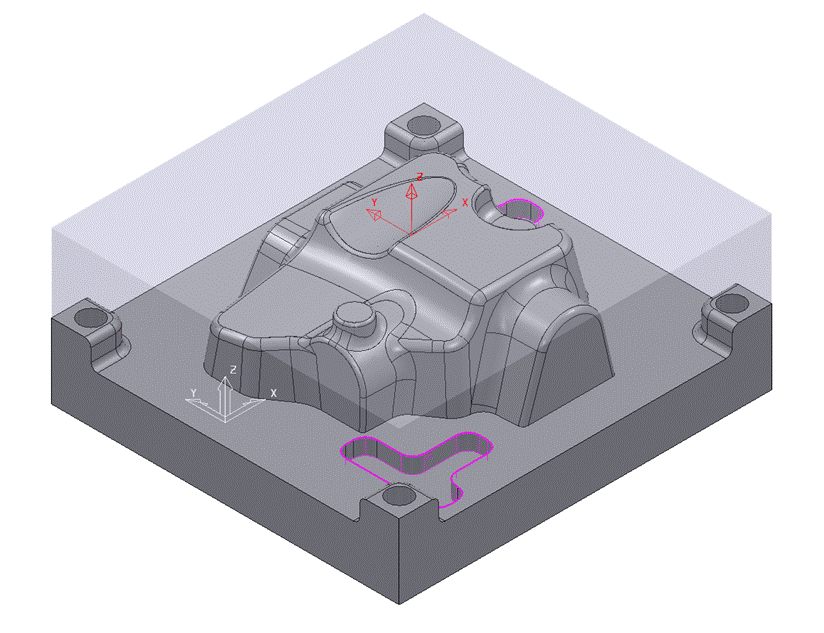
- Right click on the new feature group in the explorer, and select rename
- Name: POCKETS
Next, we’ll create a tool that can rough out the pockets.
- Create
an endmill smaller than the corner radii in the pockets
- Diameter: 6 mm
- Add an appropriate shank
- Name the tool EM6
Now we’ll use a new type of toolpath to machine the pockets, starting with the roughing phase
- Enter
the toolpath strategies dialog and select Feature Machining and then select
Feature Pocket Area Clearance
- Name the process RGH-POCKETS
- Stepover: 2 mm
- Stepdown: 3 mm
- Clicking the icon in the thickness section causes another text book to open. On the left, you have the radial thickness and on the right, you have the axial thickness
- Limits:
- Leave the axial thickness as 0, thus we’re finishing the bottom with our roughing pass.
- Uncheck z minimum so that the entire pocket will be programmed
- Calculate and close the dialog.
We can see that the toolpath ramps in from an unnecessary height. We can revise our toolpath.
- Right
click on RGH-POCKETS and select settings
- Click the recycle symbol to enable editing
- Limits:
- Z maximum: click the top of a corner
- Recalculate the toolpath
- Run a ViewMill simulation of the roughing toolpath
It’s time to finish the pockets and ultimately finish our part!
We’re going to use the same tool that we used for roughing for the finishing pass.
- Create
a new toolpath. Select the Feature Machining option then select Feature Pocket
Profile.
- Name the toolpath FIN_POCKETS.
- Tolerance: 0.01 mm
- Radial and axial thickness: 0 mm
- Stepdown: 5 mm
- Limits:
- These will remain the same as our roughing pass
- Calculate the toolpath and close the dialog.
- Once again, simulate this toolpath using the ViewMill feature.
Because we’ve finished the part, you could run a simulation of each toolpath in order to ensure the part will be machined correctly.
Now, with all of your toolpath created, we're ready to generate our NC code!
Step 7: NC Code
Our toolpaths have been simulated and appear successful, so now it’s time for us to generate the NC code.
- Right
click on NC programs in the explorer and select Create NC Program
- Give the program an appropriate name
- Right
click on NC programs in the explorer and select Preferences
- Select the desired postprocessor for our NC code
- Drag all toolpaths into the program and run a full
simulation.
- Right click on the program
- Simulate from Start
- Generate NC code by simply right clicking on the program and selecting Write.
Note: This exercise is for educational purposes. While this exercise outlines the process of generating your NC Code, no actual code is to be generated as a part of this class.


