

Introduction: Chexx/"bubblehockey" Goal Mod


I bought an old Chexx machine, that had the original nets that were broken and poorly repaired. I knew it could be done better and more realistic. This wasn't meant to be an instructable so some steps don't have proper photos. I'll try to explain clearly. This mod is better than stock for bounce outs, Back net play is unaffected, side net play is unaffected, ands it looks way better (in my estimation). In many many games, I've had 1 puck land on top of the goal. I keep my bubble unbolted so it's not an issue for my application.
Step 1: Out With the Old


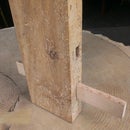
In order to remove the goals from your Chexx machine you need to remove the safety bolts around the perimeter of the dome. Push the skaters toward the center red line and remove the goalie. This will allow you to lift the end of the ice and flex it just enough to remove the old goal assembly. This photo is an original goal but the chute has been removed. Do not remove your chute until your goals are ready and fit properly. Otherwise, you wont have new goals or old goals either. No hockey for you!.
Step 2:


I used the old goal to match dims with the new copper pipes. For the new goal I used some scrap copper wire stripped and cleaned. I believe it's 6 or 7 gage. Approximately 4 mm in dia. I made a simple pipe bender with two nails hammered into a board in close proximity this worked better than bending in a vice. from here the most important features are the length of the crossbar, and the 90 deg bends at either end. It's important that the new goal fits well in the existing opening in the ice surface. The posts and the horizontal side nets can be trimmed to length later. (provided you make them with a little extra length)
Step 3: Soldering Order

Make sure that your 90's are square. the post ends should touch the Ice surface. The goal bottom should terminate into the posts. The top shelf ends should terminate into the posts
Step 4: Zig Zag.


With a needle nose pliers bend up some narrow gage wire for the net attachment points. Just a bunch of opposing 90 bends. These proved difficult to solder due to the difference in material thickness, I resorted to epoxy. My next set of nets will have a small groove cut into the goal to receive the zig zags. This would help the epoxy grip. I chose to apply the zig zags only to do the posts and the crossbar. This detail really makes this upgrade.
Step 5: Paint

duh.
Step 6: Netting

the fabric store had this perfect netting, I had every intention of cutting up an old fishing net, but was glad I decided to check the store. Either end of the strip of net had a solid band, this is perfect to mimic the bunting around the base of proper nets as well as hide the double bar at the bottom. Sew this tightly around the entire bottom minus the goal opening of course. once the bottom is solid, tightly sew the top middle to the zig zags. continue to sew tightly around the zig zags to the upper corners and down the posts. The extra netting will be accounted for along the bottom bar. You'll be sewing the base of the flap together, and leaving the floppy flap part alone. once this is secure, you can cut the flap off, and nobody will know that it was ever there. I used PLENTY of thread. if one portion broke, I have triple or more backup.
Step 7: Puck Play Net Detail

I also sewed in a piece of netting a little way up from the bottom that was designed to help direct the puck down into the chute and keep it from bouncing out. this should hang down into the chute a little bit.
Step 8: Remove the Stock Net From the Chute.
this will no doubt void your warranty. I used an exacto blade.... very carefully, If I damaged the stock chute, I would have to learn how to vaacu mold.... not something I had expected to take on.
Step 9: Wed the Net/chute

I drilled two tiny holes into the chute next to the posts and used a tiny wire to hold the nets in place, strategically bent to hold fast.
Step 10: Replace the Nets

using the same method in step 1, replace the net assemblies, GAME ON and enjoy!


