

Introduction: Intro to Chip Carving


For all you out there with the need to learn a new hobby, look no further. Chip carving has been one of the most relaxing hobbies that I do, besides fishing of course. It isn't super expensive to start out and with enough practice you can make great gifts for people.
Step 1: Materials Needed


You will need:
•Pencil
•Ruler
•Chip Carving Knives
•Sharpening Compound
•Basswood
*If you're just starting out and need a recommendation, then I highly suggest Flexcut's Chip Carving set. You can pick it up at Amazon for around $40 and it includes the sharpening compound, and three knives all used for chip carving.
https://www.amazon.com/gp/aw/d/B0057P4ARM/ref=mp_s_a_1_1?ie=UTF8&qid=1474318473&sr=8-1&pi=SY200_QL40&keywords=flexcut+chip+carving+set&dpPl=1&dpID=51GRDNaOWyL&ref=plSrch
*I buy my basswood at a Woodcraft store near me but you can also find it at Michaels.
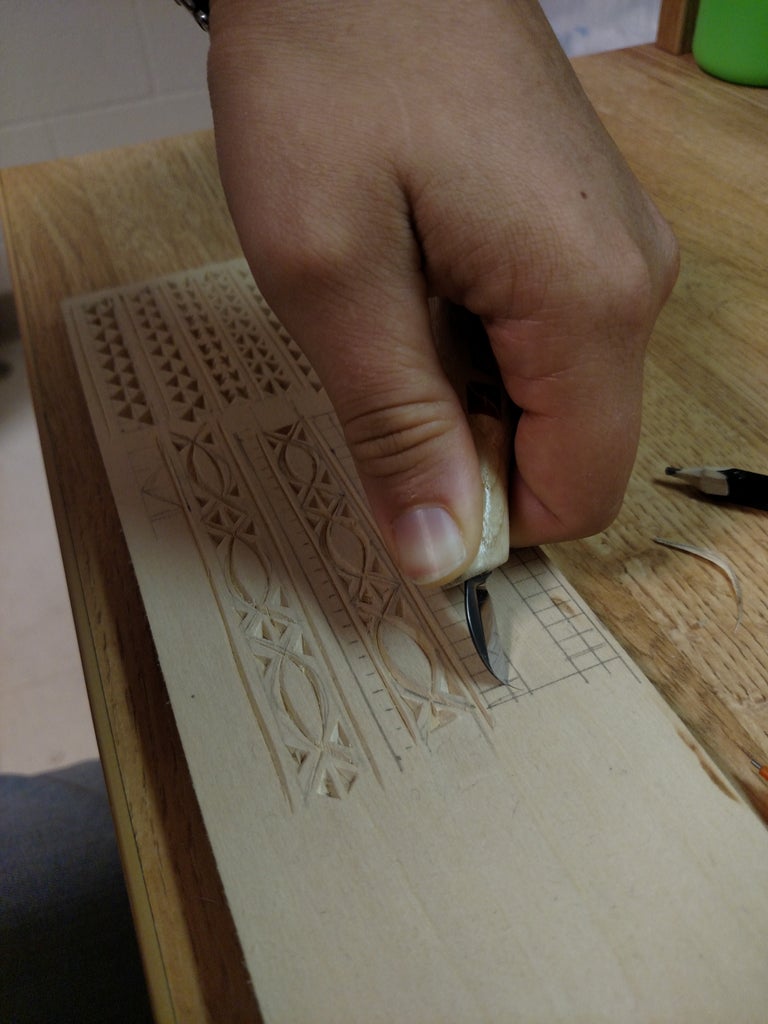
Step 2: Holding the Knife


The images show first position. You thumb is going to keep in contact with the wood surface and the knife at all times when carving. This allows for more control and reduces risk of ever cutting yourself.
The second position is simply facing the blade away from you and pushing the tip of your blade into the wood with your thumb on the back of the knife.
Before carving it's important to sharpen your knife. There are videos all over YouTube which can help you out.
Step 3: Measuring It Out and Start Carving


Start out by measuring out a two block high grid and however long you want it. Each block or square is 4mm wide and tall. So in total the two squares on top of each other are 8mm.
Chip Carving the first basic pattern:
Put the tip of you blade into the first intersection of lines and press down coming towards you. You want to make sure that the blade of the knife is going in at about a 45° angle into the wood. There's no need to move the blade forcibly. Just push down towards the bottom left corner of the square.
Step 4: Continuing on the Pattern

Now flip your basswood over and your going to hold the knife in second position. You will be pushing it away from you.
Again, at 45° angle into the wood itself, push down towards the opposite corner of the block next to the one you just carving into.
Step 5: Removing the Chip


This is the third cut of the chip and will remove the triangle. Pus your knife in at and angle towards the middle of the triangle chip and push down towards the middle line. Then start to lift your knife out towards where the other cut ended, while still adding pressure.
This will hopefully remove your chip.
Step 6: And Repeat..


You're going to do this again in the blocks above where you just carved the triangle. The two triangles should have their top points touching.
Repeat this process all the way down you row of 4mm measured squares. Makes sure to skip a square when starting the next one because the base of each triangle takes up two square widths.
Step 7: Now for Some Decoration


So far you have completed a nice basic border. To touch it up and add some really nice detail, we're going to make some small cuts into the wood squares between the triangles.
Just switch from first position to second position.
•From the middle of the side of the triangle, cut inwards at an angle towards the intersection of lines.
•Then go to second position and push into the wood removing a small thin chip.
Repeat this on all four sides of every square and the result will amaze you!
Step 8: All Finished!


Hope you enjoyed learning some of the basic steps to get started with chip carving. I'd love for you all to share what you end up carving when you try it out. Feel free to ask and questions or give some input in the comments below.
If you're interested in learning some more, then go watch this video below! I think it's great and its one that was very helpful to me when I started out. Thanks for stopping by!
https://youtu.be/Q-90UZ5UqYg


