

Introduction: Invisible Wine Rack


This simple and quickly built rack is a great way to store some wine and a fun way to recycle a few empty bottles. I designed this rack for a small wall in my kitchen, but you can make yours as large as you want. Be aware, once loaded with full bottles it is not light and needs to be very securely anchored to the wall.
AN IMPORTANT NOTE ON SAFETY: One of the steps involves hammering dowels into wine bottle necks. Make sure to wear gloves and eye protection when doing this. There is a chance that a bottle could shatter and throw shards. Besides that step this build is very simple and safe, just use good judgement and wear necessary safety gear when drilling and sawing.
Step 1: Materials and Tools

Materials-
- 4’x4’ sheet of good quality ¾” plywood. Under $20 at any building supply store.
- One tube construction adhesive. $5
- One quart tinted shellac. This is the finish I used, feel free to use what you like.
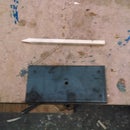
- One 4’ long ¾” dowel. $5
- A few sheets of paper towels or napkins
Tools
- Rubber mallet
- Drill
- ¾” Forstner bit
- Tape measure
- Framing square
- Pen
- One sheet 150 grit sand paper
- Chaulk Gun
- Circular saw, jigsaw, or table saw for sizing the plywood
- Pencil
- Ten empty and dry wine bottles
- Handsaw for cutting dowels
Step 2: Layout


Layout your bottles right side up on your board and arrange them so there is about a ¼” gap between each bottle left to right. Use two bottles above your first row to set distance between the two rows. The photos show the layout I used, but because of difference in bottles, or for aesthetic reasons, your layout may look different than mine. Once you have your bottles set, mark the center of each bottle on the lower row and mark the center of the two far right bottles of each row. Use your square and continue these lines both up and across. You should now have a grid with 10 intersections which mark the center of your bottles and where you will need to drill for the dowels. Define the outside shape of the piece with your square and cut it out. You may choose to make yours a different shape than mine, which is great, but the grid should look similar to the one in the photo.
Step 3: Drilling


You now need to drill out the 10 holes using the Forstner bit. Be aware you will only drill 5/8" into the 3/4" thick board, leaving a great surface for the glue, which is why you need to use a Forstner bit. These bits drill beautiful holes in plywood and leave a flat bottom, but you need to set the depth. I used a drill press with a depth stop, but if you are using a hand drill measure 5/8” up the Forstner bit and wrap a piece of tape around the shaft. Drill out the holes while watching from the side and when you get to the tape you know you hit the depth.
Step 4: Finish Prep


Use sandpaper to get off the pencil marks and prep the wood for finishing, then wipe off any dust. Before finishing put a small wade of paper towel into each dowel hole. This keeps the finish from getting in the hole which would inhibit adhesion of the glue. Paint the board and allow to dry.
Step 5: Inserting Dowels


Cut ten 2 5/8" long pieces of dowel with a handsaw or chop saw. Mark a line at 5/8” on each dowel. This mark will set the depth of how far to hammer it into the bottle neck. This is the one dangerous part of this build so make sure you have safety glasses and gloves on. I have not had a bottle break on me, but you are going to be hammering dowels into the necks of the bottles so if one does break it could be very dangerous. Use a rubber mallet to hammer the dowels into the bottle until you get to the mark, leaving 5/8” exposed. You should not have to hammer hard to insert the dowel, just a some strong taps. If it seems hard use the sand paper and sand away some of the dowel, just don’t sand above the 5/8” mark because this part is going into the board not the neck.
Step 6: Gluing


Make sure your board is dry, remove the paper towels, and place it somewhere stable. Once you have glued and placed all the bottles the board really shouldn't move until the construction adhesive is completely cured. Completely coat the dowel ends with the construction adhesive and then seat each bottle in it's hole. Adhesive will come out of the top, just wipe it up before it cures.
Step 7: Installing


Once the adhesive is cured install the rack on the wall. This unit is heavy, so I used two 2 1/2" long #8 wood screws making sure to hit studs to hang the rack. Depending on how many bottles you use and the size of your board you may need to use even more fasteners, just use good judgment.


