

Introduction: KEYTAR


With 20 synthesizer settings, 8 rhythm selections, 2 speed and volume adjusters and 1 light-up keyboard - this custom keytar re purposes the electronics of an existing keyboard in a new frame and body.
Step 1: The Electronics


Instead of programming the entire Keytar from scratch, I decided to use the electronics from an existing keyboard. I started out with a Casio ML2, which I choose because the original frame accommodated a tonal range of two and a half octaves within a relatively narrow width. Because of the smaller size of the individual keys, I would be able to fit more playable notes onto the body of the Keytar without needing to oversize the entire frame. As a bonus, the Casio ML2 had a system for lighting up each key as they were played, which I was able to incorporate into the completed Keytar.
Step 2: The Measurements

After removing the electronics from the original shell and detaching other unnecessary components such as the speaker, it was extremely important to measure the pieces I wanted to keep in order to make a properly fitted frame to house them within the larger body of the Keytar.
Step 3: The Body

The body of the Keytar was designed to precisely fit around the keyboard and existing electronics. The resulting shape was based partially on the ergonomics of having to simultaneously hold and play the instrument as well as for its visual aesthetics.
Step 4: Design - the Keyboard

The keyboard was the most complicated part of the Keytar, and so it was the first to be digitally modeled.
Step 5: Design - the Body

With the dimensions of the electronics set, the body of the keytar was 3D modeled around the keyboard.
Step 6: Fabrication - CNC Mill


The body of the Keytar was split into two halves, each that would be double sided milled to create the necessary pockets for the keys and electronics and joined together after being painted and finished. The Keytar was milled from laminated layers of 3/4" MDF and the CNC file included tabs at regular increments to ensure that the pieces would not fall out of alignment when they were flipped.
Step 7: Fabrication - Cut and Sand


After cutting out the pieces using a saber saw, I removed the tabs with a disc sander, then used an orbital sander at progressively finer grits to smooth out the ridges made by the CNC across the entire body.
Step 8: Assembly - Electronics

Based off of the meticulously dimensioned electronic components, the frame was laser cut from 1/4" plexiglass and 1/8" masonite. These were then attached together by various types of fasteners.
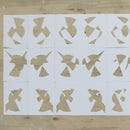
Step 9: Assembly - Keys

Especially difficult was getting the keys to respond to touch with the right amount of resistance. By tensioning the back end of each key with a small spring and calibrating their balance on a set of two individually adjustable end points, I was able to get the right feel for the keyboard after an extended amount of tweaking.
Step 10: Assembly - Body

With the electronics and keyboard complete, the parts could be placed into the body together with the battery pack.
Step 11: Paint


Another 2 coats of primer, 6 coats of glossy black with light sanding in between and a layer of polyurethane and wax gives the Keytar a classic laquer black finish.
Step 12: Playing

An audio jack in the back of the Keytar lets me hook up to an amp and play.


