

Introduction: KNEX POCKET GUN


This is an easy 20min build Knex Gun, with a lot of power and an easy locking method*. It is very compact but still packs a nasty amount of strength! It is not a toy.
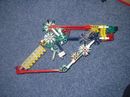
You'll need the pieces shown in the picture as well as 3 'standard' elastic bands or some reasonable equivalent. If the gun snaps often you can superglue the parts on. So let's get started!
*The trigger should fall down due to the elastic bands.
Connectors
13 grey
1 yellow
1 'hubcap' brown
2 red
3 orange
1 black joint
2 light grey
2 black 'square' joiners
Rods
4 white
2 red
1 blue
Spacers
6 blue (4 when using revised version)
If in doubt all will become clear in the following pictures.
Step 1: Construct

Build end of firing rod.
Step 2: Build Firing Rod

Get red piece and add 'hubcap' like so.
Step 3: Finish Firing Rod

Add the parts from step 1 and 2.
Step 4: Build Trigger

Construct - two white rods, two grey connecters, an orange connector and the two black connectors.
Step 5: Handle

Build handle as pictured. If it is too small to fit your hand then adapt one.
Step 6: Main Barrel

Get a NEW red rod and put these on. This is separate to the firing rod. The red connectors are fixed to the red rod in their middle joint.
EDIT: Please look at note (yellow box surrounding blue connector) the gun works better without this blue piece - sorry for inconvenience.
Step 7: Next Part of Barrel

Build this on the other end of the SAME red rod as in last step.
Step 8: Finish Barrel

The barrel should look like this.
Step 9: Add Trigger


Fix on trigger as shown to the barrel.
Step 10: Fix on Handle


Fix on handle as shown.
Step 11: Gather Elastic Bands

You'll need 3 'standard' red elastic bands or good equivalent.
Step 12: Fix on Elastic Bands


Slot the firing rod into the barrel so the yellow piece on the end of the rod is on the opposite end to the black piece at the end of the barrel. Fix on elastic bands as shown in the pictures.
Step 13: Fire Away and Hold in Right Place


PLEASE HOLD THE GUN AS SHOWN OR YOU WILL GET HURT! This gun is small, but that has its drawbacks. Be careful when holding the gun, you don't hold it like a real gun.
HOW TO FIRE
Pull back the firing rod a long way until the trigger drops down (if it does not, your elastic bands are either too weak or in the wrong place - manually push down the trigger in this case). Load your ammunition, aim, holding the gun as shown and push the trigger to the left. The firing rod will shoot at whack the ammunition which will fly out very accurately.
I use white rods with red 'arrowhead' connectors as ammunition but anything will work - I just found that these were the best. If the gun does not work for you please post a comment and I will try my best to help you out - the gun is usually very reliable and fires powerfully.
Thanks,
bunduk
Step 14: Modifications
Take out the blue 'connector' mini piece on each end of the gun (not the doubles in the middle) and the gun will not bend.
Thankyou for pointing this out.


