Introduction: Knex Ball Machine Paths Official Guide
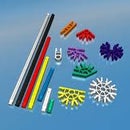
Welcome to my guide of various paths that can be seen on a k'nex ball machine. You may have noticed that paths (at times) are considered to be called "elements." Well, I made this guide because my "elements" guide was becoming a little too oversized for more elements to be added. I then realized that it would be easier to make a separate guide based on just the regular paths that carry out the process of transporting balls to elements, lifts, etc. throughout a ball machine.
This guide will use paths I make and other paths (I didn't conceive) that aren't that piece-consuming, acting as an Add-On to my Knex Ball Machine Elements Guide.
Step 1: The Path
This is one of the simple paths that's perfect for any ball machine.
Step 2: Triangle Path
A great sturdy path that takes very few pieces.
Step 3: The Skinny Path
This is the most simple ball machine path possible. Be careful though, if the ball falls off at curves, you'll have to put rails on the pathing as shown in pic. 3. This path can also be easily extended to having much longer rods connecting the yellow connectors and other alternating rails also.
Step 4: The Orange Slide
Like the skinny path, but with gold connectors that have bumps on them which requires tubing. This path helps to add more variety to itself and can even be used to make curves (pic. 2). Make sure every gold connector is always attached with no bigger than 3 7/16 in. yellow rods. However, if tube track is well supported but is still somehow kinked or if separate pieces of tubing need to be reconnected, use "track splicers" to give it the support it needs (shown in pic. 4).
Step 5: Custom Paving
Conceived by Knextreme
Step 6: Rod-Railed Path
This is another simple path that takes very few pieces to construct, but isn't able to be used in making turns.
Step 7: V-Path
A path that provides less friction to passing balls then a normal 'rail' with connectors would. It can also bend as show in these last pics here.
Step 8: Motorized Madness Track
The special green track from the Motorized Madness Ball Machine building set. This track has other connectors molded into it when it comes outside its box. Though at times, it becomes a small drag when you want to make a straight path.
Step 9: Cage Pathing
This is a remake of the cage pathing I built on Path 2 of my first custom ball machine, looking like a ball bails out of jail. lol
Step 10: Super Path
This is pathing made by 95martb that needs a lot of orange connectors, but works really well and can be bended in all directions and it sounds nice. This is the solution for when you don't know how to connect awesome elements.
Step 11: Orange Paving
The ball rolls in between the orange bumps. This is the solution for when you don't know what to do with all those leftover gold connectors, made by Knextreme.
Step 12: Mario Kart Paving
This is a new kind of pathing idea I conceived that is just simply Mario track onto a ball machine. This was first introduced in my ball machine Alternation. It should require good slopes, balance, and lots of support.
Step 13: Gray Path
This is a new kind of pathing I came up with for fun. It takes gray rods and uses various connectors to make it stable.
Step 14: Yellow-Sided Pathing
This is yellow pathing that is basically yellow connectors onto rods with wall support.
Step 15: Jungle Bridge
It bit tough for beginners, but this jungle bridge needs tons of yellow rods and small connectors. When built correctly, balls rod on it to give it the effect of a rocking bridge in a forest.
Step 16: Rolling on Connectors
This is a path where a ball is able to roll on top of connectors. Make sure it stays upright, has something beside it to help keep the ball balanced, and that it's well-supported.
Step 17: "Rolling on Rods"
Step 18: Red Path
This is a path made by The96jonse that is VERY similar to the super path made by 95martb in the previous step. The ball just simply rolls on the red connectors without falling off. The green rods help to add rails if there are flying balls.
Step 19: Blue Path
This is a variation of the blue pathing made by sandroknexmaster which was featured in his ball machine Dragonfire at 4:02. The ball will just simply roll on the blue connectors.
Step 20: Coaster Track
This made just seem like coaster track from the Screamin' Serpent building set. But it can also be use with balls and works great. This can bend in all directions and requires several green coaster pieces a a ton of tubing.
Step 21: Upside Down Crosties Path
This is pathing MADE BY ME where green coaster pieces are turned upside down basically. First used in my ball machine Protagonism at 2:30.
Step 22: Mini Chain With Rails
This is a new kind of pathing that requires micro parts. The ball just simply rolls on the chain supported by rails. Found in my ball machine Quadrivium at 1:01.
Step 23: SideStep Paths
These are all kinds of curve paths I have made to fit those places that's hard to put straight paths on. Thanks to TheKnexDude for the name.
Step 24: Done!
Well, that's every kind of path (that isn't so piece-consuming) I have here. Be sure to check back here when myself or others make new kinds of paths.
Till next time,
-collinjo12


