

Introduction: LED Lego Guy


A dirt cheap LED lego guy
Step 1: Tools

The tools you will need are:
Soldering iron
Rotary tool
Hot glue gun (not shown)
Step 2: Supplies

The supplies you will need are:
LED
Lego guy
Solder
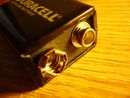
1 3 volt button cell battery
Step 3: Off With His Head!

First you need to cut off the lego guys head, I used my rotary tool to do this.
Step 4: Drilling Out


Now you need to drill a hole where the head used to be about the same size as your LED.
After that hollow out the inside of the lego guy.
Step 5: Wires

Now attach 2 wires to your LED and push it through the hole in the top of the lego guy then fill with hot glue
Step 6: Switch

The switch is optional but is highly recommended.
after you have wired your switch glue it to the back of the lego guy.
Step 7: Battery

Now solder both sides of the battery to the wires using the correct polarity.
(I am not responsible for bodily injuries caused by exploding batteries)
Step 8: Legs

Now cut the stubs off the legs and glue them back on the body.
Step 9: ITS ALIVE!

Now test it out.
I used a connector to secure the battery and it has been very reliable.


