

Introduction: LED Light Holder From Plastic Tie Wrap


The purpose is to create a LED light holder using a plastic tie wrap.
In particular its head will accommodate the LED pins, while the tie will be fixed using strong duct tape on the spokes of my bicycle wheels for night visibility and safety.
Weight and dimensions of the system should be the smallest as possible to be almost unnoticed during the day, while providing the most effective visibility in the dark.
Step 1: Material Used and Preparation


Chose the tie wraps depending on the size of the LED, in particular the head of the tie should be as wide as the diameter of the LED (or even a little wider). I used 3 mm LEDs and the smallest tie wraps I could find that have a square head with side of 3.6 mm and the tie 2 mm wide.
I also used a very thin wire for wrapping (with diameter 0.25 mm for the conductor and 0.56 mm outside) and some heat shrinking tube.
With a small flat screwdriver, used as a chisel remove the inner tab of the tie wrap.
Mark the two holes for the pins 2.5 mm from each other in the middle of the head of the tie wrap.
The diameter of the holes is 1 mm because each one has to accommodate both the LED pins and the wire.
Step 2: Drill the Holes on the Tie Wrap


Using a sharp pin engrave on the marks to facilitate correct positioning of the drill bit on the head of the tie wrap when drilling the
two 1mm diameter holes from side to side.
Step 3: Solder the Wires to the LED Pins

Cut the connector wires of the appropriate length and remove the insulating coating on one side using the tip of the soldering iron to prevent any damage to the thin conductor.
Wrap one or two coils on each pin close to the base of the LED and solder them with as few tin as possible. This will prevent the pin to grow too much in diameter to fit the holes in the tie wrap.
Step 4: Insert the LED on Its Holder

Insert the wires and then the pin together in the holes drilled on the tie wrap.
Since the diameter of the holes (1 mm) is almost precise for the pin an the wire together, you may find out that the welding doesn't let the LED to go further. Then just heat each pin close to the base of the LED with the tip of the soldering iron so when the tin and the plastic start to melt a little bit it's possible to push it inside. To do this hold the plastic head with your fingers pushing the LED vertically against the table.
Step 5: Adjust the Pins


Bent the pins sideways and cut them close to the edge, using scissors or a clipper . The pin should form a kind of little hook on the tie wrap to give mechanical strength an prevent any electrical contact.
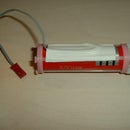
Step 6: Put Some Heat Shrinkable Tube and It's Completed


To improve appearance and insulation use some heat shrinkable tube to cover the tie wrap head and the LED collar. Heat it a little with an hot air gun until it gets the right shape. Done!, now you're ready to switch on the light :-)

Participated in the
LED Contest with Elemental LED


