

Introduction: LED-Paper Craft Lamps


This is a series of Paper Craft Lamps that use LED's. I modeled up a lamp in Blender, and then assigned textures to each of the parts, so if you want to change the look of the lamp there are several ways to do that. One is to use a paint or photo program to modify the blank pattern that I provided. The other is to use the provided .pod file in Pepakura Designer and just apply any texture that you like. I also have provided several different versions that can be mixed and matched to change up the look. Also this tutorial only shows 4 clear LEDs wired into the lamp but there is plenty of room for more than just 4 LEDs.
Step 1: Materials


Gather the materials needed.
These are needed for sure
*Rubber Cement
*Hot glue/Gun
*Double sided tape
*x-acto knife / razor
*4-LEDs (use High-Output or Ultra-Bright LEDs)
*4-Resistors to protect the LEDs I used 1K
*3ft or thin wire (I used some 28AWG ribbon cable)
*4-sheets of Card Stock 8.5X11in or Heavy Photo Paper
*one on off switch
*DC power supply ~3V or (2AA batteries and battery holder)
These are optional
*wire strippers
*wire cutters
*soldering iron/solder
*multimeter
*ruler
*cutting mat
*super glue
*electrical tape
*markers
Step 2: Download / Make Lamp Pattern

Step 3: Print, Cutout, Glue

These are the cut and fold instructions for the lamps. Each tab number is matched to an edge number. The dotted lines indicate folds, and the solid lines indicate edges to cut.
Step 4: Parts Assembled

These are the parts that have been cut out and assembled. This process is really straight forward, just follow the instructions included in the download of the lamp. Use some markers to mask the edges if the white paper is showing to much. Also rubber cement works really well, but skip the brush use a little piece of scrap paper to apply the glue.
Step 5: Wiring the LEDs


The LEDs are glued to the front side of this square, and wires and resistors are placed onto the back of this part.
Step 6: Test the LEDS

Connect you chosen power source and test that every thing is working. LEDs are directional so if it is not working try switching the leads.
Step 7: Assembling the Base


Cut the holes to run the wires, and fit the switch in.
Step 8: Switch


Wire the Switch in.
Step 9: Glue on the Stem


Glue the stem on and thread the wires through.
Step 10: Assembling the Top


This step is where the top is joined into place.
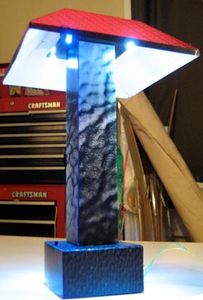
Step 11: Place the Shade On


This is the final step, just put the shade on, and straighten. Then give it a try.
Step 12: Make Lots of Lamps


