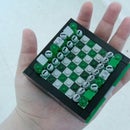
Introduction: LEGO Hyperbolic Slot
I recently attended the 7th annual Bricks by the Bay convention in Santa Clara, California. I entered a few MOCs and two were liked enough to earn themselves a trophy! Hyperbolic Slot was one of those MOCs, taking home an overall award. The award is for "Best Little Thing" and the trophy is really cool, featuring a very familiar little robot atop a spiraling set of steps.
The inspiration for this build came from an exhibit I first saw during an elementary school field trip to the Exploratorium in San Francisco. The contraption always stuck in my mind and after visiting the Exploratorium at their Pier 15 location as an adult, I knew I'd like to have my own version to play with. Eventually the idea of building the model from LEGO elements crossed my mind so I decided to make it happen!
The straight rod can pass through the curved slot because the rod doesn’t go through the slot all at once, but a bit at a time. As the rod rotates, it traces out the shape of a three-dimensional shape called a hyperboloid.
The edges of this hyperboloid form the branches of a hyperbola, and the slot represents one of these two-dimensional branches. Hyperbolas are conic sections which you can imagine as two cones that are standing tip-to-tip that you slice straight down through, the curves on the resulting flat faces will form the branches of a hyperbola.
The mechanism that makes this work is really simple. A motor is attached to an axle that also holds a worm gear. That worm gear drives a 24 tooth gear that's on a shared axle with the swinging arm mechanism. This inner working is shown as the last still in the video. The rest of the build is also pretty basic, the slot is just slope and inverted slope pieces with basic bricks.
Improvements:
I plan on making an improved version of this later on (I have quite the backlog of LEGO projects!) but I wanted to document this one before it was disassembled. I put this together with only parts I already had on hand so the color scheme and part choice aren't ideal. In the video you can see that the rod shakes a little bit as it passes through the slot and this is mainly because panel isn't built in the most secure way and I didn't adjust it correctly before filming the video. The issue is at the top right of the panel where a 1x2 is supporting the entire top left portion. You can see this slightly lifting in the video and had I been paying closer attention and adjusted it, the rod would have passed through without any shaking.
I think the panel would look better in a 1x thickness of transparent parts but I'll likely have to employ some SNOT techniques to make that happen since it would mean that a weight bearing part of the panel (the 1x2 mentioned above) connects only by a 1x1 footprint of a transparent part which tends to have less clutch power. I'd also change the colors of the gear box because white is super boring and tiles come in better colors than lime.
Other modifications I've considered are replacing the motor with a hand crank and having two panels. For the hand crank, I like 33299 as a single-piece option and I'd also move the axle to come out the side opposite or in front of the panel so it was more like an automaton toy. Having two panels on opposite sides could be really cool too because the curves would be mirror images of each other.


