

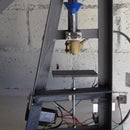
Introduction: Leaf Air Purifier Mods


Mod a Leaf Air Purifier, smarter and faster airflow together with higher water spray volume will make it work harder and cooler.
These mods, with the exception of the calm water mod are invisible, being out of the field of view once the unit is re-assembled. The calm water mod uses a clear plastic tube in the water which makes it much harder to detect.
Step 1: How It Works

I'm in the habit of taking things apart to see how they work and sometimes improvements are a result.
It's a neat design I guess, a spout draws up water and flings it out the top where it hits a lip turning into a fine spray which then runs down the side of the bowl.
In the process of pulling up the water a fan draws air into the device through the water spray, thus any airborne particles are blasted into the bowls water resevoir by tiny droplets.
My new leaf air purifier got quite warm on the top after running non-stop for 8 hours, yet that wasnt the sole reason for taking it apart, I also wanted to see how it worked, a phrase I've been using since birth I suspect.
The mods are simple plastic cutting, either a sharp knife or a dremmel with a cutoff wheel will do.
- Divert the incoming airflow over the motor coil for cooler running.
- Increase the airflow with a simple fan mod.
- Increase the volume of the water spray which ejects from the top of the spout.
Step 2: Smarter Airflow


An opening is cut over the coil to allow airflow due to the simple fact that the coil generates more heat than the armature.
After cutting the opening and taking care not to cut any wires or fingers, block the 5 square openings with pieces of foam rubber so as to divert all the airflow through the armature and coil openings. Cut the foam large enough to wedge firmly in the openings, dont block them off with silicone sealant, you might need to access those tabs to dismantle it in the future. Dont block the air exit ring of square holes, they are fundamental to the devices working principle.
- This mod alone is enough to make your Leaf Airrun cooler.
Step 3: Faster Airflow


The impeller runs clockwise flinging the air outward, but a large proportion of the air spills over the top of each impeller blade, this can be fixed with a simple plastic disk glued to the top of the impeller blades.
I used the lid off a yogurt tub and roughed it up with sandpaper for the glue to hold onto, the 40mm inner opening is the air intake.
Step 4: Larger Water Volume


I felt that the original slots were too few as well as not ejecting the water at the top against the disk in order to hit the outer lip, so I added a few more of my own, here I used the dremmel as well as a triangle file and hacksaw blade, the water flow against the side of the bowl is visibly greater.
Step 5: Calm Waters


This is an addition was prompted by Ironwave's comment, what it does is isolate the central spinning spout from the water body resulting in a very calm surface. Its a simple plastic dam which stops the wave that rolls around the inside of the water bowl.
The max water level is roughly 60mm high so I used a 70mm wide, 180mm long plastic strip. Using 5mm tabs for fixing it inside the bowl still leaves a 5mm partition above the water surface.
I wrapped the plastic around a 45mm dia salt grinder and spot welded it with a soldering iron, a small 5mm dia hole near the bottom allows water inflow to the center dam.
I initally used double-sided tape to fix the plastic dam inside the bowl but it came loose too easily. A better solution is clear silicone bath sealer.
The last pic is a view from underneath the water surface when the device is switched on showing how calm the outer water surface is.
Step 6: Final Stage

Just for good measure I also put a drop of oil on the motor shaft bearing, gave everything a trial run to make sure there was no vibration which will splash up the water resevoir in the bowl unduly.
If any of the foam pieces should fall out, then they will ride on the top of the disk making some noise but shouldn't jam the rotor.
I guess opening up the slots on the top would increase airflow even further, but could detract from the overall look if not done neatly, which is why I have left them alone.


