

Introduction: Leaf Box


I love making bandsaw boxes. This is one of the most difficult boxes i make but i love a challenge. This was not the first of this style of box the first one i made got a lot of attention and the one thing everyone wanted to know was how i made it and then that would be quickly followed by "that looks very difficult to make". I want to show you that it really is not as hard as it looks what you need most is time and patients.
I am sharing this with you all as i had not made many boxes at the time i made this, and was still learning to use the bandsaw to get small curves but as i said before with some patients and a lot of time you can make a really nice jewellery box for someone special or yourself.
Step 1: Step 1

Items needed
Wood 12 inches x 9 inches (i used Douglas fur)
pencil
bandsaw with 1/4 inch and 1/8 inch blades
1/4 thick plywood 12x9
sanding sheets or drum sander dremel tool if you have one
green polymer clay ( to make leaf shapes)
Suede tex flock and glue
clamps
glue
Ok ready to start
Step 2: Step 2


To make it things simple i put a black and white photo of design print this and set the size to fit the piece of wood use tape or glue and stick to wood.
Cut back off box 3/4 inch
Main Box
Cut out the outline first
Now cut the band around the box
Now is the time to cut all the individual boxes out, try to stick to the lines on the paper but dont worry to much if it goes over slightly in places as long as is does not cut through the branches.
Take your time
Thats the box shape all done
Step 3: Step 3


For the next part you will need the plywood
Take the tree /branches part of box
place on top of plywood
Draw around wood on plywood so the outline shape in on the plywood
Cut around keeping close to the line this will be glued to the back of tree / branches to make it stand out from box band see photo
Glue plywood to bottom of tree/branches leave to dry
once dry sand the branches rounding edges and slope the ends to meet wit the box band ( i used the dremel for this)
Step 4: Step 4

Line up the back of the box and draw around and cut shapes of box.
Glue back to main box and clamp leave overnight
Step 5: Step 5


Thats the box finished for now next the drawers.
Take one drawer at a time draw lines on wood for front of box and back of box these will be cut first draw guide line for the cut into the draw on the bandsaw with 1/8 inch blade for inner box and 1/4 inch blade for front and back of box. before you cut try each box in draw to make sure its the right way up.
glue draws and clamp
Step 6: Step 6


Now all glued we are ready to decide where we are going to place the leafs.
Put draws in box and place a small piece if masking tape where you want to put leafs
Get polymer clay and soften and make into small leaf shapes make them around 1/4 inch thick as these are draw pulls bake.
Sand seal all wood giving a light sand in between coats i used 3 coats and let it dry in between for about a hour.
I used spray lacquer 3 light coats
Suede tex flock and glue the inside of the box.
glue leafs on drawers
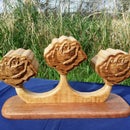
Step 7: Finished

Great thats you all done.

First Prize in the
Make a Box Contest

Participated in the
Full Spectrum Laser Contest 2016

Participated in the
Valentine's Day Challenge 2016


