

Introduction: Letterboxing: the Secret Scavenger Hunt Game


Letterboxing is an amazing (and surprisingly old) outdoor activity that's really cool, a lot of fun, and right under your nose! In short, it's a hide and seek scavenger hunt game played by thousands of people all over the world. It's easy to get started and very rewarding, and somewhat similar to the more modern hobby of geocaching.
I got my start letterboxing through geocaching--I'm told a lot of letterboxers do. I heard about geocaching from somewhere or another, I don't remember specifically. I didn't have a GPS, so I pretty much filed it in the "Some Day!" section of my brain. If you're not familiar with geocaching, it's a sort of GPS based scavenger hunt game. About a year ago I finally got a smart phone, and after a while I started finding some geocaches. It's a lot of fun, and I'm still playing, but now I've added letterboxing to my outings.
I was talking about it with my roommate, and he asked if I'd ever heard of letterboxing. I said no, and he described it like this: "It's sort of like geocaching, only instead of following your GPS, you follow a set of clues. You bring a blank book, an ink pad, and your personal stamp, and when you find the letterbox, you stamp their book with your stamp, and your book with their stamp."
The idea sounded awesome! He showed me his logbook and a couple of the stamps he'd carved, and then a little while later he bought some carving material and showed me what was up. I loved it! This is such a maker/DIY sort of activity, I figured there must be a thousand letterboxing instructables, but to my surprise I saw only one that bore any relation to the activity.
So, read on to learn all about letterboxing, from getting started to finding, hiding, and maintaining your own letterboxes!
Step 1: Materials Needed

There are three ways to go about this: the bare minimum approach, the serious approach, and the REALLY SERIOUS APPROACH.
If you just want to get out of the house and get started right away to try it out, the bare minimum you will need is:
- An ink pad (any will do)
- A stamp (they sell these already carved at any art supply store or often in the school/office supply section of a retail store)
- A journal or a sheaf of paper (lined journals are a dime a dozen)
- A raised ink pad (found at any arts and crafts store)
- Linoleum stamp carving material (found only at real art supply stores)
- Stamp carving tools (either actual carving tools or a hobby knife, or better yet: both)
- A blank, unlined journal (only found at real art supply stores, or occasionally at the dollar store)
- A sharp pencil
- Tracing paper
- The Pink Stuff (Speedball SpeedyCarve Material)
- Markers or a Petal Point stamp pad
- Serious carving skills
- Access to a laser printer
- Xylene pens (found at serious art supply stores, alternatively, Goof Off! cleaning fluid)
- Watertight containers
- Camo duct tape
- Zip top plastic bags
- Felt
- Blank paper
A note on supplies: everything you need is available through atlasquest.com, the main letterboxing website on the net If you'd rather not search around various brick and mortar stores, just hit the "Marketplace" tab at the top right of any atlasquest page and go to stampeaz, an online store run by a fellow letterboxer. The owner even stamps packing slips with her special stamps, which can in turn be logged as finds on the atlasquest site!
Step 2: History!
As of the writing of this instructable, letterboxing is 159 years old! In 1854, James Perrott placed a bottle with his calling card in a very inaccessible area of Dartmoor, England. Other visitors who made it to this out of the way locale placed their calling cards in the bottle.
In 1888, the original bottle was replaced with a tin box, and visitors began placing self addressed post cards in the box instead of simple calling cards. In 1907, John Strother first suggested that a rubber stamp and logbook be placed in the box, and the modern pastime of letterboxing was born.
However, it wasn't until all the way in 1976 when Tom Gant published a guidemap to the mere 15 letterboxes that then existed, that the hobby began to boom. Sadly, a lot of damage was caused by early players of the game, until a man named Godfrey Swinscow lay down some rules all letterboxers had to play by:
- Boxes should not be sited in any kind of antiquity, in or near stonerows, circles, cists, cairns, buildings, walls, ruins, peatcutters' or tinners' huts, etc.
- Boxes should not be sited in any potentially dangerous situations where injuries could be caused.
- Boxes should not be sited as a fixture. Cement or any other building material is not to be used.
The early internet allowed this old/new hobby to grow and spread. Nowadays, it it mostly found at atlasquest.com and letterboxing.org.
Step 3: Keeping It on the Down Low (INSANELY IMPORTANT!!!!)

Muggles: you know the word. They're the uninitiated, the unaware, the normals, the normies, the nine to fivers, the drones, the pinks. They don't have the secret knowledge you do.
Geocachers and letterboxers use the same term, and for the same reasons. People who don't know what's going on and happen to notice unknown people placing unknown boxes containing unknown substances tend to get suspicious.
Letterboxers have been arrested. Letterboxers have been detained. Bomb squads have been called. Letterboxers have been investigated by the FBI. It is very important to be VERY CAREFUL!
Don't hide letterboxes in large public buildings, bridges, or in stadiums. Be careful when searching out letterboxes in public places. Be aware that someone might get suspicious. Have a cover story ready to go!
I like to tell people that I'm on a scavenger hunt, or keep my camera around my neck and look like I'm taking macro pictures. I live in Eugene though, so people assume I'm just another weirdo and forget about it. In more stoic places, be prepared to explain yourself, and try not to get in trouble! Use common sense and don't do anything stupid!
Step 4: Level 1: Bare Minimum Letterboxing

At the very, very least to get started, you must have a stamp, a book, and an ink pad.
Lots of art supply and craft stores have stamps. You can buy one pretty cheap, if you're not concerned with the image. Even a lot of dollar stores have stamps. This will be your "trail stamp", like a signature, and it's how other letterboxers will know you've been there.
Ink pads are even easier: dollar stores almost always have these, and office supply stores always do.
A book or journal is very easy as well, as long as you're not worried about lines. High quality journals are offered at any store, but finding one without lines already printed on the pages is trickier. My daughter made do with a simple lined journal for our first few trips, and it worked out just fine.
Step 5: Finding a Letterbox


Now it's time to find your first letterbox. This gets you out into the world, either to find new places or to take a new look at a familiar place. Since I've been geocaching and letterboxing, I've found a dozen or so parks I wasn't aware of, nature trails, and even a pioneer cemetery, all right here in the town I've been living in for thirteen years!
The first stop for me is atlasquest.com. Some people use letterboxing.org, but I find the search functions and interactivity on atlasquest superior. Don't let the appearance fool you! Stylistically, atlasquest looks like it was designed in about 1998, but under the low res jpegs and weird color choices, it's really a very versatile and modern website.
Your first task is to create a free account--this is so you can log your finds or attempted finds. It's very important to let the owner of the stamp you went searching for know what happened!
Next, start with the city directory under the letterboxes tab near the top of the page. This is primarily a US website, so it immediately pops up a map of the United States. If you're from elsewhere though, don't worry, just scroll below the map to find a directory of other countries with letterboxes. If you don't find yours there, or there isn't a box in your town, now's your chance to get the hobby off the ground in your area!
Once you've narrowed things down to your own region (or the region you'll be visiting), you'll get a list of letterboxes sorted by distance from the center of the city you've chosen. You can reorder them in a variety of ways, or you can even map the results. However, it's important to read the description of each letterbox individually. Some have their location set some distance from the actual letterbox. For instance, the first letterbox I planted is pinned at Glide, Oregon, but it's actually 11 miles south (you just start in Glide to find it). Also, especially on your first couple of trips, make sure you read the comments from other letterboxers and note the last time the letterbox was found. If it hasn't been seen in three years and the last four comments say they're pretty sure the box is missing, you might try a different one for your first outing!
I like to save the directions to my phone so I can use it to navigate to the letterbox. Directions can range from very specific to very vague. The first letterbox I found told me to go to a specific business after they close, sit on the third step on the right side, reach into the bush there to find the letterbox. Others are purposely cryptic, to add an element of mystery and challenge to the hunt. My favorites are the letterboxes that are specific enough that you aren't lost, but tell a story about the area and/or the stamp. For instance, there's a local letterbox that tells the tale of Psyche and Cupid as you follow the directions on a romantic stroll into the forest. I really liked how it was done, it was a fun story to add to our short hike.
A lot of letterboxes are planted as a series. Under the main letterbox heading, a number of stamps will be listed. The first series I found was a set of stamps carved based on Disney's Cars characters. There are quite a few around my home town, including some based on Edgar Allen Poe's fiction, mustache styles, and famous authors.
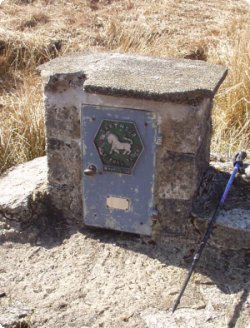
Once you find a box, make sure to watch out for the muggles! Remember not to get caught, or make people think you're doing something nefarious! Take the letterbox (I've seen everything from a gallon jar to a small zip top bag) a little way from the hiding spot before you open it.
Now it's time to "Stamp in", which is exactly what it sounds like. Assuming the letterbox is in good condition (leaking is often a problem in Oregon, and I found one letterbox that a colony of ants had moved into), you'll find a stamp and a book or sheaf of papers, and sometimes an ink pad, if the hider thought their stamp should be in a specific color. Stamp their stamp into your journal, and make a note of the date and the name of the letterbox. Next, stamp their book with your stamp, add the date, and a short note to the owner if you feel like it.
When you're done, close everything up carefully, wait as long as it takes for the muggles in the area to clear out, and replace the letterbox. Make sure it's well hidden, or it may get thrown out as trash . . . and that's a real tragedy in my book. There is some beautiful art contained in these letterboxes. We've also started bringing trash bags and gloves with us, to clear out debris less conscientious travelers have left behind.
Don't post pictures of the stamps you've found to facebook or other online locales, unless you've first gotten permission from the owner. This is their stamp, and often the letterboxer wants someone to work to find it!
Your last duty is to remember to log your find. On atlasquest, simply click the record your find button on the letterbox's page, and give all the details. Make a note about it even if you didn't find it. Don't leave clues in the comments though, that's stepping on toes and won't win you any friends. If you weren't able to find it, but you still think it's there, it's perfectly acceptable to ask the owner for hints in a private message, but by the same token it's their prerogative not to give you any if they don't think it's necessary, or if they're just feeling secretive.
Step 6: Levels 2-4: Serious Letterboxing

Leveling up to serious letterboxing is pretty easy, and absolutely worth it.
First, you'll want a nice journal, with blank pages. I looked high and low for one of these (to replace India's basic lined journal), and ended up at a really nice art supply store that had a very good selection. It's small enough for a pocket, has good quality paper, and has an elastic band to keep it secure.
Next, you're going to need an art quality stamp pad. Most of the pads available at office supply stores are only available in black, red, and sometimes blue. Worse, they are almost universally sunken in. Art stamp pads, available in any crafting or art supply store, come in a wide variety of colors and, more importantly, are raised. This allows you to run the pad over larger stamps, which is really difficult if the actual stamp pad is below the edge of the box and the stamp is larger than the pad. You'll have to choose between dye (quick drying, less water resistant) or pigment (longer lasting, less crisp stamps if the paper is already damp) inks. I went with dye, the quick dry aspect appeals to me. *** UPDATE - after lots and lots more letterboxing, I've started going with pigment dyes exclusively. The end result is far superior to dye once you get practiced at stamping.
After you have these in place, the final step is to carve your own trail stamp. This can be as simple or as complex as you want it to be. Mine was fairly difficult, as it was a stylized rendering of my avatar image with "depotdevoid" below it--lots of little lines to carve, and both words and shading are very tricky. My daughter's was much easier, she just wanted hers to be Hello Kitty. You'll have to find an art supply store for stamp carving material. I go into more detail on this in step seven.
Step 7: Carving a Trail Stamp


Carving a personal signature or "trail" stamp is a lot of fun! It's the way you'll become known to other letterboxers and literally leave your stamp wherever you go. It may seem daunting at first, but even a mediocre artist like me can, with patience and time, carve a good looking stamp.
You'll need a few things to carve your trail stamp. They can be broken down into four basic categories:
1. A picture
You can use pretty much anything, from your own drawing to something you find on google image search. It's important to keep in mind your limitations though; starting off with a multicolor stamp as your first carve could be tricky, so you might pick something monochrome, with limited or no shading.
I used my avatar, an upside down moon that was my first telescope photograph, along with some text at the bottom that says depotdevoid. I didn't realize it, but I was being pretty ambitious for my first carve! It turned out well though, I guess I remembered a few things from high school art classes.
If you use words, don't worry about reversing them; when the image goes on the carving material, it will be reversed. They will end up stamping the right way around.
2. Stamp material
Carvers use anything from cheap erasers to professional carving materials (which aren't too pricey). Ideally, you want something that carves easily, doesn't crumble or break when flexed, and lasts a long time in less than ideal conditions. All of my reading points to SpeedBall SpeedyCarve as the best, and my experience carving with it seems to bear that out. It's got a great consistency that's really nice to work with. A large sheet runs about $20 on Amazon, though you can get smaller sheets for much less.
If you want to start small or get some practice, pick up some erasers at the dollar store. They aren't as good, but they will allow you to play around with the process. You can also pick up linoleum carving material at art supply stores, but it isn't as good as the SpeedyCarve, as the material is a bit gritty and I'm told it doesn't age well.
3. A way to transfer the image onto the material
There are three basic ways I know of to get an image onto the stamp material.
The simplest is to just draw directly on the stamp with a permanent marker or dull pencil. I'm not confident enough in my abilities to try this, but I have seen decent results using this method. If you incorporate words, keep in mind this method does require you to reverse them when drawing them on the stamp.
Next, and the method I use most often, is to draw or print out a picture and tape tracing paper over it. Then, using a pencil, I trace the image I want to carve heavily onto the tracing paper. Finally, I put the image face down on the carving material and rub the back. This transfers the graphite to the material. The one downside is that lines tend to get thicker when you use this method, so precision is more difficult. Also, it's easy to slip or smudge when transferring.
Finally, the real pros print their images via laser printer (must be a laser printer, not an ink jet), and then transfer them chemically to the carving material. I have had limited success with this. There are a variety of chemicals, most of them nasty and requiring ventilation, that can do the job. Acetone works, but is slow. Xylene is available in pens at most art stores, or else is a major component in Goof Off! cleaning fluid.
In this method, after printing off your image with a laser printer, tape it ink side down on the carving material. Saturate the paper with acetone or xylene, and gently rub the back side of the paper with a smooth, rounded object--I use a spoon. I've not used acetone, but with the xylene you have to be careful not to oversaturate the paper. If you use too much, the ink will run and ruin the transfer. Conversely, if you use too little, not enough ink is transferred. I've been getting better with this method, but I find it takes some trial and error. When it does work, it works great!
4. Carving tools
There are basically two methods for carving: hobby knife and gouging tools. I tend to use a mix of the two, but lean more towards the hobby knife as it allows a much greater degree of control and precision, though it is more time consuming. I recommend practicing with both until you find a mix you are comfortable with.
The carving process itself is quite simple in concept, just remove any white space and leave any dark space. In practice, especially when you're trying for a detailed stamp, it can be very difficult. The key is to make sure you don't undercut the dark lines, and remember that you can't take back your cuts, so remove a little bit at a time. Always carve with the hobby knife or gouging tool angled away from the dark lines. Take your time. Don't fret over small mistakes, they likely won't ruin an image.
This isn't meant to be an instructable on how to carve rubber stamps (though I may publish one some day), I'm just trying to give you the basics in relation to letterboxing. Here is one good instructable on the subject, here is another, and here is a youtube video.
Step 8: Levels 5-∞: REALLY SERIOUS LETTERBOXING!

Really serious letterboxers take it to the next level and beyond: this is what I'm aiming at right now. There are people in my town who have carved dozens of stamps, and maintained their letterboxes for years. I hope that I'll be that diligent!
First, you want some serious carving material. From all of the articles and forum posts I've read, SpeedBall SpeedyCarve is the best. I picked some up recently, and it really seems great! The carving process is better, and I'm told it ages better than most other materials, especially when exposed to the elements as it surely will be in a letterbox.
Next, you may consider adding some color to your stamps. I like mine in black and white, but there are letterboxers out there who add some serious color to their trail stamps, everywhere from simply using a colored ink pad, to coloring their stamp and then adding color afterwards. There are a variety of methods:
- "Petal point" ink pads
- Markers
- Mixed ink pads
- Water color paint
- Multiple stamps in multiple colors
- Coloring after stamping
Thirdly, it's very important to interact online with other letterboxers. If you go out and find a stamp, there's nothing a 'boxer loves more than hearing about it! Conversely, if you can't find a stamp and you never post a comment about it, how is the owner of the stamp going to know? These things go missing all the time, and it's super important to tell the owner of the stamp.
By this point you'll probably have the itch to hide your own letterbox! This can be super simple, or super complex. It'll require another stamp (hand carved or store bought), some camo tape, a watertight container, and a few more things, not to mention a good place to hide it. Check out step nine where I go into detail on this.
Finally, maintaining your stamps is also part of being a REALLY SERIOUS letterboxer. Once you post a stamp on atlasquest.com or letterboxing.org, it's going to be there until the internet dies or you remove it. I have gone searching for a lot of stamps that are clearly missing, and have been for a while. It doesn't take much to remove one from the various websites, or go out and replace it, so people don't waste their time searching for a stamp that isn't there!
Beyond that, the sky is the limit! You can get social, interacting with letterboxers around the world. There are gatherings and events in various areas. Some people trade stamps through the mail. There's a lot more, and the rabbit hole goes very deep. Check out atlasquest.com and letterboxing.org for more information.
Step 9: Hiding a Letterbox


Once you've found a few letterboxes, you'll probably start thinking about planting your own. I started thinking about it after my first find, but I decided to do some more searching and get a better feel for game before I did.
After I'd been at this for a month or two, I had a short trip planned a few miles south to do some letterboxing and geocaching with a friend. I decided to commemorate the trip with a specially carved stamp and my first letterbox! I figured it's not too far away, if it ever goes missing I'll be able to drive down and check on it.
When placing a letterbox, you'll need four things:
1. A container
I have seen a variety of containers, from a simple zip top bag to a gallon jar spray painted green. What you decide on will depend on a variety of factors, size of hiding spot, terrain, size of stamp, etc. Of the various containers I've seen, clip top food containers seem to keep their contents driest, and seem to be most durable over a long period of time.
Whatever you choose, it's best to wrap it in camouflage duct tape. Some I have seen were wrapped in black tape, which works well enough. The goal is to make it unnoticeable to passersby.
It's also important to make a note on the outside of the container explaining that it's a letterbox and not garbage (or worse). I've got a simple note I tape to the outside of the box that tells people "Congratulations, you've found a letterbox!" and asks them to visit atlasquest.com for more information. Mostly, you don't want people afraid of what it is, and you don't want them throwing it in the trash.
2. A logbook
Finding a book sized to fit your container can be tricky. I found a couple of small books at the dollar store, but the next time I went there they were all out. Other times, I have simply cut down some sheets of paper and either taped or tied them together. This should be placed in its own zip top bag inside the main container.
3. A stamp
Most of the time, letterboxers will carve their own stamps. The first one I hid was a pair of crossed rock hammers over a picture of the earth--sort of a geology logo, as I was seeing a lot of cool rock formations and such on the trip I took. India has carved a set of super hero logos, which we have hidden as a series near my work.
Some letterboxers will hide a series of stamps, and then invite others to add to it! I'm planning on adding to a few around town, and I've just finished up my own series of space images I'd like others to add to (though as of the writing of this instructable, I haven't planted it yet).
4. Somewhere to hide it!
When hiding a letterbox, it's important to get permission if you can. Never hide them on private property without permission! Don't hide them on the wrong side of no trespassing signs, and don't hide them somewhere that searchers could rip up a fragile ecosystem looking for the box. If the owner or land manager of an area asks you to remove the letterbox, do so!
For this reason, one of the primary places letterboxes are hidden is in public parks. It's easy to find a rotten log or a loose rock to hide the letterbox under. Look for sneaky places and little holes, but be aware of your surroundings, don't get caught, and think about damage that might be caused by potential searchers!
Step 10: Connecting With Other Letterboxers

I've pretty much stuck to the social features on atlasquest.com, and you can find me there (as depotdevoid, unsurprisingly).
So far, nearly everyone I've logged a find with has commented back, to say thanks and welcome to the game! It really seems like a friendly community, and I understand new members are always welcome. I'm still pretty green, but that doesn't seem to bother anyone.
One piece of advice I've been given recently is to contact a letterboxer before you log a box as missing. Lots of "missing" logs can discourage others from making the attempt, even if you simply missed the box. Make sure you send a message to the owner asking for a hint before you post, maybe you'll be able to add another stamp to your book after all, and make a new friend in the process!
There are other ways to connect to others via the online community--these include special meetups and events, as well as trading stamps through the mail. I find that I really like carving the stamps, so I'm hoping to send some out in the mail sometime, and I'll certainly be participating if there are any local events!
Finally, here's a bit of secret knowledge. Say you're out searching for a letterbox, and you see someone else that looks like they're searching the same area. How do you tell if they're another letterboxer, or just some weirdo? Easy! Simply ask, "Which way is north?" If they point up at the sky, it's a fellow 'boxer!
Step 11: The Instructables Letterbox!

I like to make my instructables as interactive as humanly possible, so I've got a special something for this one: a letterbox to bridge the gap between 'boxers and 'iblers! I've sent a letterbox with a hand carved stamp of the Instructables Robot to Instructables HQ in San Francisco--all you have to do is walk in the door and ask for Mario (during regular business hours, of course).
**Update 8/29/13 - With instructables HQ's move to their new location, the box is no longer kept inside. Mario found a spot to hide it near the entrance though, so check the atlasquest page and follow the new clues!
I took to letterboxing like a fish to water. It felt like it been designed for crafty types and people like me who self-identify as Makers. I was really surprised no one else had posted any letterboxing instructables, so hopefully this 'ible will introduce the two communities to each other.
If you post a picture of your trail stamp in the Instructables Letterbox log, next to your own journal with the Robot stamped in it in the comments below, I'll send you a digital patch and a 3 month pro membership. One full year for the first person to post it!
Step 12: Final Thoughts

Thanks as always for reading my little 'ible. Between my shop being too cluttered to use due to some home improvement work, and planning, going on, and recuperating from a trip to Chicago, I haven't had a lot of time for making in the last few months. Despite that, I've really gotten in to letterboxing, and I hope you do to!
As I mentioned in the last step, if you post a picture of your trail stamp and the Instructables Letterbox stamp together in the comments, I'll send you a digital patch and 3 month pro membership. If this instructable inspires you to carve your own stamp but you can't get to San Francisco, or if you are already a letterboxer and can't make it all the way there, just post a shot of your trail stamp below and I'll send you a digital patch of the Robot stamp!
Please take a moment to rate, subscribe, follow, comment, etc. I love hearing from my readers!


