

Introduction: Light Switch Plate. . .Switch


Commonly over looked, continually used, the light switch and it's plate take a lot of abuse. Why not dress it up with a little duct tape? Go from dull and drab to fun and funky.
Step 1: Supplies

Simple Supplies:
Duct tape
Pencil
Knife
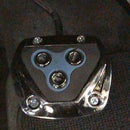
Light switch plate.
Step 2: Design


Pick a design.
Cover the light switch plate with duct tape.
Cut the design out.
Transfer the design to the plate.
Step 3: Fiddly Details


Press down the duct tape over the opening in the plate.
Cut a 45 degree angle from each of the corners in the switch slot . Cut in the center between the points.
Fold the edges down.
Cut a cross into the screw holes and press down with a pencil.
Trim the edges of the tape around the switch plate leaving 1/8 to 1/4 inch border.
Pull and roll the edges under smoothing the tape at the corners.
Mount the switch plate back over the switch, and now the room has a fun little detail that's sure to light up any room!

Participated in the
Cardboard and Duct Tape Contest


