

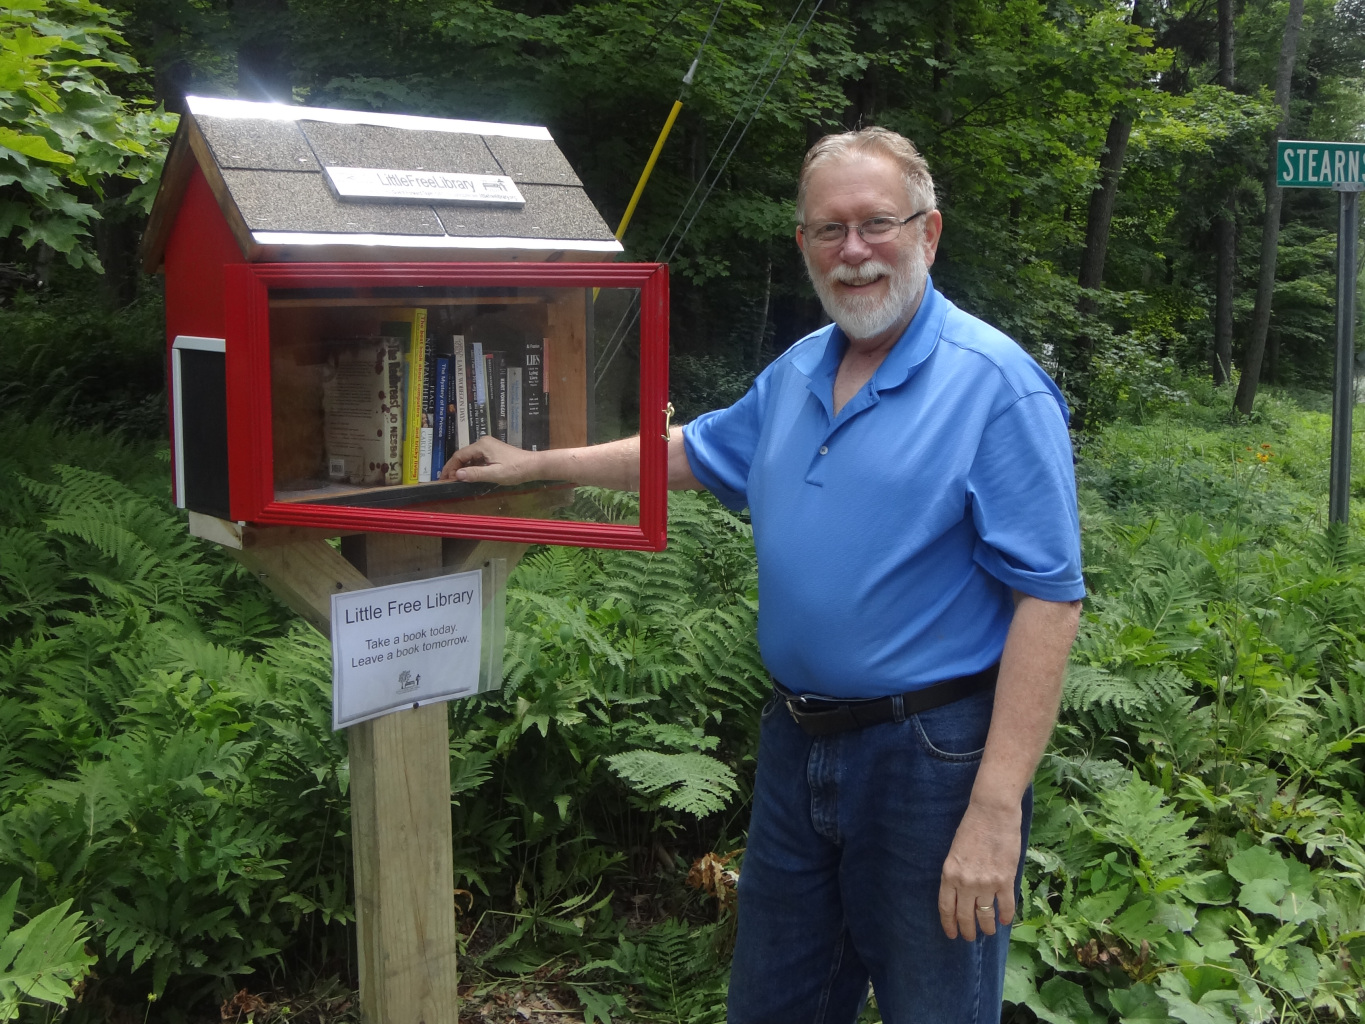
Introduction: Little Free Library


The Little Free Library web site has good tips and plans for builders and I used those as a starting point. Mine is a little larger and has these design characteristics:
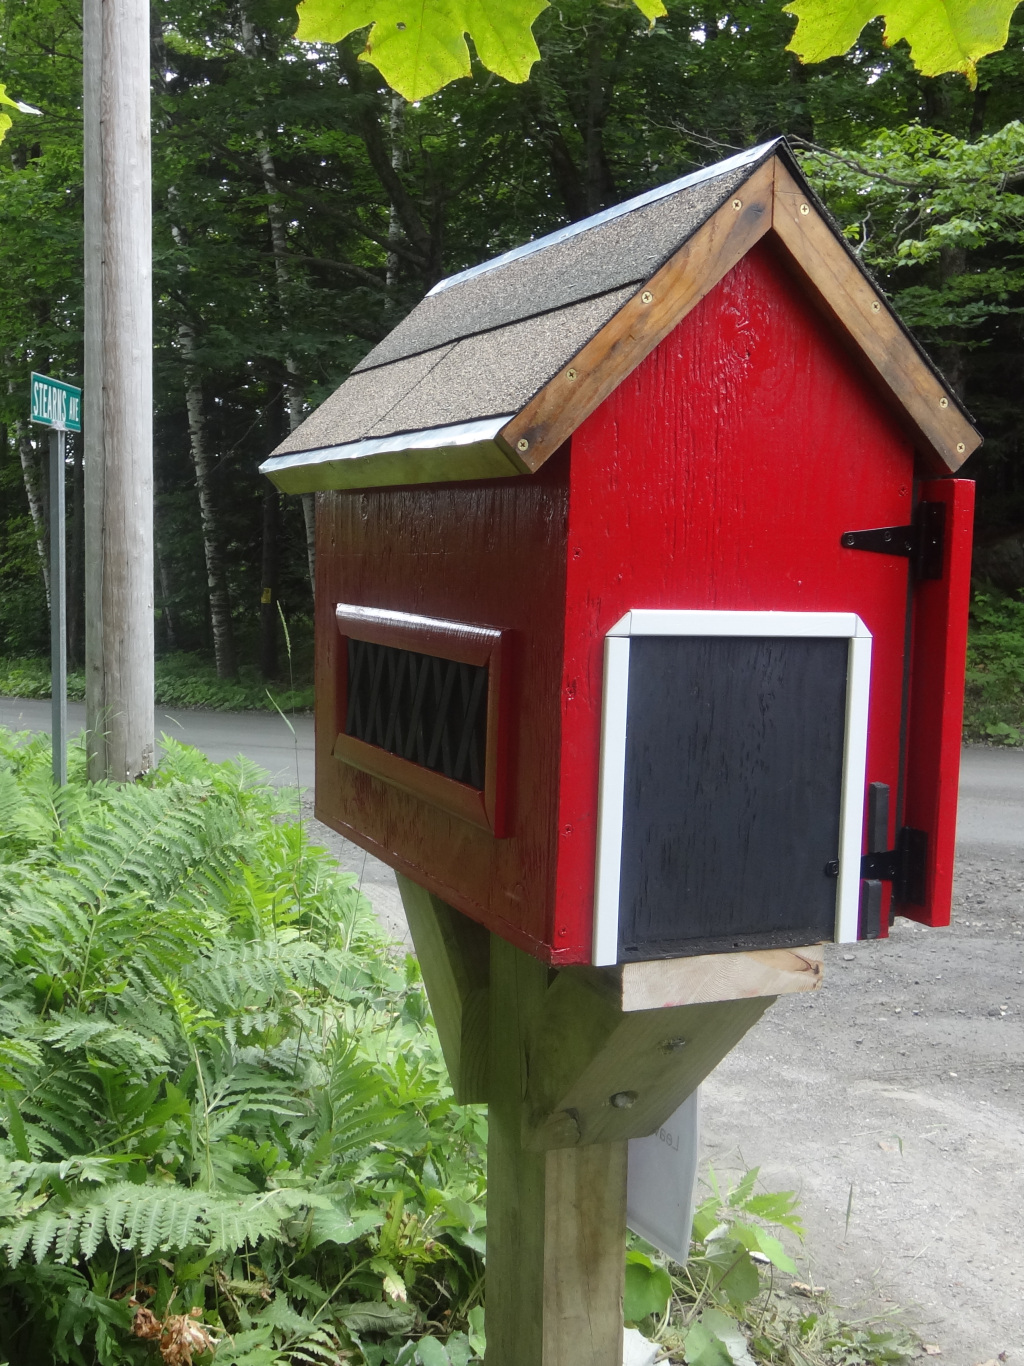
- Looks like a Vermont covered bridge
- Weatherproof
- Uses recycled materials where available
- Accommodates tall books
- Has a shelf above the books to store papers
- All joints are glued and screwed
- Half sheet of 5/8" exterior plywood for walls, floor, and roof
- Recycled pine for trim, shelf, and braces
- Recycled asphalt shingles
- Recycled aluminum flashing
- Recycled mirror frame for door
- Hinges and hook for door
- Weatherstrip rubber foam self-stick tape for door
- Clear acrylic for door
- Push glazier points for door
- Box of #8 x 1-1/2" flat head brass wood screws
- Wood glue
- Caulk
- Enamel paint for exterior
- Translucent oil stain for interior
- Recycled 2x8 for base
- 4"x6"x8' pressure-treated post
- Lag screws for post, braces, and base
- Bag of gravel mix cement
- Circular saw. A table saw would be even better but I don't have one.
- Carpenter's square
- Tape measure
- 1/4" drill with Phillips bit, drill bits for pilot holes and flat boring bit to counterbore lag screws
- Phillips screwdriver.
- Paint brushes and rags
- Caulking gun
- Level
- Socket wrench
Step 1: Draw Out Your Plan

You don't need a professional blueprint--just a pencil and paper. A sheet of graph paper makes this easier. If you don't have one you can print one from the web.
I changed my mind about some dimensions along the way so my plan is mostly to scale. Notice a few design details:
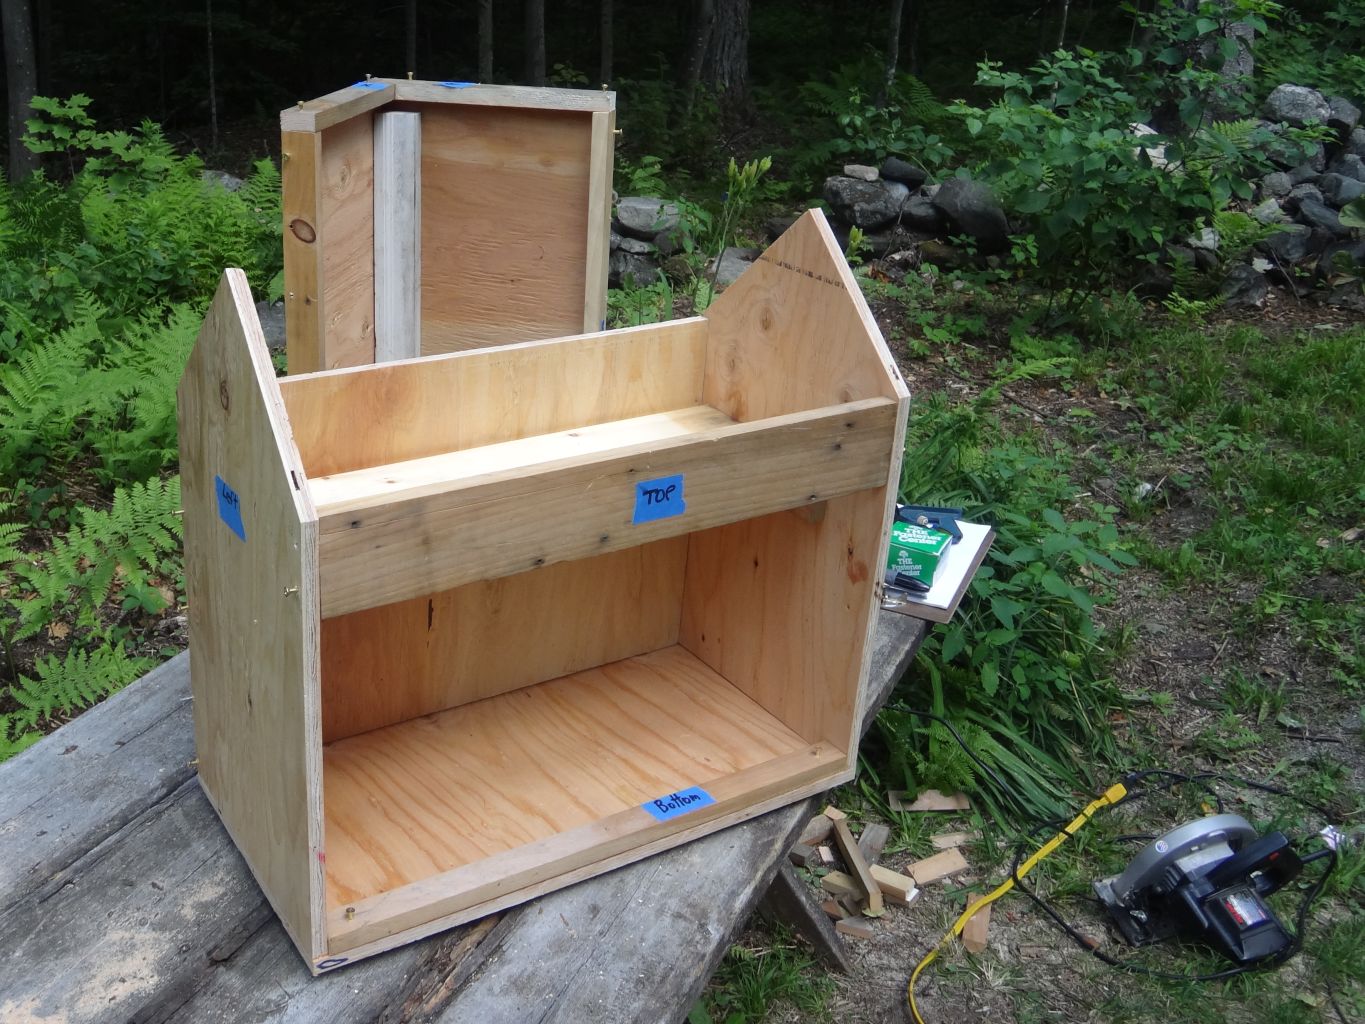
- The walls rest on the floor so their screws can go in from the bottom.
- The roof boards are at a 90-degree angle--easy to work with.
- The front roof is shorter than the back roof to give the door adequate clearance.
- Inside the peak of the roof is a 2"x2"x20-3/4" brace.
- The roof trim provides a more finished look and a tight fit onto the walls
- The door closes against a brace at the top and a brace at the bottom.
- The original design called for the base and posts to be made of logs.
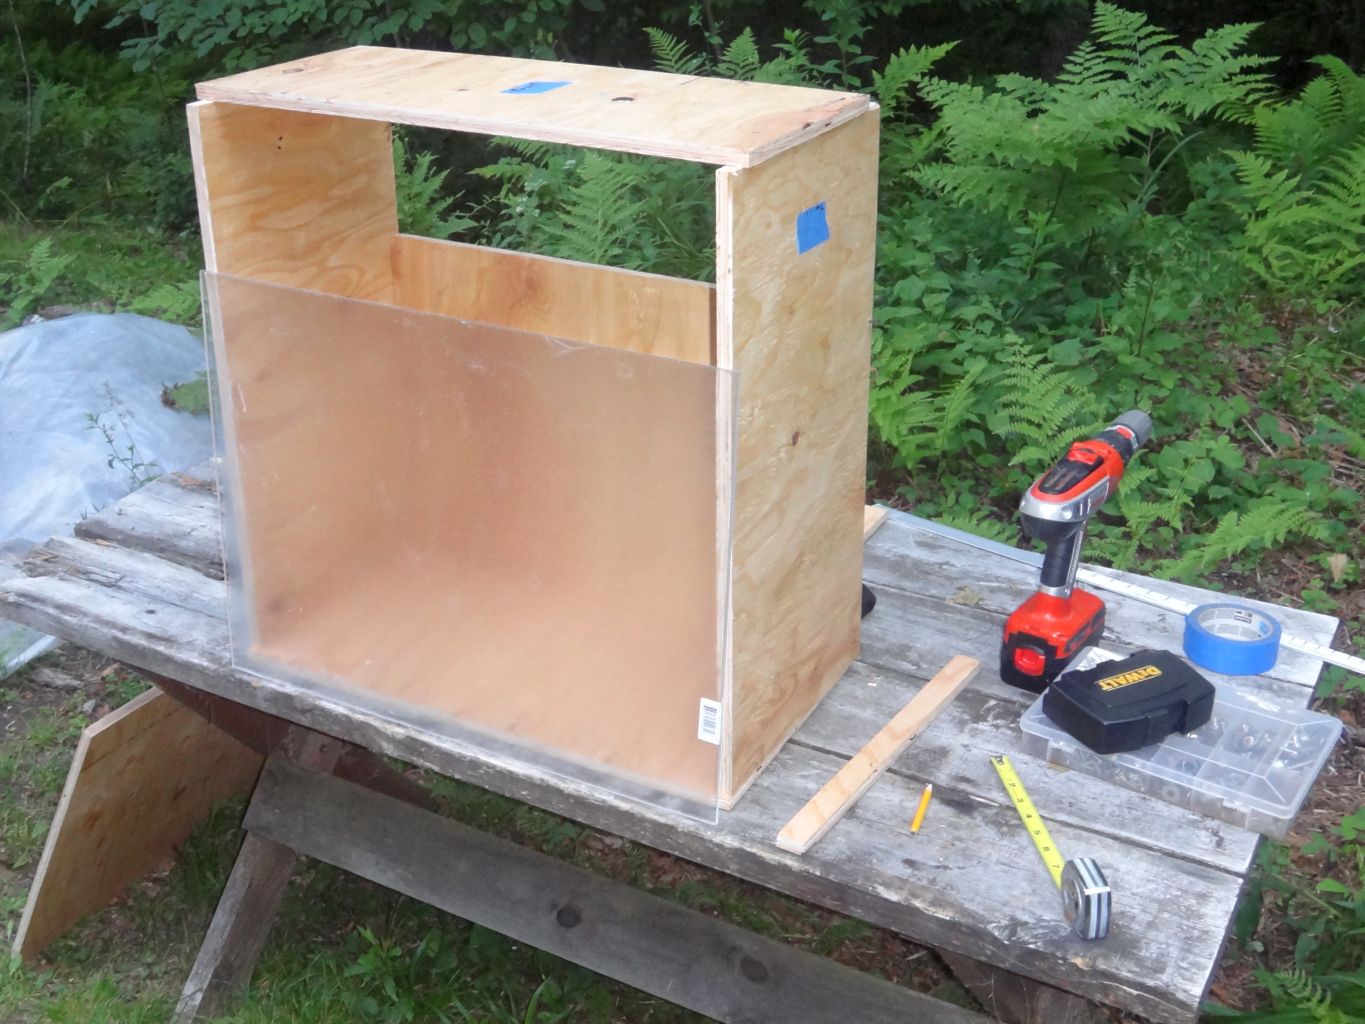
Step 2: Cut and Label the Plywood Pieces


Follow your plan and revise it as needed. Measure and cut the walls, floor, and roof boards. To save problems later, be sure all cuts are square. Label each piece--otherwise it's easy to get a piece out of place. Trust me on this.
Brass screws don't rust, but they are soft so pilot holes are important. Drill them with two different bit sizes. Holes in the board you are passing through should be the same diameter as the screw shanks. Holes in the board that the screws are tightened into should be smaller than the screw threads. Temporarily assemble the pieces to ensure that everything fits correctly. Hint--place nails in the pilot holes or drive the screws just part way in.
Step 3: Cut and Assemble the Braces, Trim, Shelf, and Door Frame

The roof's end trim pieces fit snugly outside the walls. Cut the 2"x2" brace for the roof so it fits snugly inside the walls.
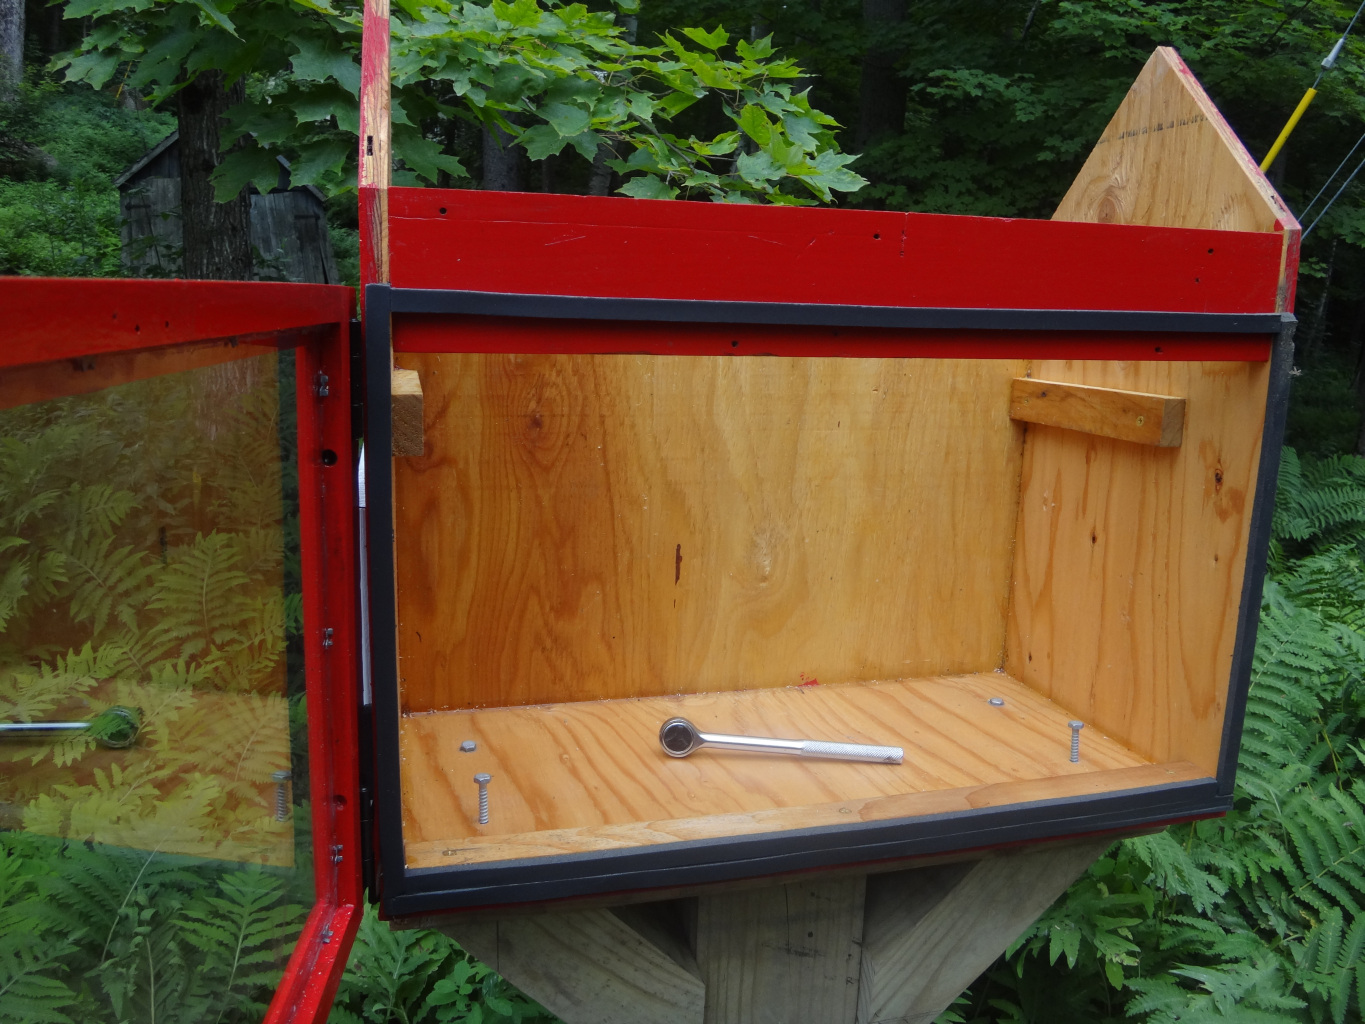
The shelf's depth is about 3/4 the depth of the side walls and it rests on braces attached to the side walls. Position the shelf braces so the shelf has about an inch of clearance below the top brace on the front.
The door frame rests against weatherstrip tape applied to the edges of the side walls, the edge of the floor, the top front brace, and the bottom front brace, so all these surfaces must be flush. The top front brace is attached to the side walls and the bottom front brace is attached to the floor.
I made the door from a recycled oak mirror frame and cut it down to size. I used both wood glue and screws to make the two new corners as strong as possible. Then I cut the clear acrylic window to match the frame. The clear acrylic can be cut by sawing or by scoring and breaking. I just used my circular saw with a fine-tooth blade and that worked well.
Step 4: Paint and More Paint


Paint all the interior surfaces with your favorite waterproof sealer. I used a translucent oil stain that I had on hand. Each joint will be glued as well as screwed, so for best glue adhesion avoid painting the surfaces where the glue will be applied.
Paint all the exterior surfaces. I applied several coats of Rustoleum exterior enamel. I also added black paint for the covered bridge look.
Step 5: Assemble the Pieces


Apply wood glue and screw the brace and trim pieces to the plywood roof. Cut the flashing and roofing shingles to fit. Nail or staple them in place.
Apply wood glue and screw the shelf braces, walls, floor, top front brace, and bottom front brace together.
Step 6: Add the Door and Caulk the Interior


Install the clear acrylic into the door frame with glazier points. Apply the weatherstrip tape to the edges of the side walls, the edge of the floor, the top front brace, and the bottom front brace. Attach the door's hook and eye.
Caulk all the inside joints.
Touch up the exterior paint to cover the screw heads.
Add exterior trim pieces if you want yours to look like a covered bridge. ;-)
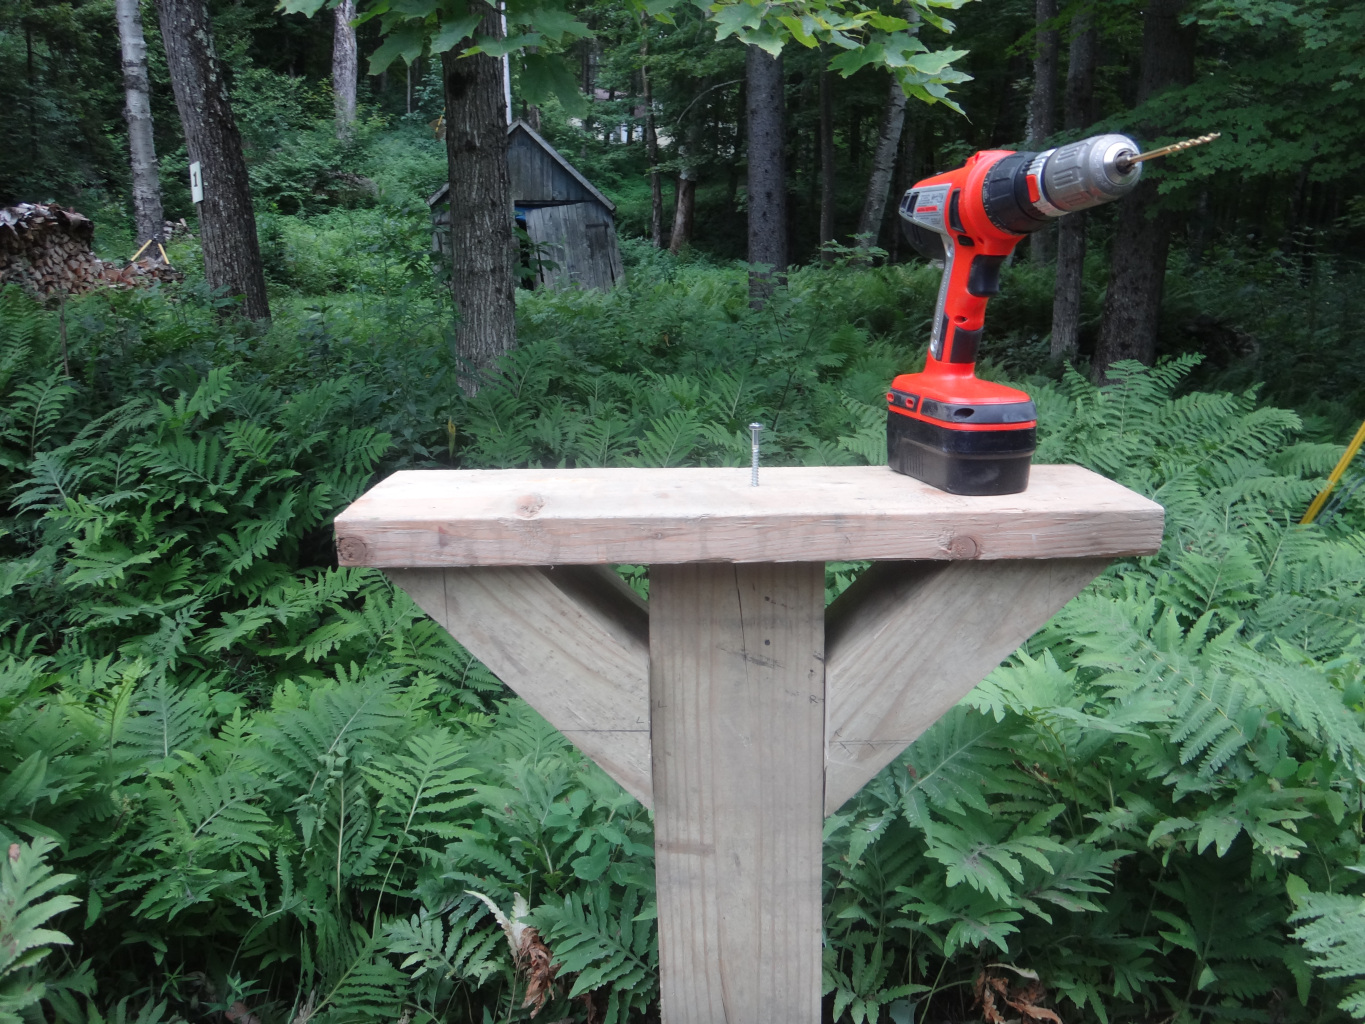
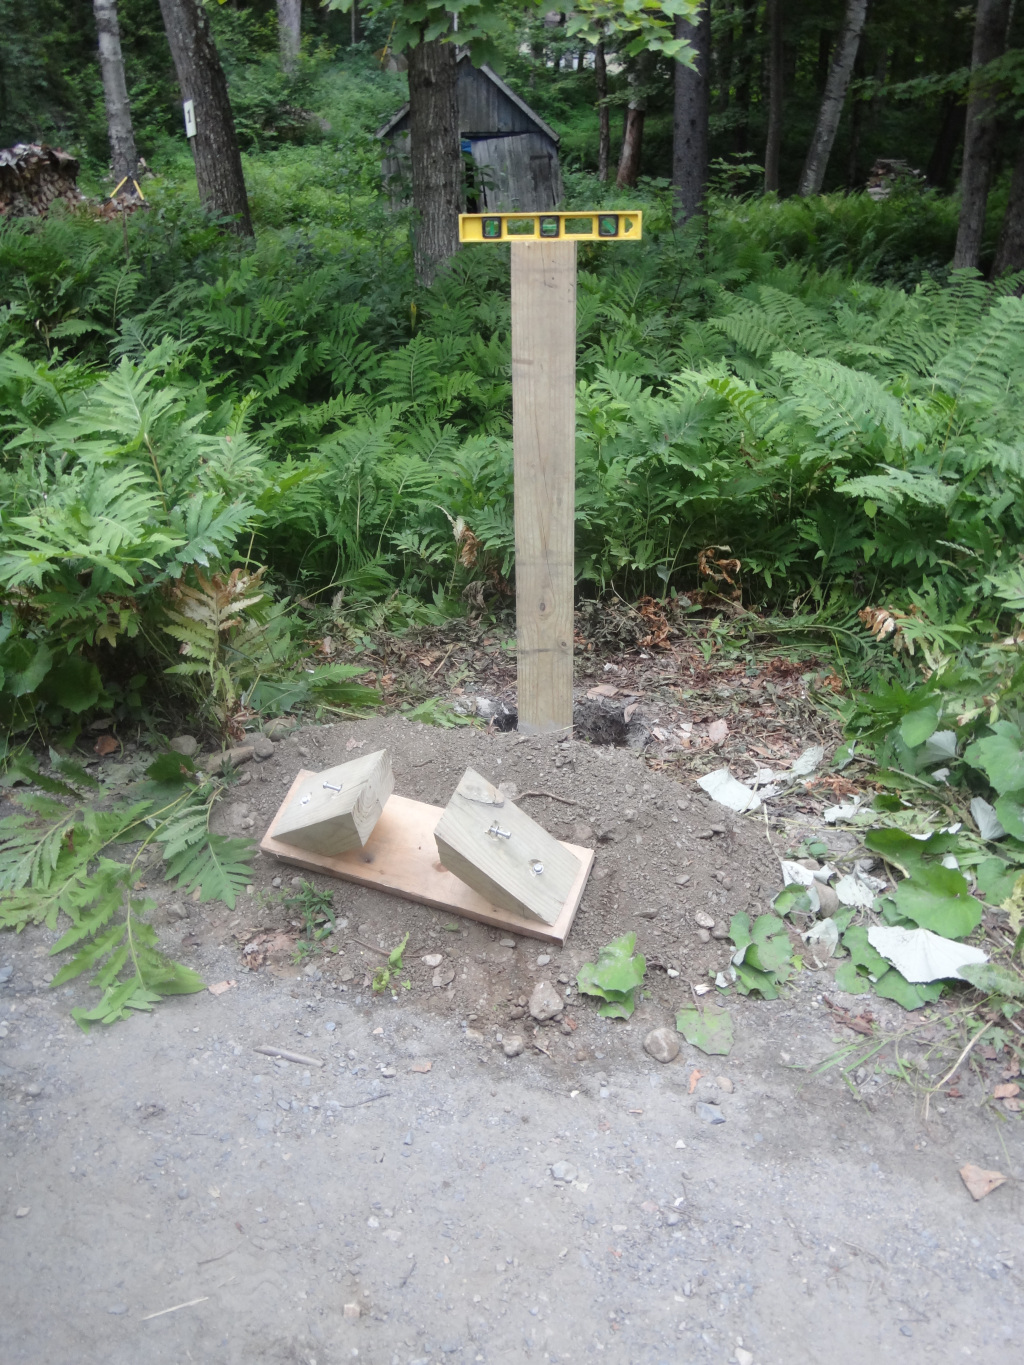
Step 7: Build and Install the Post


Cut a section of 2x8 to match the width of the Little Free Library. This is the base that rests on top of the post.
Cut off two 12" lengths of the 4"x6"x8' post to make two braces. Cut the braces at 45-degree angles. Counterbore each place you will put a lag screw--this will provide clearance around the lag screw head when you tighten it with the socket wrench. Drill pilot holes for the four lag screws. Attach the angle braces to the base with lag screws.
Dig a 2' hole and drop in the post. Pour in the bag of concrete mix and water. Level the post and let the concrete dry.
Step 8: Install the Little Free Library


Set the angle braces and base on the post. Level the base and use the socket wrench to tighten the lag screws in the angle braces.
Drill a pilot hole for a lag screw through the base into the post. Tighten the lag screw to stabilize the base.
Set the library on the base and drill four pilot holes through the floor into the base. Tighten the four lag screws to secure the library to the base.
Add the roof, the shelf, and the books. Enjoy your Little Free Library!


