

Introduction: Louche Foot-stool. Lounging Comfy-ness From Found/recycled Stuff


Here's a lovely little stool I just made from free materials, scavenged or found out of skips and kind give-ways. Took only two weekends.
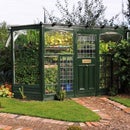
I built this to match the sofa in my garden summerhouse. It was designed for two purposes:
- Being a dead comfy foot rest for lounging - yep that worked.
- Acting as a padded table to take a tray when eating out in the garden. That also worked
Specifically, it is made of...:
- Some 2"x2" stud-wall frame timber leftovers
- Some surprisingly good hardwood planks ripped off a pallet
- Really nice quality leather hide, and padding, from an old sofa, given away free on Gumtree.
This build also used a few leftovers and sundries in the shed, like webbing, tacks and glue, but everything else was scavenged - nice!
Step 1: Basic Frame From Recycled Pallet Wood


Who'd have thought that you can get pretty damn fine hardwood timber (lumbar for my US readers) from pallet planks?
Well, it appears you can... The rails on this stool were cleaved off a pallet retrieved from a fireplace-shop skip. It turned out they are some nicely dense, unidentified tropical hardwood - result!
To extract this wood from pallets, I have found that the least damaging way, is to take them apart with a cold chisel and lump hammer. By smacking the chisel in between plank and rail, you can usually separate the two without splitting the plank. It rips the nails out very nicely.
You can use crowbars, but they are narrower and apply pressure too locally. Crowbarring can split a board, if one side of the board is free to move, but the other is still attached.
I have to say, it is not common to find decent hardwood on pallet - Most pallets are sotwood (in fact the chisel technique is shown here on a softwood pallet, but it is as effective on hardwood)
This pallet was from a skip outside the local fireplace shop. I assume they use hardwood pallets for strength, as they ahve to bear the heavy stuff they sell, like cast-iron fireplaces and heavy marble slabs that they use for decorative surrounds. To be honest, I don't care. I was just happy to get the wood for free. While you can do woodworking with any wood, it is much more enjoyable with hardwoods. They saw, carve and sand much more precisely than softwoods like pine, so I was happy.
Step 2: Making the Basic Frame


On top of foot support when lounging, the stool was designed so that it could be used as a table for resting a tray on.
The dipped frame top was also because, when a tray was rested on it, it would be supported firmly at each end to give stability.
The frame was made with some simple mortice and tenon joints. Nothing too tricksy here
It was designed to give a wide and very stable base for the cushioned top, so that feet could be draped over it louchely in any way that felt comfortable. Feet-together or feet-splayed - It was made so that both would work. The soft dipped centre is intended to make it well comfy, under-arse!
The tenons were hand cut in the traditional way. The mortices were cut out using an electric route - much faster. They were then squared off using mortice chisels. The long sided rails were done first, then the mortices for the short side cut with the long rails in place.
Step 3: Adding the Webbing


Because the wooden frame was made by jointing legs (uprights) and rails (horizonal struts), it had no support in itself, for the cushioned top that would rest upon it., and so webbing was needed.
This was the only bit not really recycled. I happened to have a roll of webbing in the shed left over from a chair I made a few decades ago, so that was handy. And the tacks were given to me some time in the 1990s from a friend's dad's shed when he died. They were still in a very nicely smelling tobacco tin.
Anyway, the webbing was simpy tacked on at each end, then a holding bar screwed over the tacks at both ends, to make sure they wouldn't popo out under duress (contingency against a great big lardy arse sitting on it).
Step 4: Leather and Padding Recycled From a Give Away Sofa


The stool was designed to be used with an existing leather sofa and had to be plump and lush and super comfy.
The cushion needed to be the money shot, over the solid frame.
Now leather is not cheap to buy, but conveniently, people are often needing to get rid of old furniture and even more conveniently, this sometimes means old leather sofas.
I got this old leather one free, off Gumtree, and cannibalised it.
Actually, old sofas have lots of raw materials like ziped and bolts and padding. I kept all those - here's a blog post about that...
http://makingweirdstuff.blogspot.co.uk/2016/05/rec...
The top was made by just cutting out one of the sofa seat cushions and reshaping it using string tenssioning underneath (literally, green garden string).
It was then tacked onto the frame through the leather.
Step 5: User Testing for Comfiness...


The stool was varnished to seal it, but otherwise was finished.
Initially the stool had been tested by sitting on it and was really comfy, but as it is a foot stool/tray table it needed testing in those scenarios.
It turned out the slightly domed cushion was too taut, so I removed some of the stuffing so it was de-plumped a bit.
You can see the shape - convex before and concave after.
A bit of idling on the sofa with the pug poved to be sleep-inducingly comfy - nice!
I also tested the support properties of the stool with a tray full of full english breakfast - this also proved very satisfactory!

Participated in the
Reclaimed Wood Contest 2016


