

Introduction: MAKE a ZOMBIE HEAD!


Meet my zombie, Dexter. Here's a step-by-step to make his HEAD!!
Tools needed:
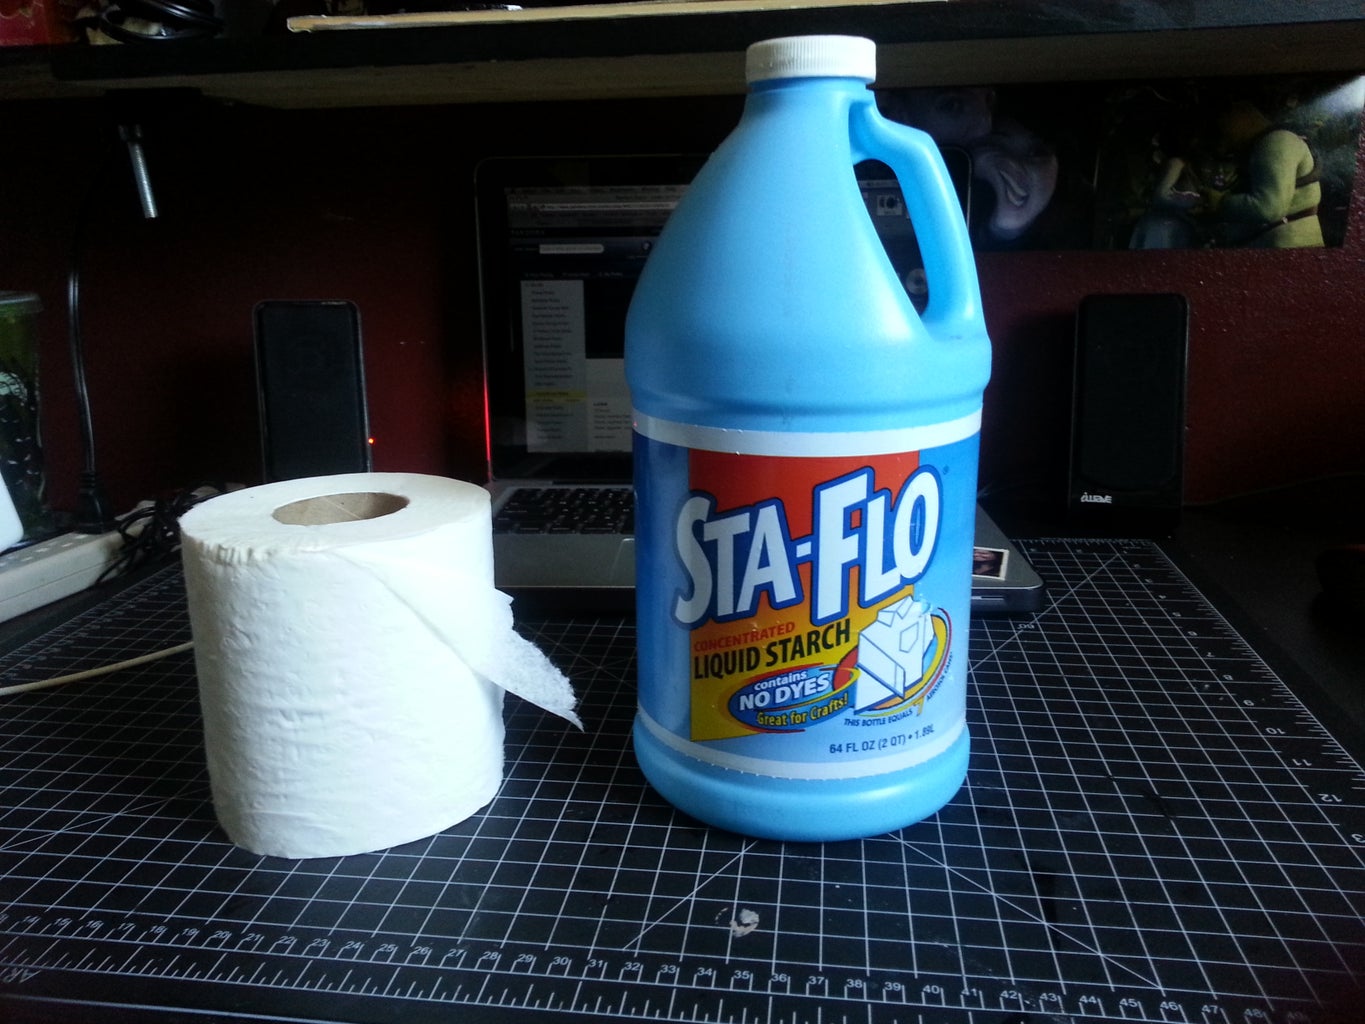
-skull prop
-toilet paper/tissue paper
-paper mache liquid of some sort (I used Sta-flo)
-paint color of your choice
-hair and elmers glue (I'll explain later...)
optional: exact-o knife and BBQ stick
Step 1: Making the Mouth Open

Step 1-
First, what I did was buy a cheap skull prop. This one is entirely light, fragile, and made of foam.. cheap enough to tear apart, but also easy enough to put back together.
THIS STEP IS OPTIONAL. I wanted its mouth to be open, so this is how I did it. If you don't want its mouth open, skip this step. I took an exacto knife and just cut off the sides and where the teeth meet. It's styrofoam so to reattach it, I angled it to how wide I wanted the mouth open, and used a BBQ stick to pierce both pieces together.
Step 2: STEP2- Adding Texture to Skull
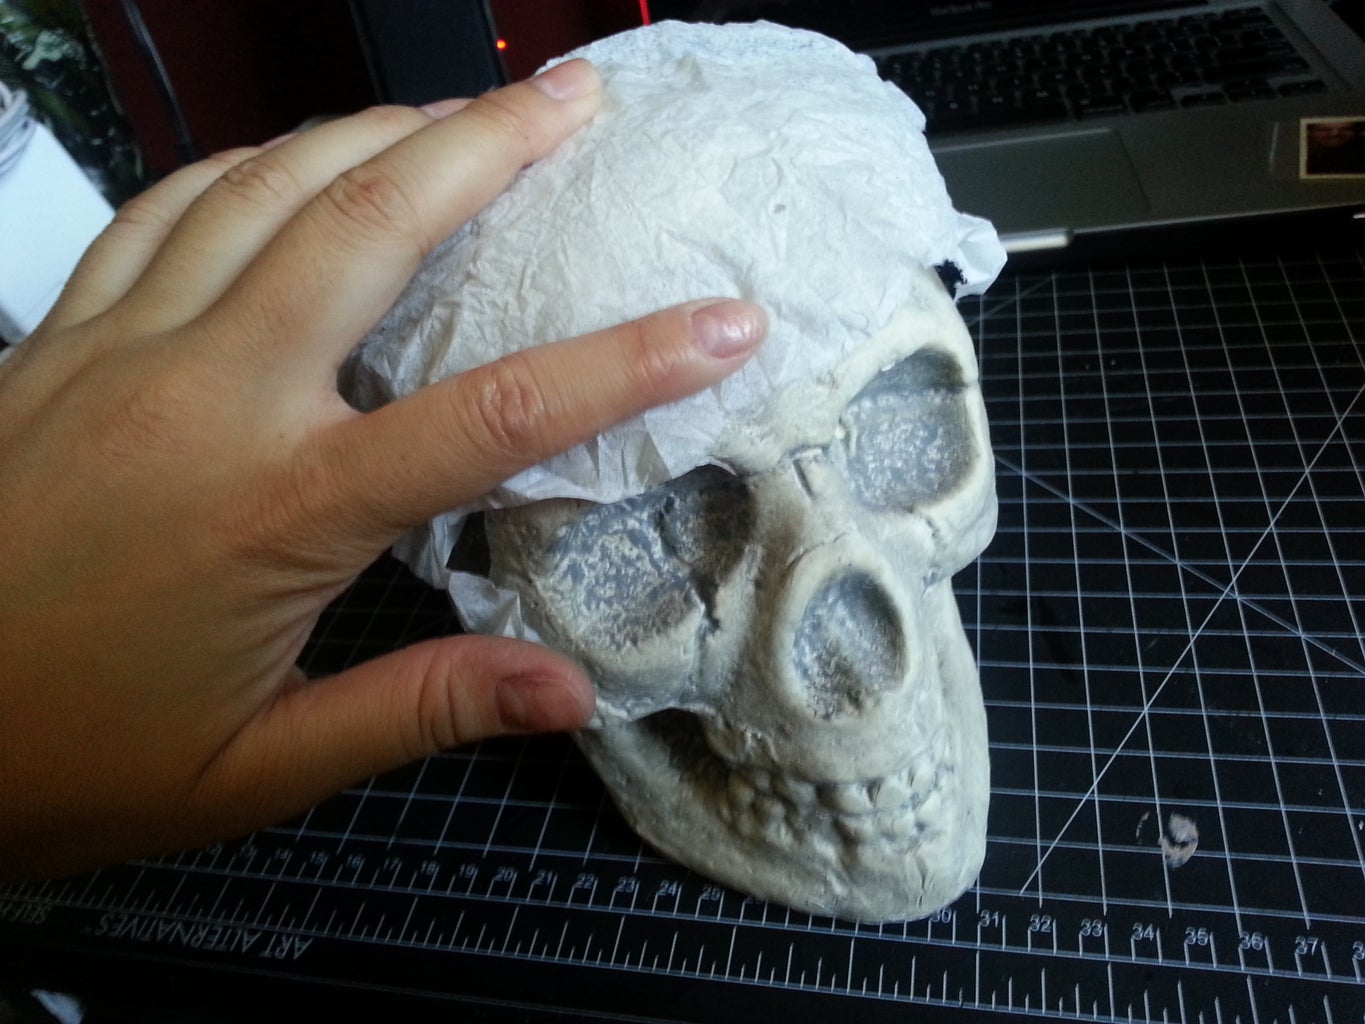


STEP2-
To add "texture" to the skull, I took toilet paper and Sta-flo and just applied it all over the skull.
>DON'T soak the toilet paper. (see images) Apply the toilet paper onto the skull and dab enough Sta-flo onto it till it's wet enough to stay put. Do one layer at a time and use your fingers to dab it wet.
>Let each layer of toilet paper dry before adding onto it. Use a blow dryer if needed. After a couple of layers, make sure your last layer of toilet paper is wrinkly and not so straight/flat, so when it dries up the texture will be more apparent.
>Notice that I also added forehead wrinkles and eyelids!! Same concept, but you clump the toilet paper into place
>Also, I just filled in the eye socket with toilet paper
After that, I added paint. Choose two colors- I have a light, beige brown color that I used as a base color. Paint the whole skull with this solid color. Once that dried, I dried brush over it with a darker gray color to give it a dirty look!
**To dry brush-- you take a DRY BRUSH, dip LIGHTLY into a SMALL AMOUNT of paint, smear it onto newspaper a little, and lightly brush it like crazy (in all directions, not just one stroke) over the skull
Step 3: STEP3- Adding Hair!
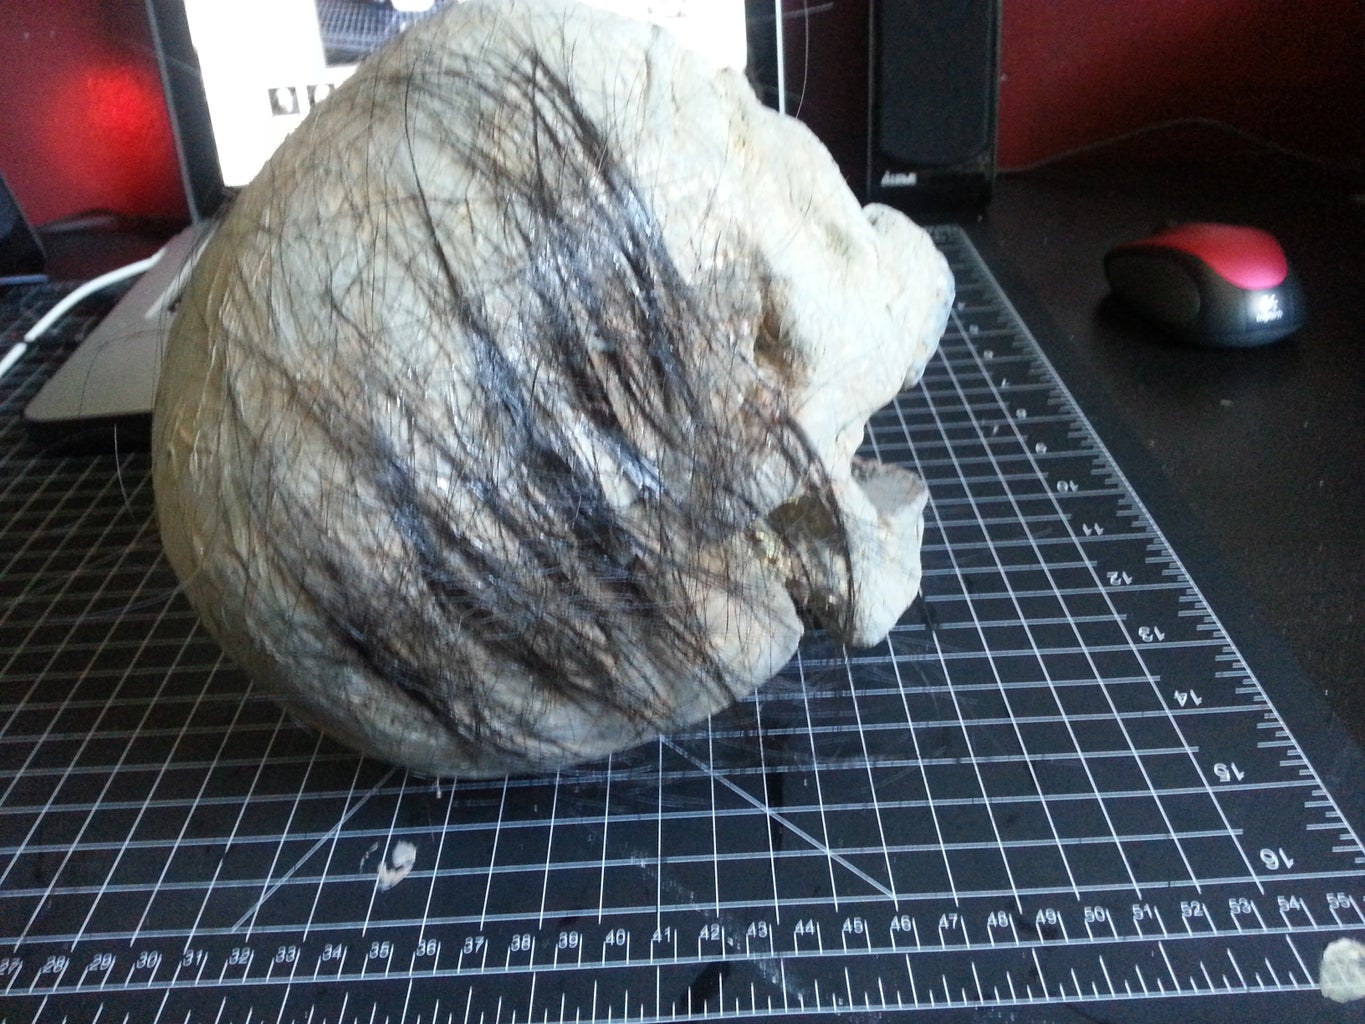
THIS STEP IS COMPLETELY OPTIONAL AND CAN BE DONE DIFFERENTLY, depending on what you can find around the house!
So how do you make a zombie head as disgusting as possible?
You add real hair.
Yes, real hair. Hahahaha
I dabbed some elmers glue on the side of the skull and carefully aligned hair trimmings onto the sides. It'll dry clear so you don't see the glue, and it stays on pretty well. Yes, disgusting, but IT LOOKS AWESOME.
Separate the hair enough to make it look balding. Not too much. It's a zombie after all.
Step 4: FINISHED PRODUCT!

NOW MAKE THE ZOMBIE COME TO LIFE!!!
This is how I had my Dexter displayed in front of my house for Halloween :)
Remember how I stuffed the eye sockets with white toilet paper? It looks great in black light.
I took an old shirt, stuffed it with newspaper... made some hands for the little guy, and made him look like he was crawling out of my porch!!
Last, enjoy all the compliments!! :D (We even added a beer bottle near his hand for those with a sense of humor)

Participated in the
Zombie Contest

Participated in the
Craft Contest

Participated in the
Halloween Decorations Contest


