

Introduction: Macrame Rings


So, I like making rings. I like it a lot to be honest. But, there is one problem with rings: when they don't have the exact right size, they are not very comfortable. That's why I wanted to try out this idea: macrame rings. It uses just the regular macrame knots and that's what makes it so easy, especially if you already know how to macrame! You can also decide to give it your own twist by adding a bead to it, or by using more than one colour.
Step 1: Materials

- scissors
- glue
- round object matching the size of your finger, when you are using thicker yarn/multiple colours it could be useful to take something slightly bigger, otherwise your ring may not fit
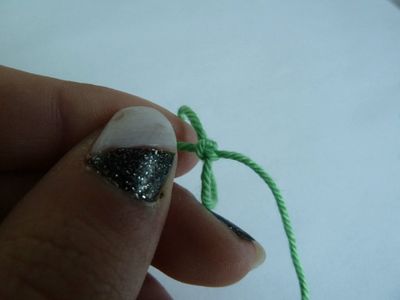
Step 2: The Basic Ring Shape


Fold your yarn in half and put it around the round object, making sure it is divided in half evenly. When you've done that, make a simple knot with the two ends. This is a good moment to make sure both halves are the same length. When you have checked that, make a second knot to secure the first one. Now you can take the ring off the round object and start with the macrame!
Step 3: The Macrame


When you already know how to macrame, I think this step is really clear. When you don't, don't worry, I've included an instruction.
Start by putting your right strand over the middle strand. Then let the left strand go underneath the middle strand and up trough the part shown in the second picture. Pull it tight. That's your first knot already :)
Next is actually the same but mirrored. Start by putting the left strand over the middle strand, let the right strand go underneath the middle strand and up again.
Continue making these two knots until your ring is almost finished.
Step 4: Finishing the Ring


When you have made your last macrame knot, pull it really tight. Then, make a regular knot on top of the ring. Add a dab of glue to it and cut off the ends. Make sure the ends are covered in glue too, so it dries as a nice, smooth ring.
Step 5: Done!


And that's it, that's how you can make a macrame ring. I hope you enjoyed reading this project and found it useful :)

Participated in the
Fiber Arts Contest

Participated in the
Holiday Contest


