

Introduction: Make a Luminaria With a Laser Etcher


Luminaria are paper bags with a bit of sand in the bottom and a lit candle providing some light. The nicer ones (in my opinion) have patterns cut into them. Our goal here is to cut patterns into paper bags so they can be used as luminaria.
We're going to get cheap bags from a dollar store and use a laser to cut the paterns. We'll do two patterns, one that consists of simple geometric shapes and one that uses graphics from the internet.
I made this at Techshop. http://www.techshop.ws I used their Epilog laser cutter/etcher.
Step 1: Materials and Tools


* A gift bag (or several gift bags)
* Laser cutter (I used a 45 watt Epilog Helix laser cutter). I assume in this instructable you know how to use a laser cutter.
* Piece of scrap cardboard
* Sand
* Candles
Step 2: Creating a Pattern


We need a pattern. I used CorelDraw because that's what the lasers at techshop are connected to. A word of warning: the techshop lasers use CorrelDraw x5 but the new version is x6. If you have x6 be sure to export the files using XMS so you can import them again at TechShop.
Almost any pattern will work. On one side of each bag I cut the pattern out of the bag and on the other side I etched the bag with a pattern which would make it more luminous in some places.
Measure your bag and create a drawing window in CorelDraw of the right size.
The easiest thing to do is to use the polygon tool to make stars. You can also use circle, rectangle and so forth, and you can rotate them and overlap them in interesting ways.
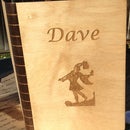
Another thing I did was to get an image off the internet. I wanted leaves so I downloaded several images of leaf shapes I liked. I then manipulated them so that all I had was an outline and rotated and arranged them in what I thought was a pleasing configuration.
The main thing to remember is that if you cut holes in the bag you want there to be enough bag afterwards to contain a light so leave enough material. Remember that to cut you need to make a hairline outline but to etch you want no outline but some kind of fill.
The bags I used have handles so I had to put the bags in upside down. I had to flip the designs upside down, too.
Step 3: Lasering


These bags are pretty heavy compared to lunch bags and even a little heavier than grocery bags. You'll need to do a test to see how much power you want for your bags. I used 50/15/500 for cutting and 70/40 for etching.
For cutting, cut the scrap cardboard so it fits inside the bag and put it in. That way, the front pattern will only cut the front and will be blocked by the cardboard. Then you can do the other side separately.
Put the bag in the laser.
Cut or each bag, front and back, with whatever pattern you like.
Step 4: Make the Luminaria


Fill each bag with about 2" of sand. I bought a 50 lb bag of "play sand" for about $5 and used half it it for 7 bags.
Add a candle. I used emergency candles and paid a lot for them but votive candles are the usual.
Place the bag exactly where you want it then light the candle (it's a bad idea to move the bags with the candles in them). Be very careful while lighting the candles lest you burn yourself or set the bag on fire. A long handle match or lighter is very helpful.
Be very careful with these bags! They can catch fire! So be sure to put them somewhere away from anything flammable.
Enjoy the display!


